How to Add Photos to Your Wedding Website
Learn how to create photo galleries on your wedding website. Upload engagement photos, organize them into sections, and let guests view them in a beautiful lightbox.
How to Add Photos to Your Wedding Website
Your Photos page is where you share beautiful images with your wedding guests. Whether it’s engagement photos, pre-wedding shoots, or candid moments from your relationship, this page lets you display them in a visually stunning way. This tutorial will walk you through creating galleries, adding individual photos, and organizing your content.
What the Photos Page Shows to Guests
When guests visit your Photos page, they can see:
- Photo galleries – Collections of images displayed in a responsive grid
- Single images – Standalone photos for featured shots
- Section headers – Titles that organize different photo collections
- Lightbox viewing – Guests can click any photo to see it full-size
The Photos page uses content blocks, giving you flexibility to mix galleries, single images, and text sections.
Accessing the Photos Editor
To edit your Photos page:
- Log in to your Harusi Hub account
- From your dashboard, look at the left sidebar
- Click on Website to expand the menu
- Click on Photos
You’ll see the Photos page editor with any existing content or an empty page ready for your photos.
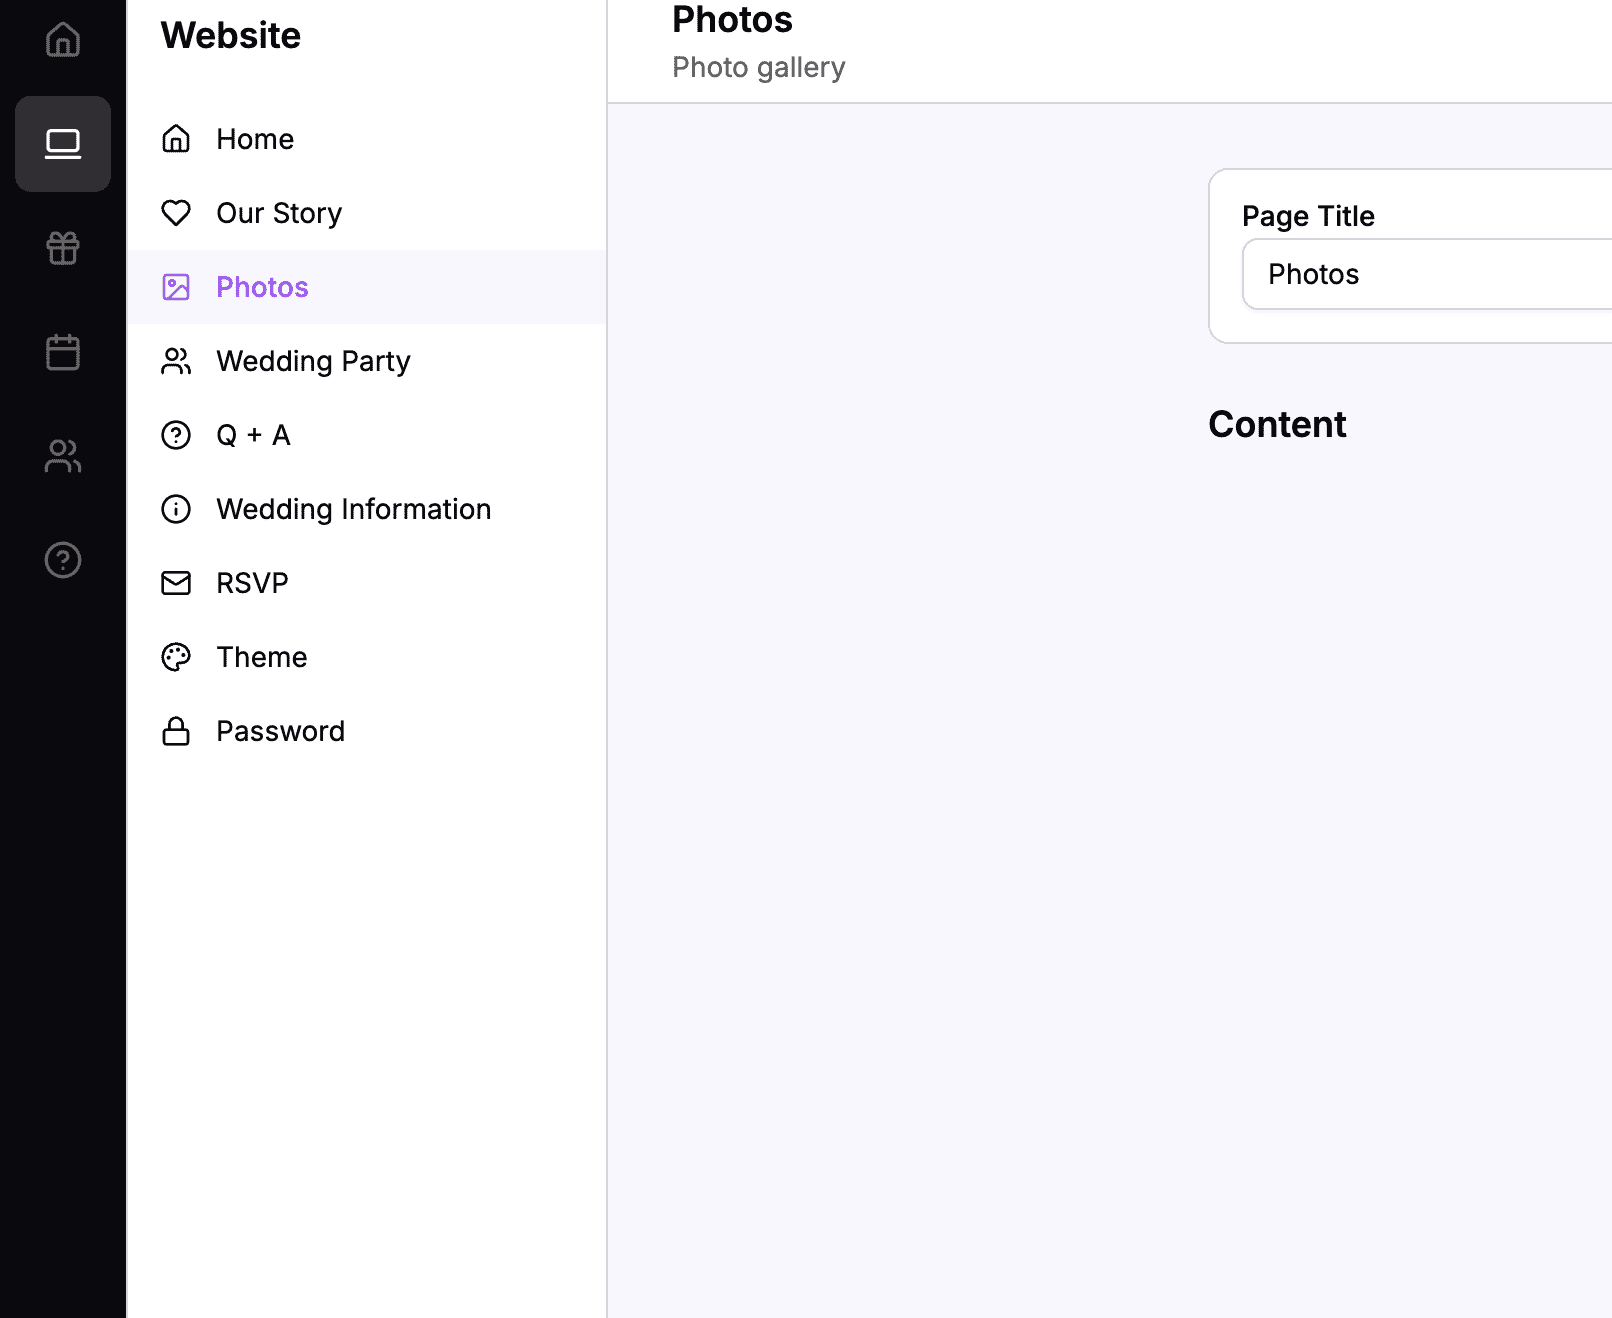 The sidebar navigation with Website > Photos highlighted
Understanding the Photos Page Blocks
The Photos page supports these content block types:
| Block Type | What It Contains | Best For |
|---|---|---|
| Gallery | Multiple photos in a grid | Collections like engagement shoots |
| Image | A single photo | Featured or standalone photos |
| Title & Body | A heading and text | Section headers with descriptions |
| Spacer | Empty vertical space | Separating sections |
The most powerful block is the Gallery, which lets you upload many photos at once.
Adding a Gallery Block
Gallery blocks are the main way to display multiple photos on your Photos page. They show images in a responsive grid that looks great on both desktop and mobile.
How to Create a Gallery
- Click the Add Block button
- Select Gallery from the options
- The Gallery editor opens
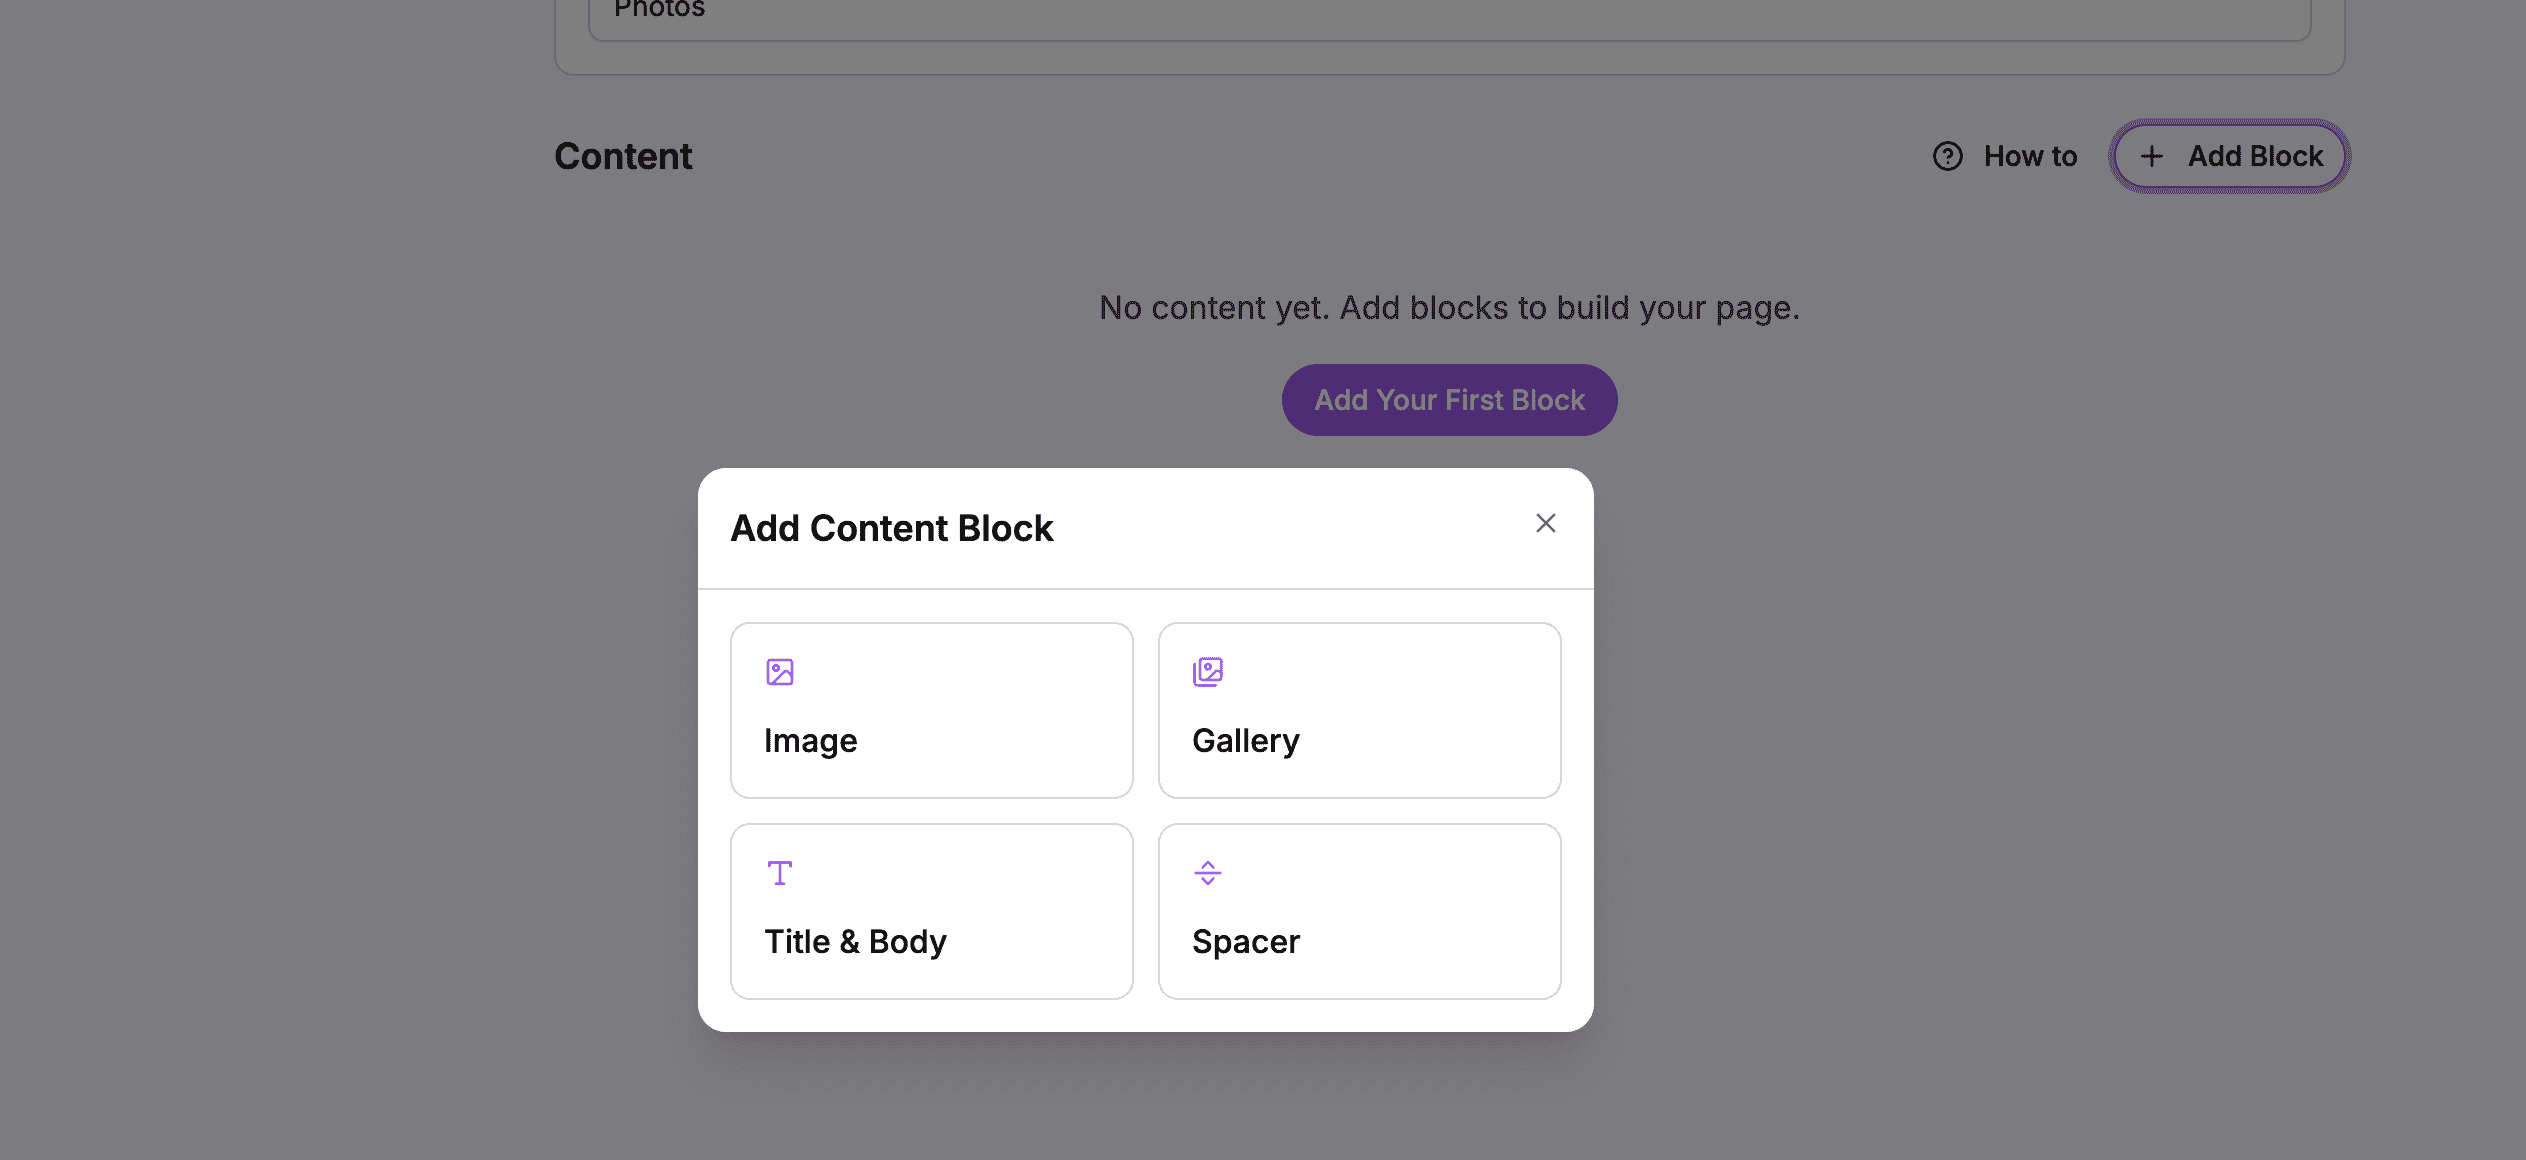 Choose Gallery to create a photo collection
The Gallery Editor
The Gallery editor shows:
- An upload area where you can drag and drop photos or click to browse
- A preview grid showing all photos in the gallery
- Individual controls for each photo
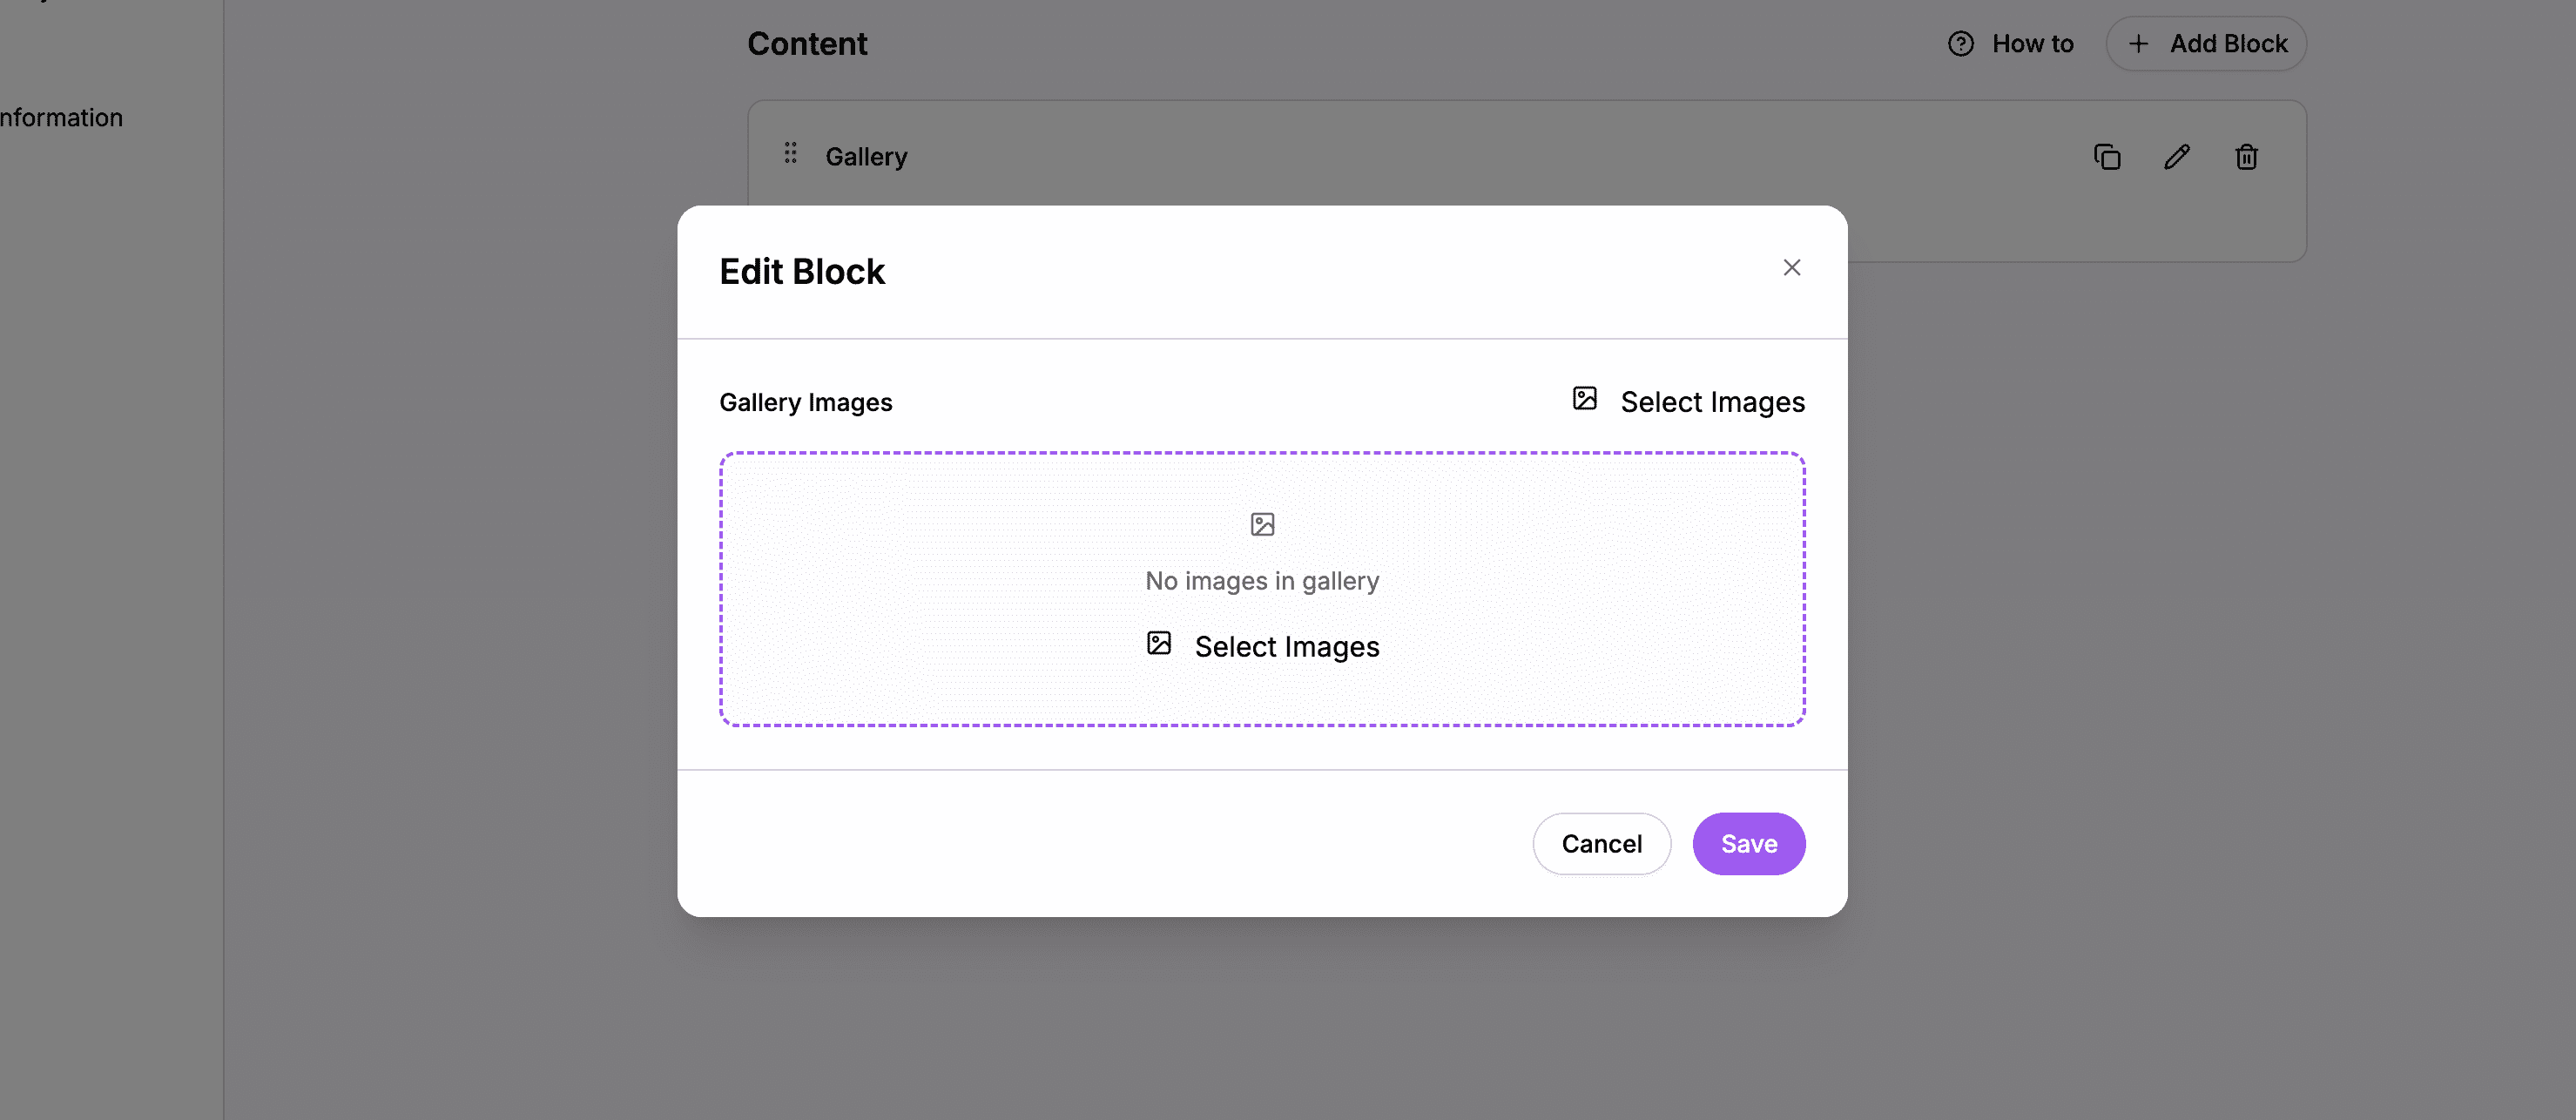 The Gallery editor with upload area at the top and photo previews below
Uploading Multiple Photos
You can upload multiple photos at once:
- Click the upload area or drag photos onto it
- Select multiple files from your computer (hold Ctrl/Cmd to select multiple)
- Watch the upload progress as photos are added
- Photos appear in the preview grid as they finish uploading
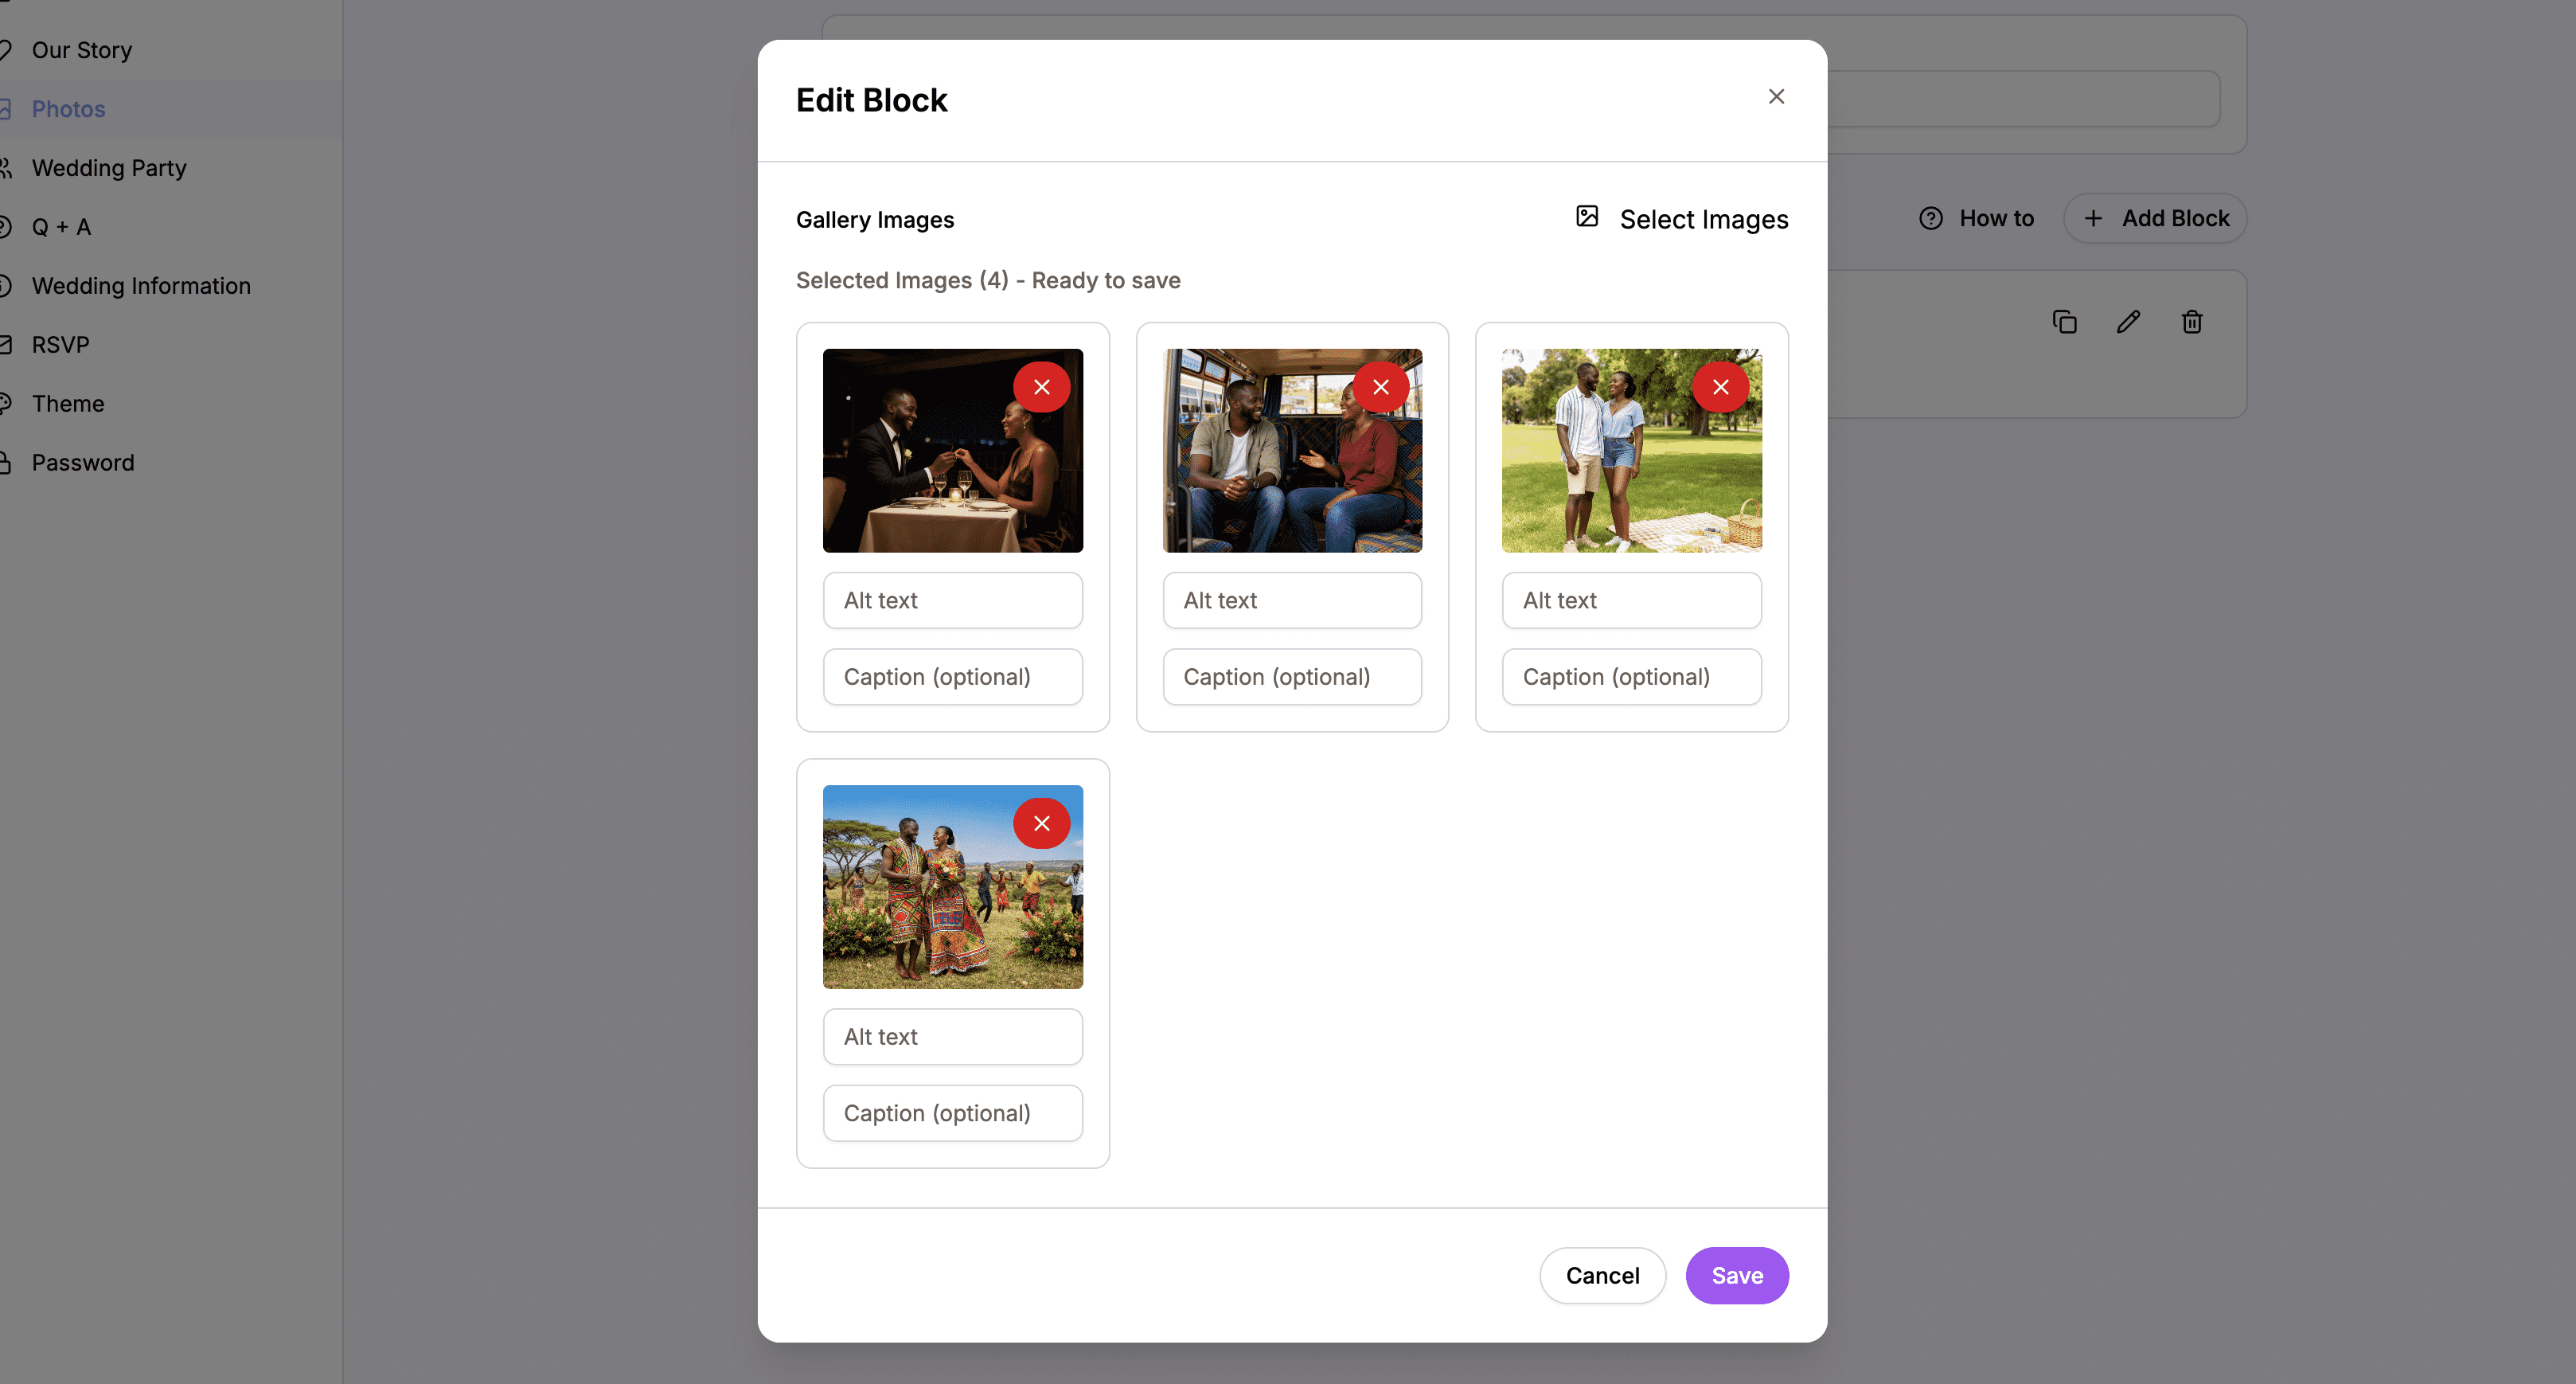 Photos show upload progress as they’re added to your gallery
Tips for Uploading Photos
- Upload in batches – For many photos, upload 10-20 at a time for best performance
- Use high-quality images – Photos display at various sizes, so quality matters
- Consistent orientation – Galleries with similar aspect ratios look more polished
- File size – Images are automatically optimized, but starting with reasonable file sizes speeds up upload
Adding Captions
Each photo in a gallery can have a caption that appears when guests view it in the lightbox.
- Find the photo you want to caption
- Click on the photo in the preview grid
- Enter your caption in the Caption field
- The caption saves automatically
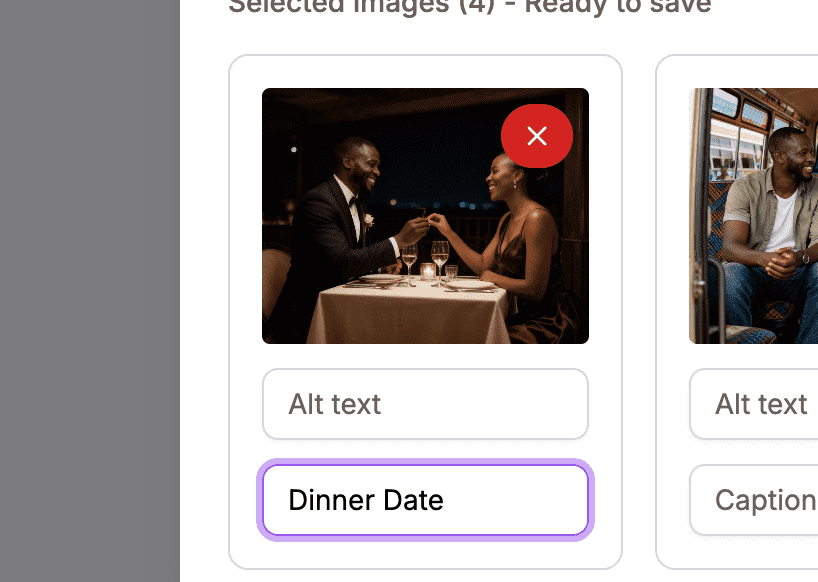 Add a caption to describe the moment in the photo
Adding Alt Text
Alt text is important for accessibility. It describes the image for:
- Guests using screen readers
- Search engines
- Browsers when images can’t load
For each photo:
- Click on the photo
- Enter descriptive alt text in the Alt Text field
- The alt text saves automatically
Good alt text describes what’s in the image: “Sarah and James at their engagement party” rather than just “photo.”
Reordering Photos in a Gallery
Photos appear in the order you uploaded them, but you can change this:
- Find the photo you want to move
- Grab the drag handle (usually the whole photo is draggable)
- Drag it to a new position in the grid
- Release to drop it in place
 Drag photos to arrange them in your preferred order
Removing Photos from a Gallery
If you want to remove a photo:
- Find the photo you want to remove
- Click the Remove or Delete button (usually an X icon)
- The photo is removed from the gallery
 Click the remove button to delete a photo from your gallery
Note: Removing a photo from a gallery doesn’t delete it from your storage – it just removes it from this gallery.
Saving Your Gallery
After making changes:
- Click Save to save all your changes
- The gallery is saved with all photos, captions, and alt text
Adding Single Image Blocks
While galleries are great for collections, sometimes you want a single featured photo to stand on its own. Image blocks are perfect for this.
How to Create an Image Block
- Click Add Block
- Select Image
- Click the upload area or drag a photo
- Add Alt Text describing the image
- Click Save
 The Image block editor for a standalone featured photo
When to Use Single Images vs. Galleries
Use a Single Image when:
- You have one standout photo you want to feature
- You’re creating a visual break between galleries
- The photo deserves its own space without other images
Use a Gallery when:
- You have multiple photos from the same event or shoot
- You want photos displayed together in a grid
- You’re showcasing a collection
Adding Section Headers
If you have multiple photo collections (like engagement photos and a pre-wedding shoot), use Title & Body blocks to label each section.
How to Add a Section Header
- Click Add Block
- Select Title & Body
- Enter a title like “Engagement Photos” or “Our Pre-Wedding Shoot”
- Optionally add body text describing the collection
- Click Save
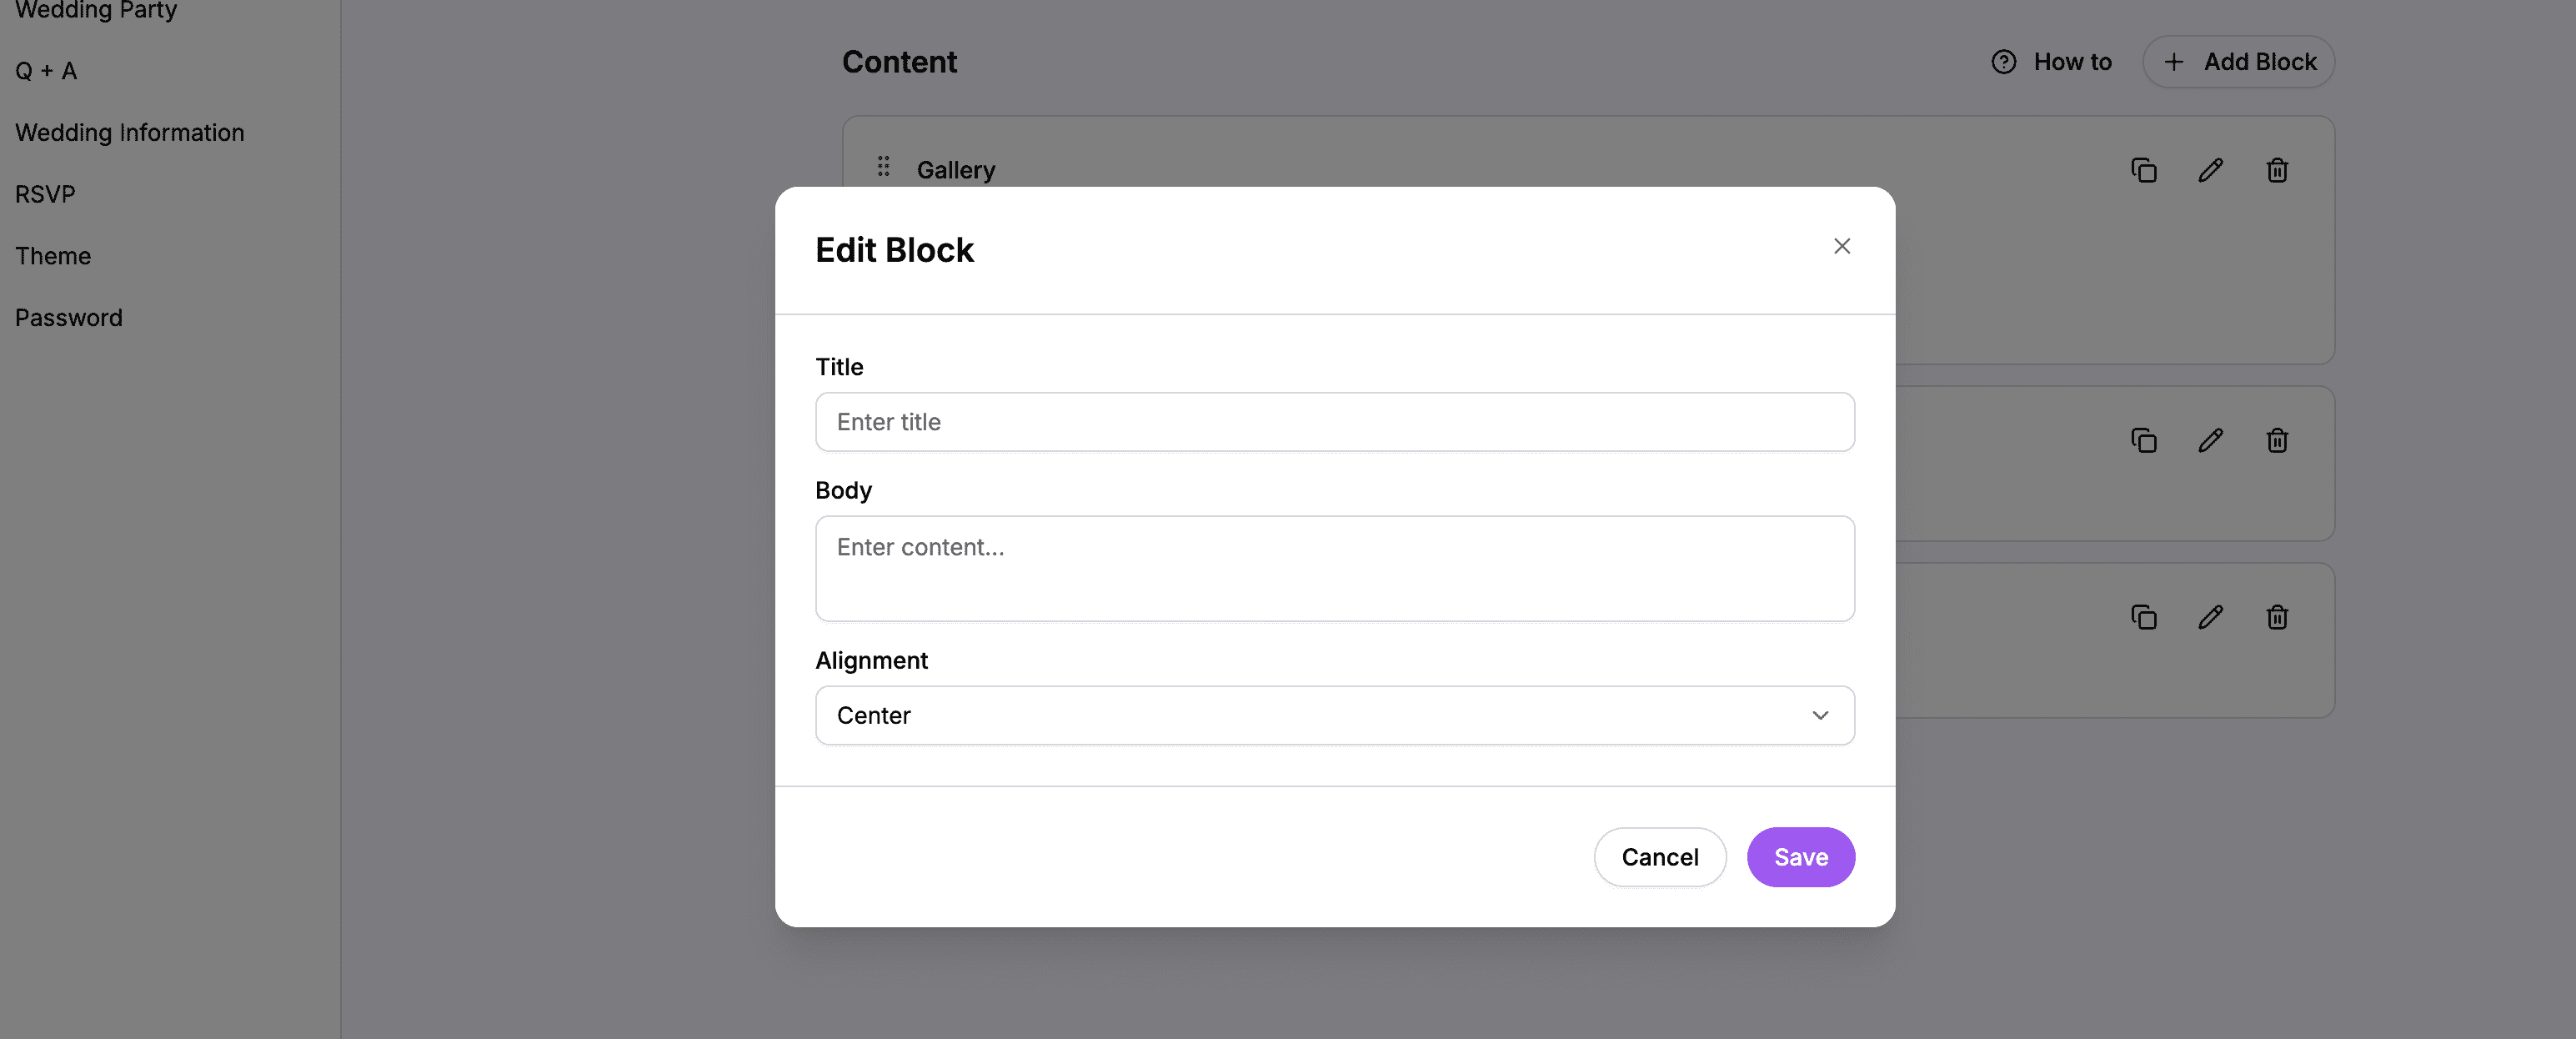 A Title & Body block creates a clear section header for your photos
Example Section Structure
Here’s a typical Photos page structure:
- Title & Body – “Engagement Photos” with a brief description
- Gallery – Your engagement shoot photos
- Spacer (large) – Visual breathing room
- Title & Body – “Pre-Wedding Celebration”
- Gallery – Photos from your pre-wedding event
- Single Image – A featured photo to close the page
Using Spacers
Spacer blocks add empty space between other blocks, helping your page breathe.
How to Add a Spacer
- Click Add Block
- Select Spacer
- Choose a size:
- Small – 5 pixels
- Medium – 10 pixels
- Large – 20 pixels
- Click Save
Use spacers between different sections to create visual separation.
Organizing Your Photos Page
You can reorder any blocks on your page by dragging them.
How to Reorder Blocks
- Find the block you want to move
- Grab the drag handle on the block card
- Drag it to a new position
- Release to drop it in place
Block Management Options
Each block card has buttons to:
- Edit – Modify the block content
- Delete – Remove the block
- Duplicate – Create a copy of the block
How Photos Appear on the Live Website
Gallery Grid Layout
On your live website, galleries display in a responsive grid:
- Desktop: Up to 3 columns of photos
- Tablet: 2 columns
- Mobile: 1 column
Photos are displayed with consistent sizing and spacing for a polished look.
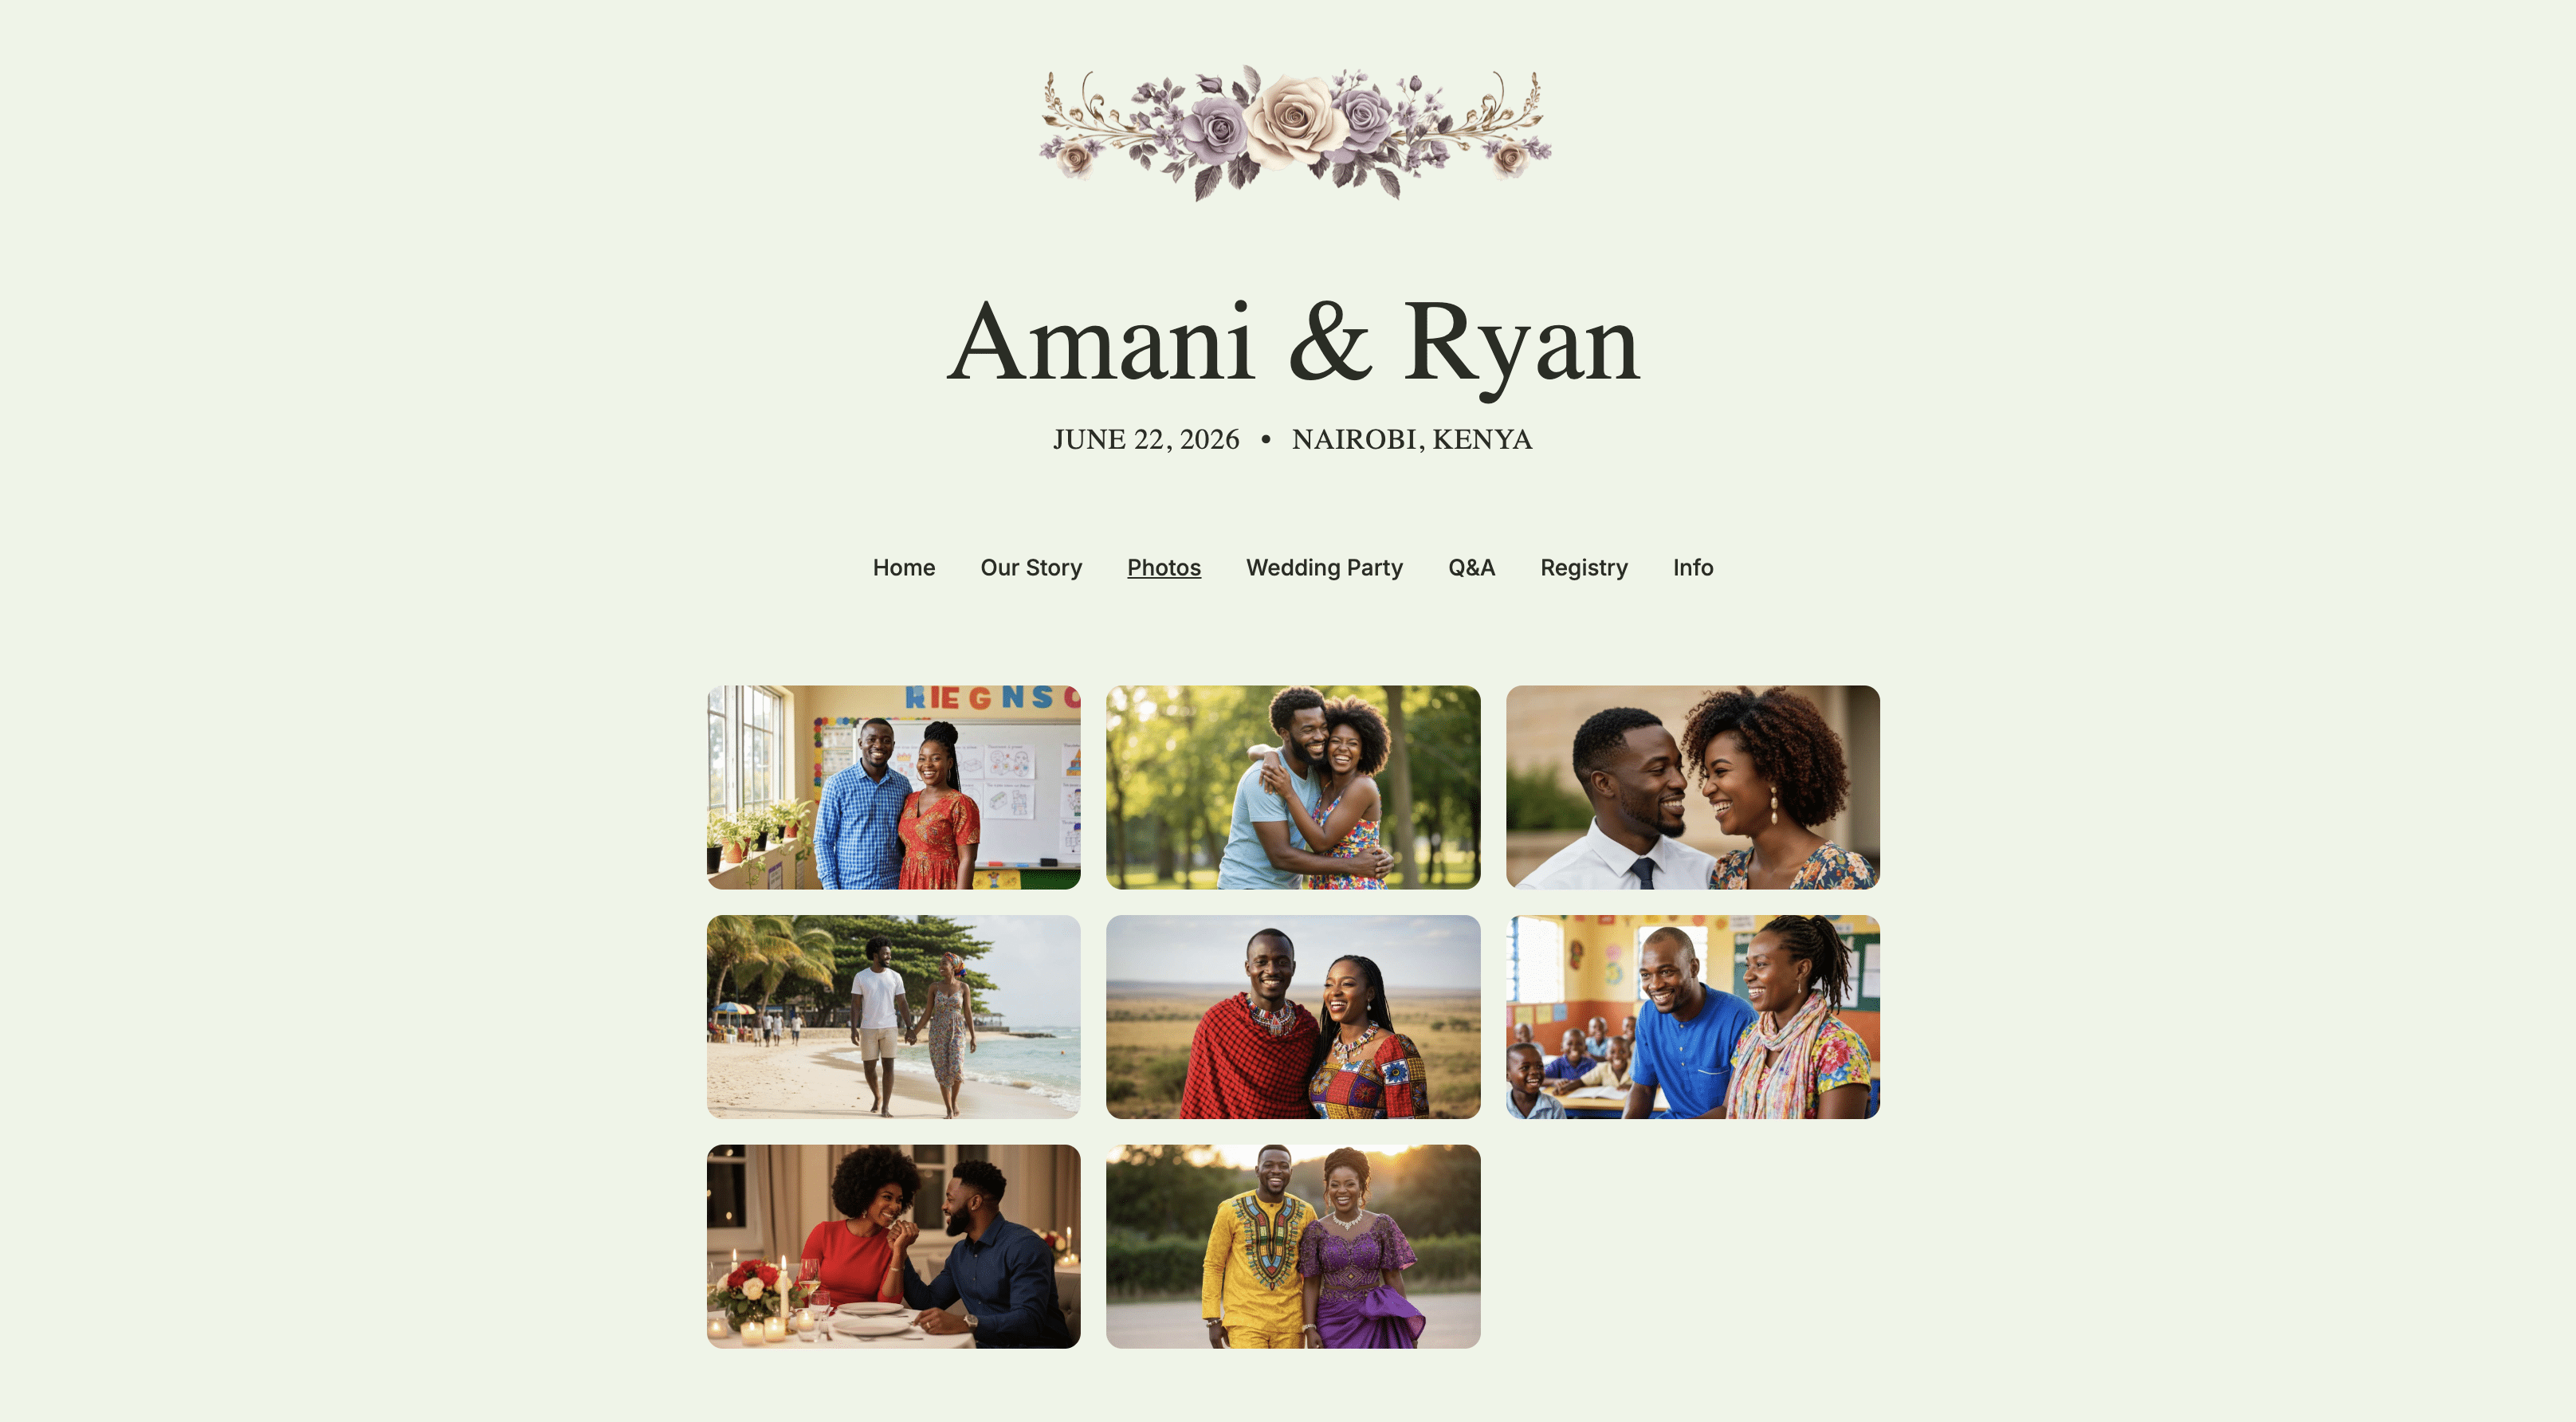 Your gallery appears as a beautiful grid on the live website
Lightbox Viewing
When guests click on any photo, it opens in a lightbox – a full-screen overlay that shows the photo at its largest size.
In the lightbox:
- The photo displays as large as possible
- Captions appear below the photo (if you added them)
- Guests can close the lightbox to return to the gallery
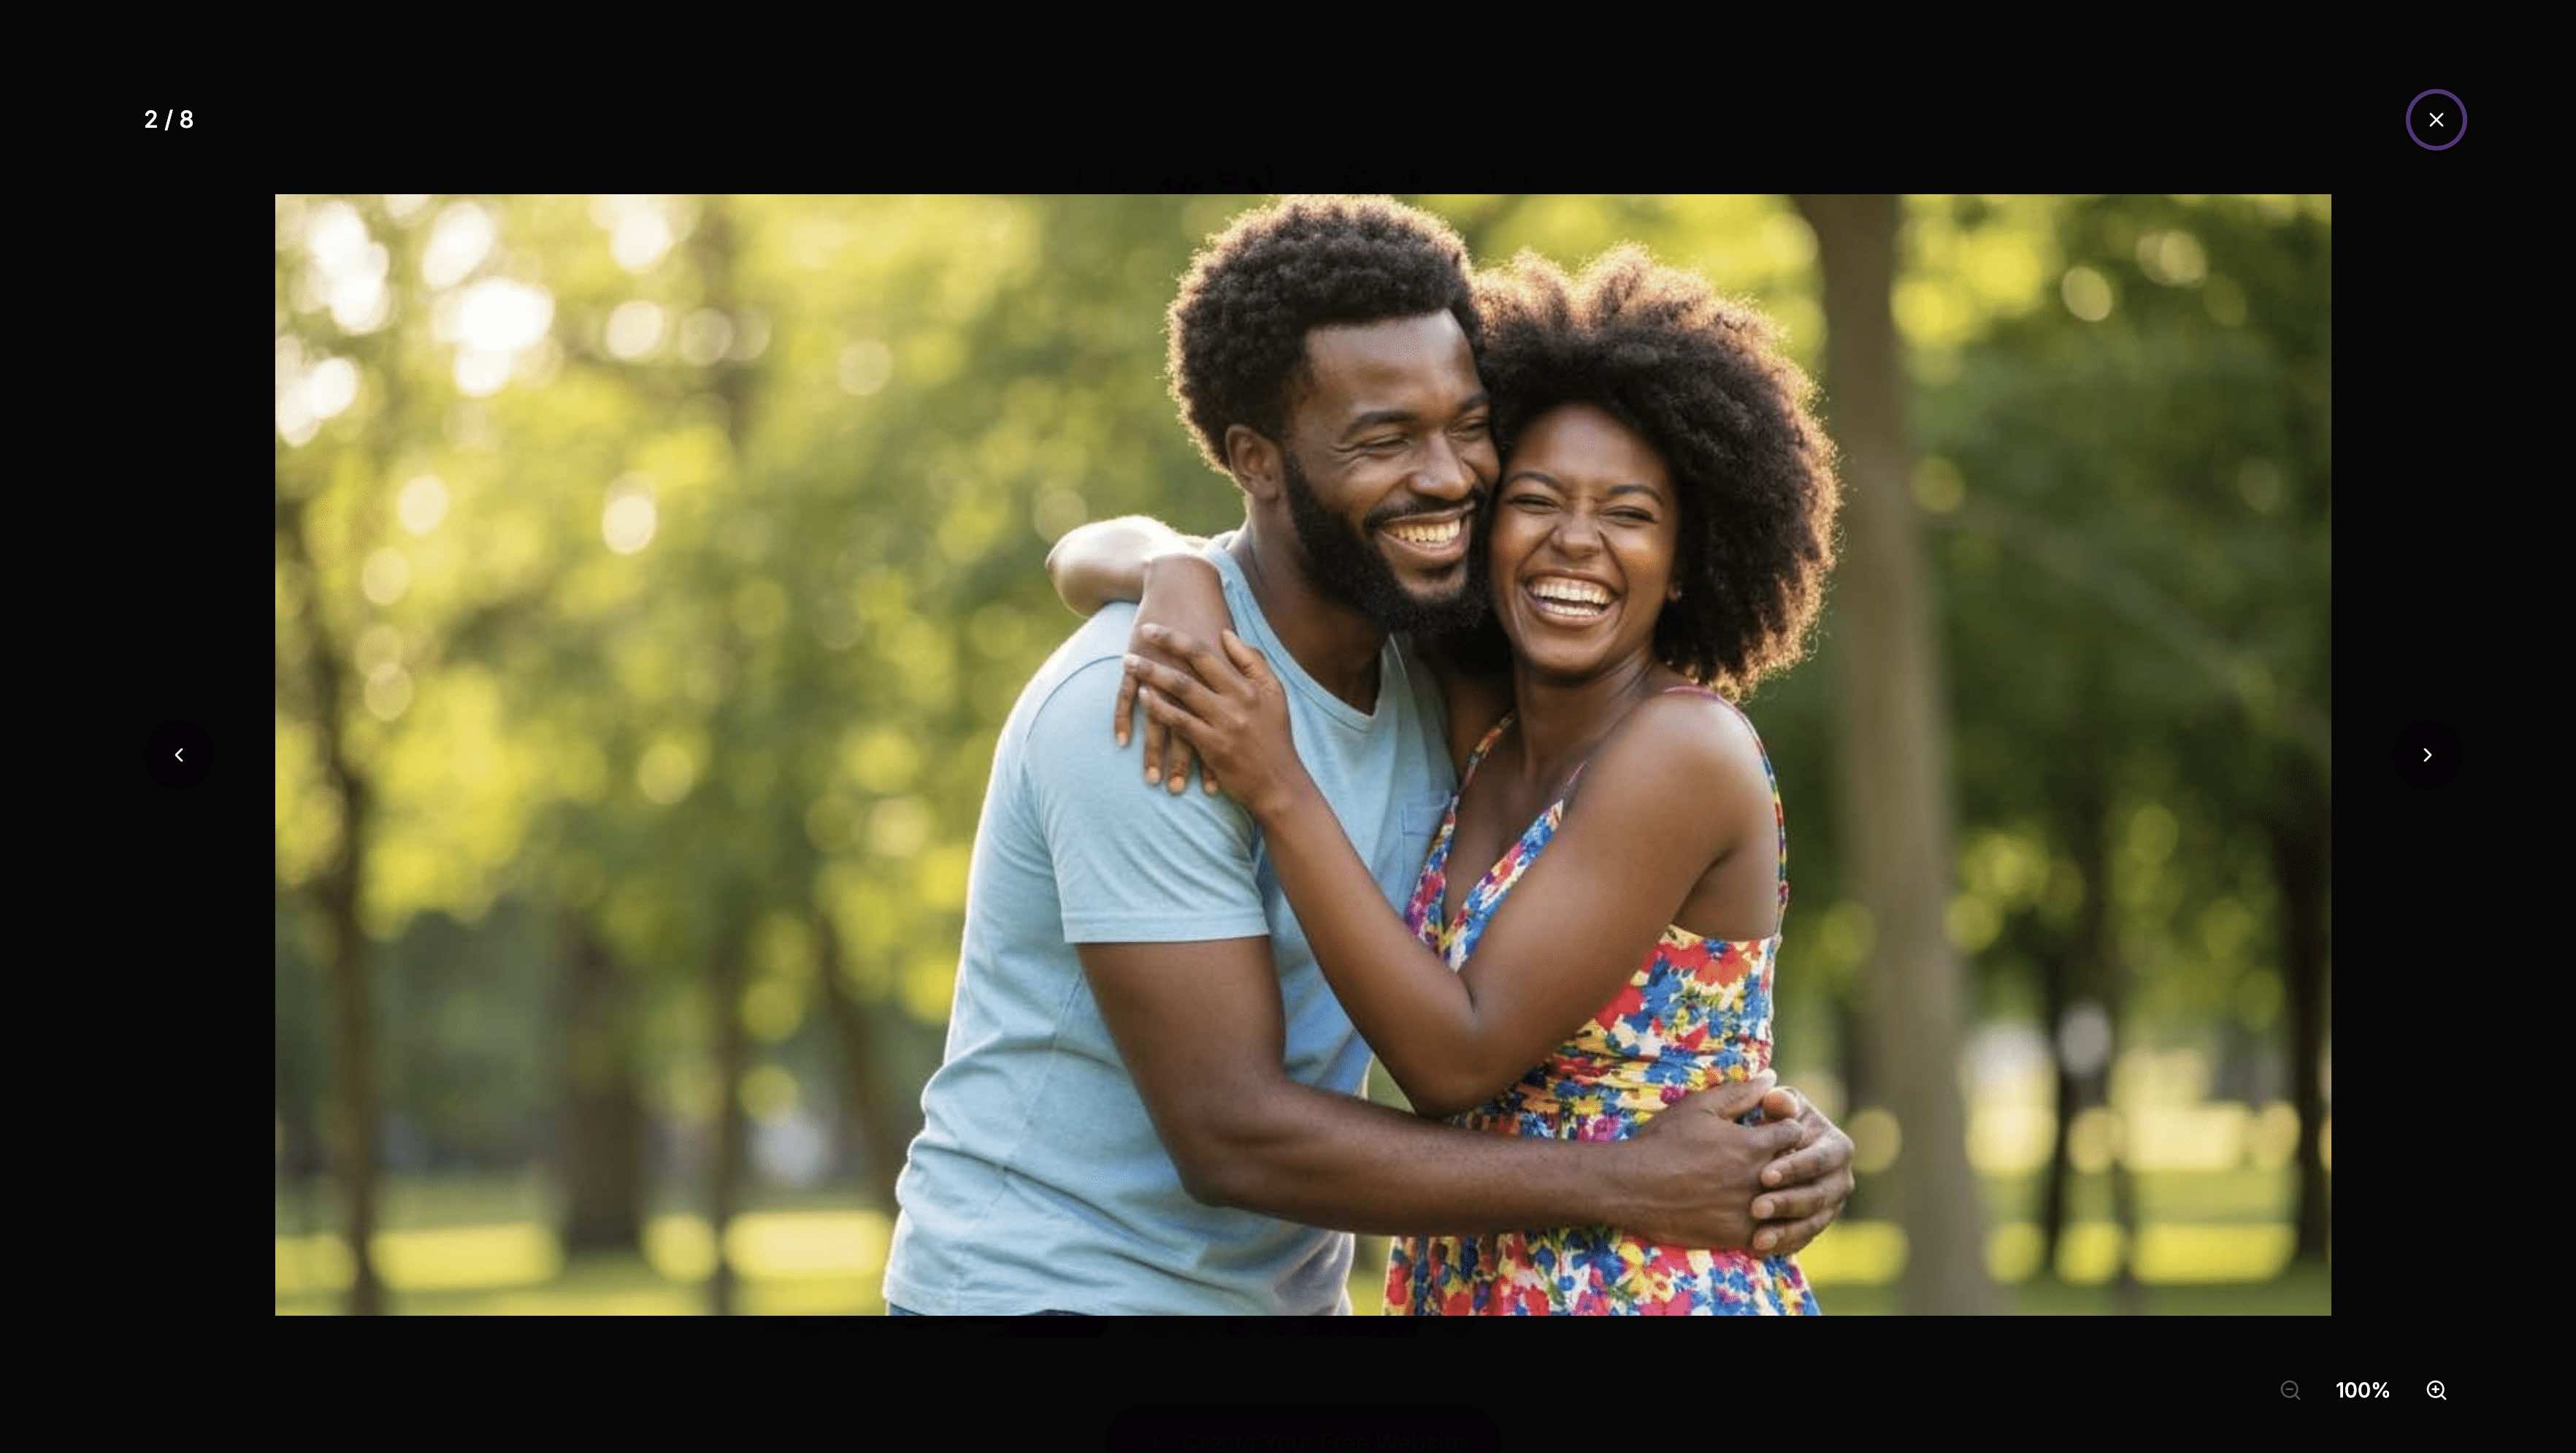 Clicking a photo opens it in a beautiful full-screen lightbox
This gives guests a great way to appreciate your photos in detail.
Tips for a Great Photos Page
Photo Selection
- Quality over quantity – 20 great photos are better than 100 mediocre ones
- Variety – Mix close-ups, wide shots, candid moments, and posed photos
- Tell a story – Order photos to create a narrative flow
- Consider your audience – Guests want to see you as a couple
Organization
- Group related photos – Keep engagement shots together, pre-wedding separately
- Use descriptive headers – Help guests understand what they’re looking at
- Add spacers – Don’t let sections run into each other
Technical Tips
- Optimize before upload – While images are auto-optimized, starting with reasonable file sizes helps
- Use consistent lighting – Photos with similar lighting look better in a grid
- Landscape and portrait mix – Both work, but too much variation can look chaotic
Summary
The Photos page editor gives you everything you need to showcase your images:
| Feature | What It Does |
|---|---|
| Gallery block | Upload multiple photos in a grid with captions |
| Image block | Feature a single standalone photo |
| Title & Body block | Create section headers and descriptions |
| Spacer block | Add breathing room between sections |
| Drag and drop | Reorder photos and blocks |
| Lightbox | Guests can click to view photos full-size |
Create a beautiful Photos page that lets guests see your love story through images.
Ready to share your photos?
Create your wedding website and build beautiful galleries.
Add Your Photos