How to Choose a Theme and Set a Password for Your Wedding Website
Learn how to customize your wedding website's appearance with themes and protect it with a password. Choose colors, fonts, and decorations that match your style.
How to Choose a Theme and Set a Password for Your Wedding Website
Your wedding website should look beautiful and reflect your style. The Theme settings let you choose colors, fonts, and decorations that match your wedding aesthetic. The Password settings let you protect your website so only invited guests can view it. This tutorial covers both settings to help you customize and secure your wedding website.
What Theme and Password Settings Control
These settings determine:
- Your website’s visual style – Colors, fonts, and floral decorations
- Access control – Whether your website is public or password-protected
Unlike content pages with blocks, these are configuration settings that affect your entire website.
Part 1: Theme Settings
What a Theme Changes
When you apply a theme, it changes:
- Primary color – The main accent color throughout your site
- Accent color – A complementary secondary color
- Background color – The page background
- Text color – The color of all text
- Heading font – The font used for titles and headings
- Body font – The font used for paragraphs and content
- Floral decorations – The flower illustrations on your pages
Every theme is designed to look cohesive and beautiful together.
Accessing Theme Settings
To change your theme:
- Log in to your Harusi Hub account
- From your dashboard, look at the left sidebar
- Click on Website to expand the menu
- Click on Theme
You’ll see the theme selection page with all available themes.
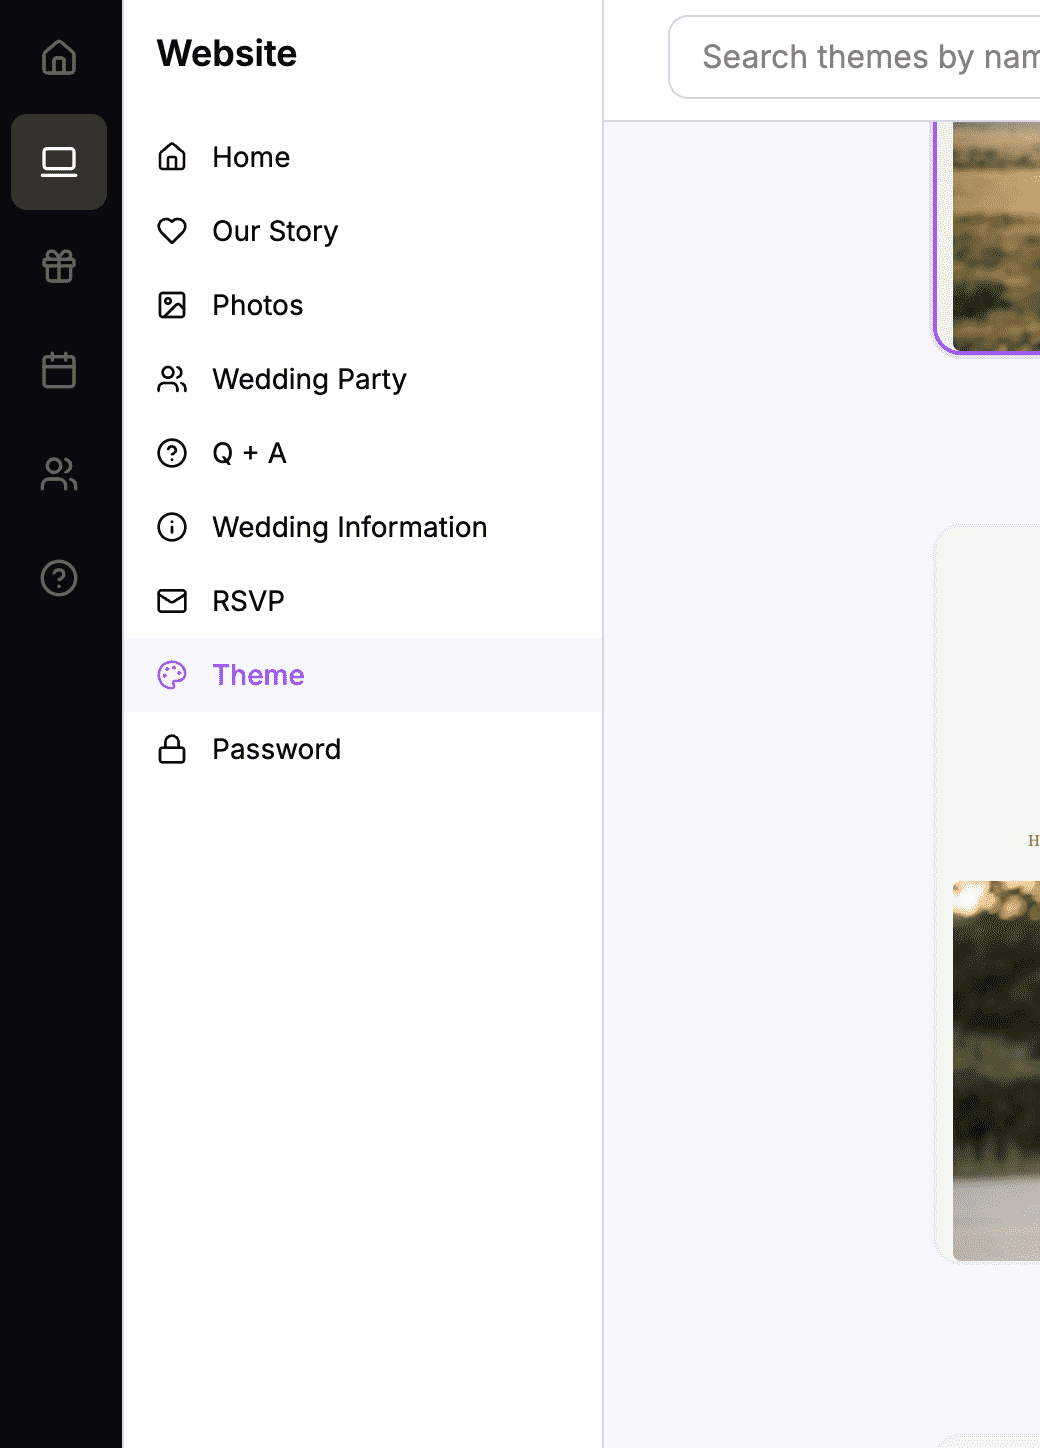 The sidebar navigation with Website > Theme highlighted
Browsing Available Themes
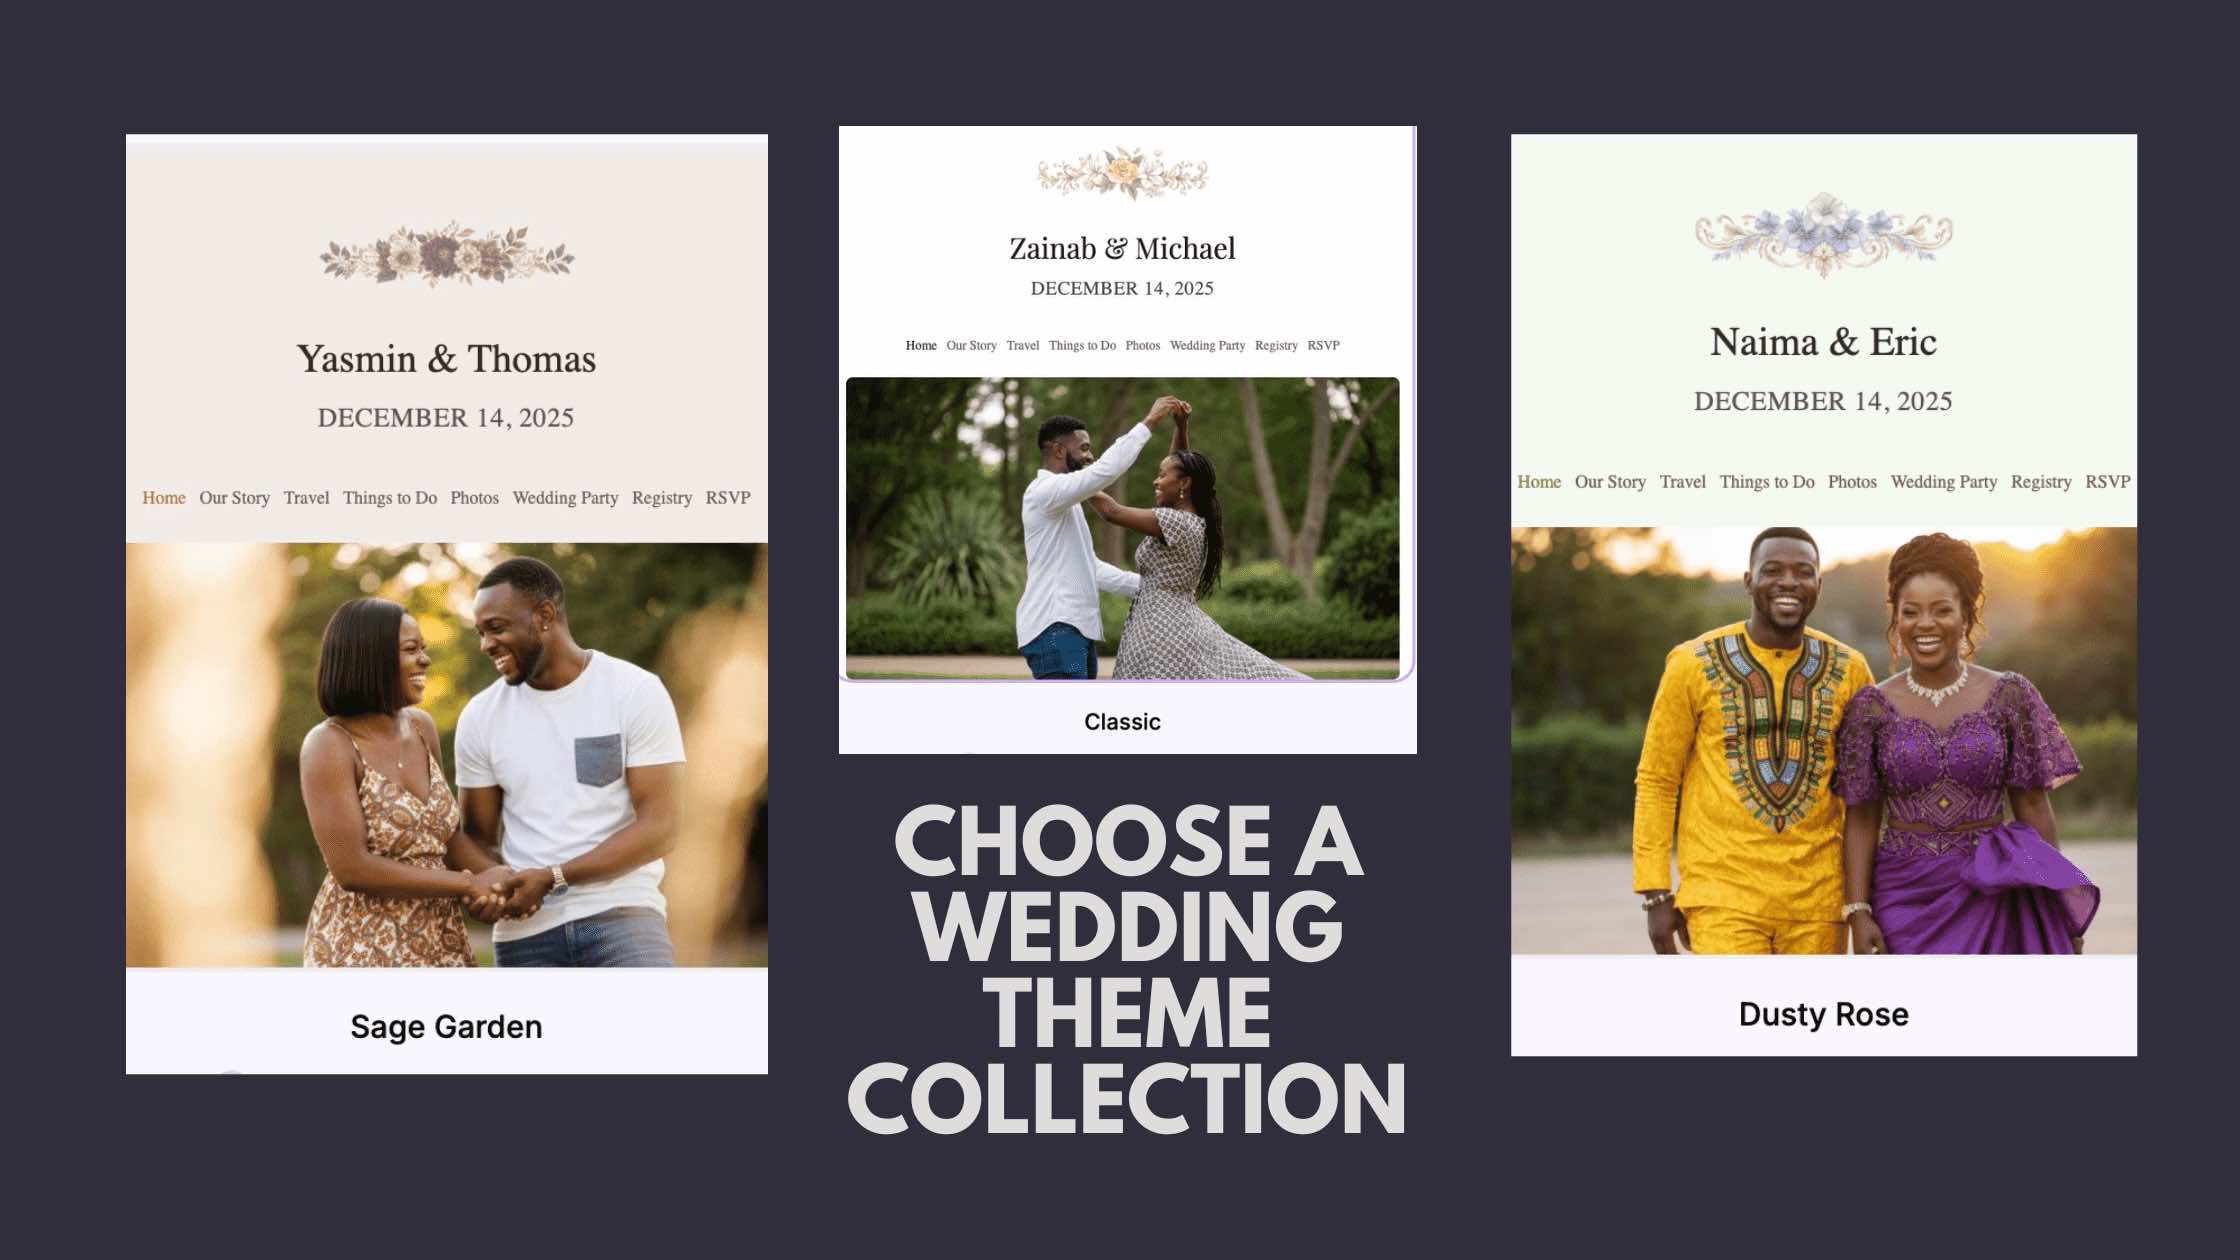
The theme page shows a grid of all available themes. Each theme is displayed as a preview card.
The Theme Grid
You’ll see themes arranged in a grid, each showing:
- Theme name – “Garden,” “Classic,” “Blush,” etc.
- Color preview – The theme’s color palette
- Current selection – A checkmark or highlight on your active theme
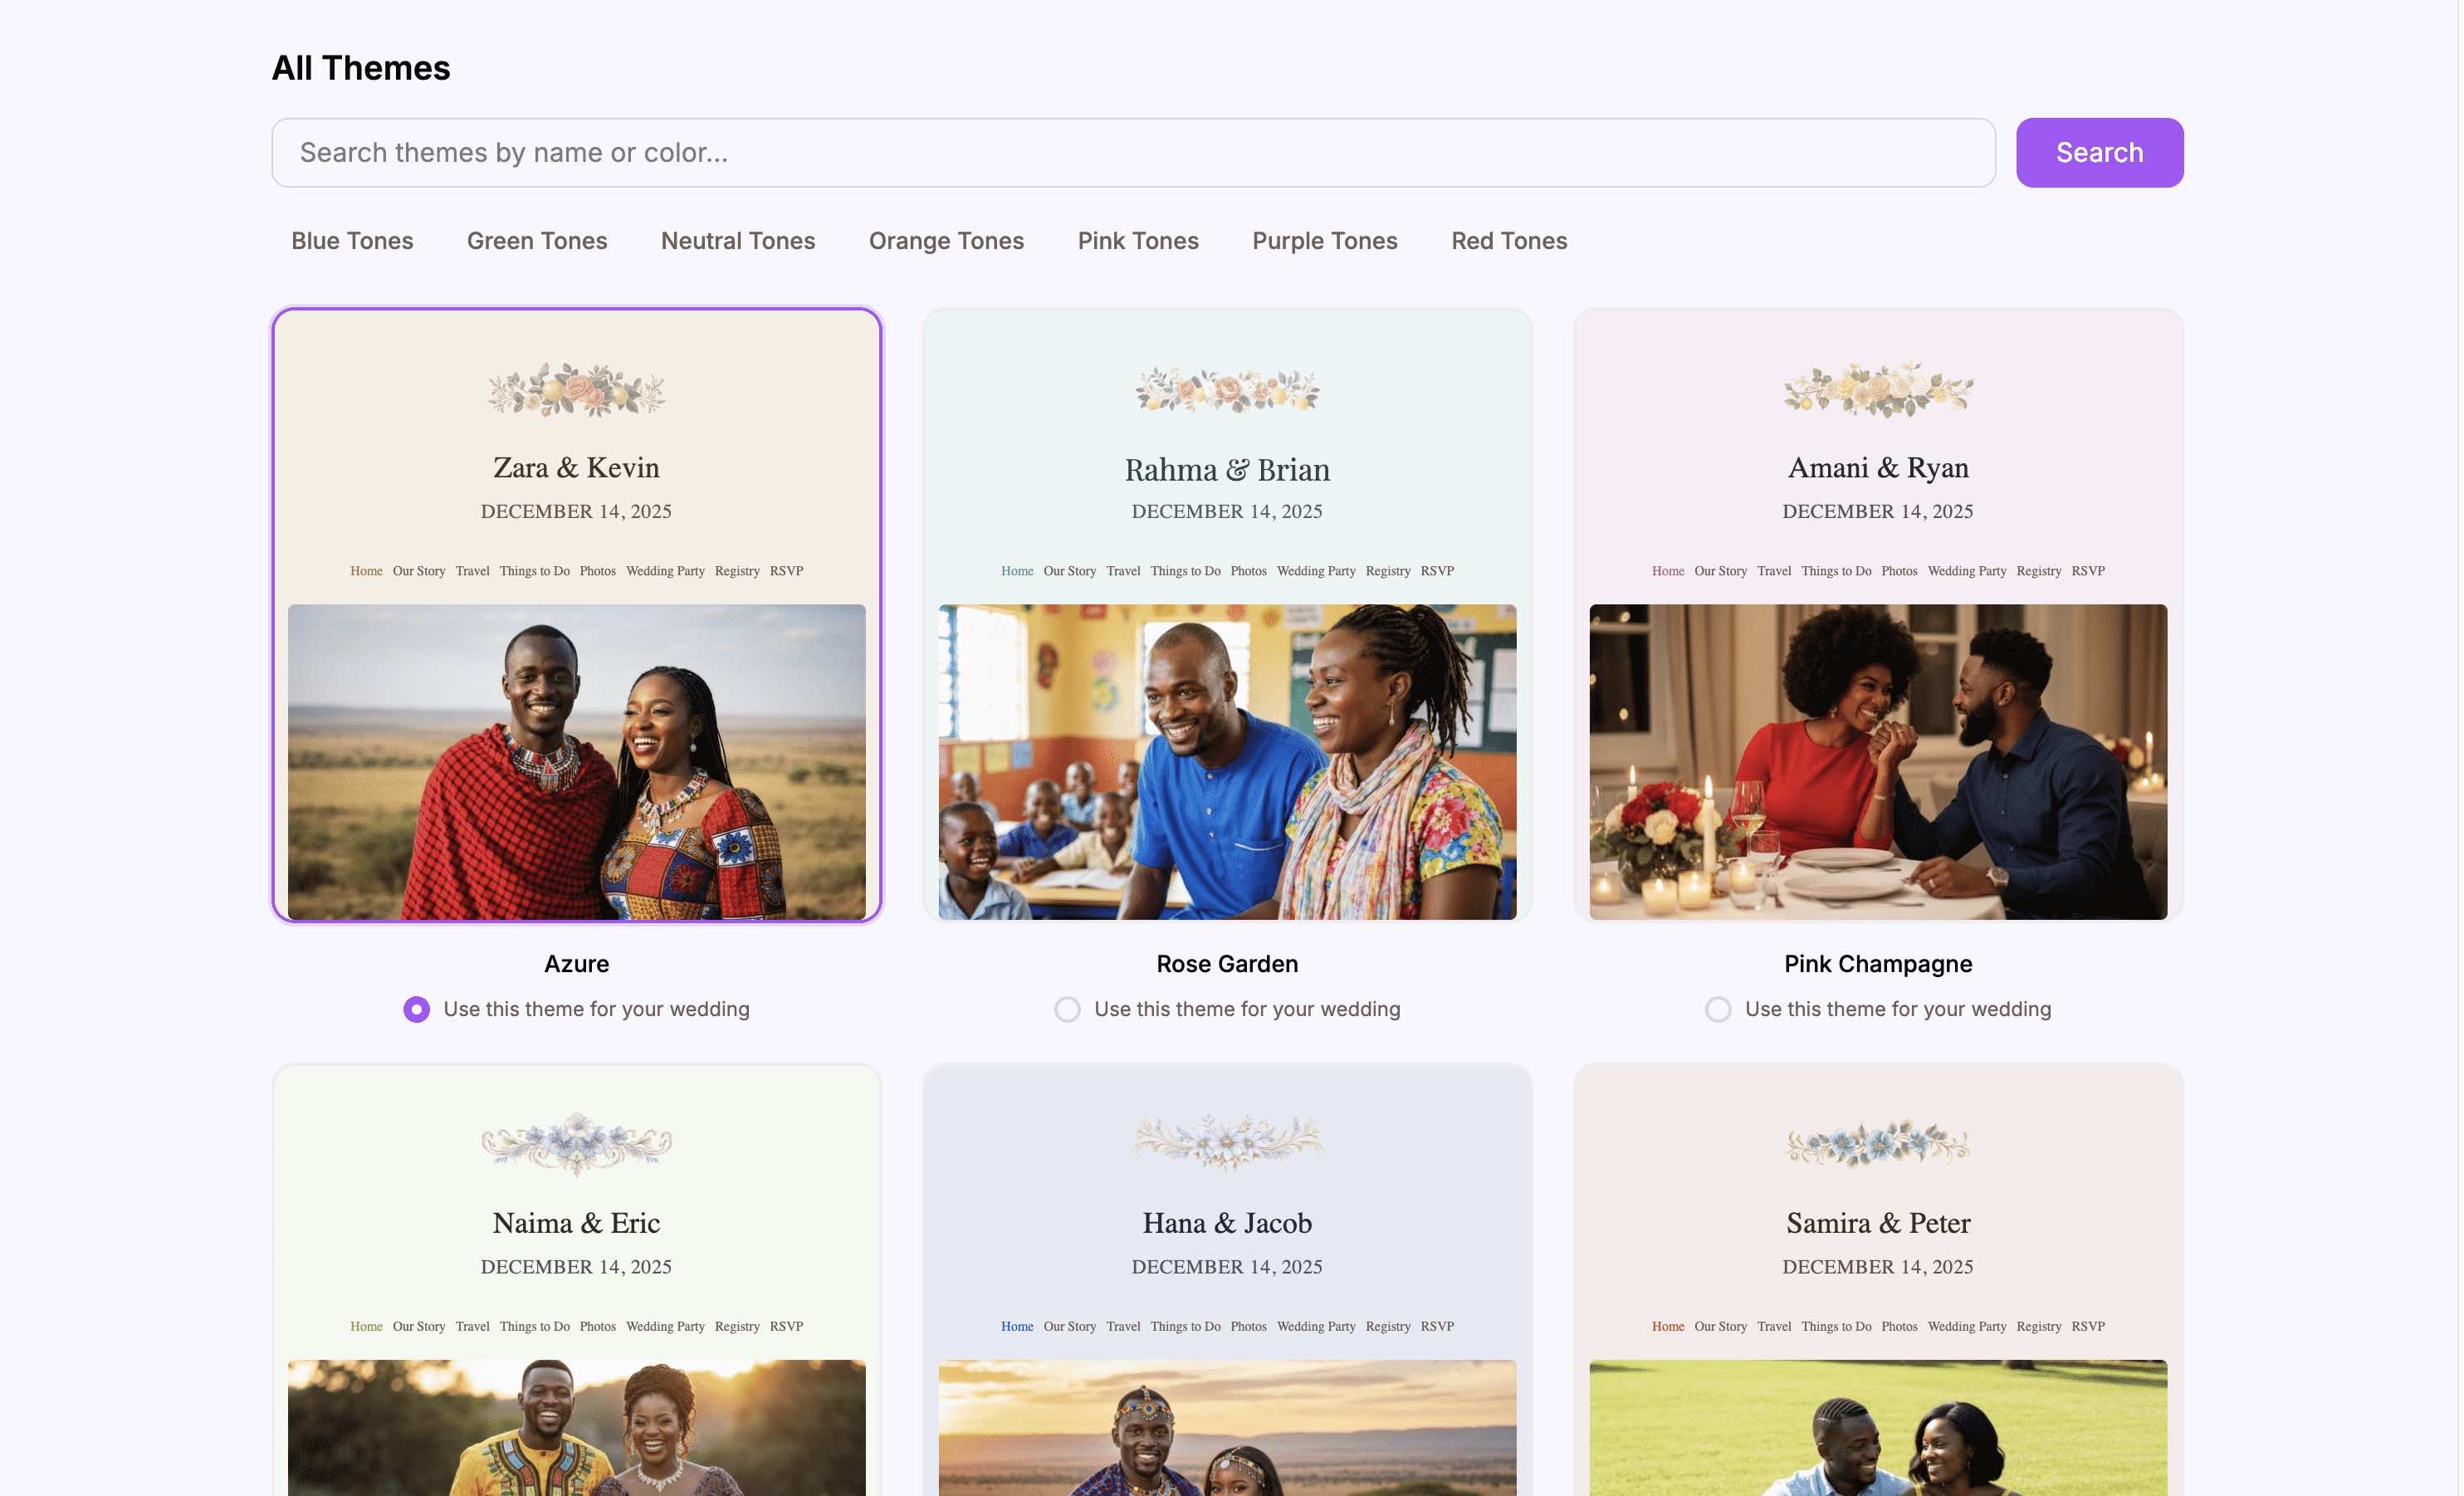 Browse all available themes in the selection grid
Theme Categories
Themes are designed around different wedding styles:
- Natural themes – Garden greens, earth tones
- Classic themes – Timeless, elegant colors
- Romantic themes – Soft pinks, roses, blushes
- Bold themes – Rich, dramatic colors
- Minimal themes – Clean, simple palettes
Theme Elements to Consider
When previewing, think about:
- Does it match your wedding colors? – Complement your décor
- Is it readable? – Text should be easy to read on the background
- Does it fit your vibe? – Romantic, modern, traditional, etc.
Applying a Theme
When you find a theme you like, apply it to your website.
How to Apply a Theme
- Click on the theme you want
- The theme is selected immediately
- A checkmark or highlight indicates the active theme
- Changes are saved automatically
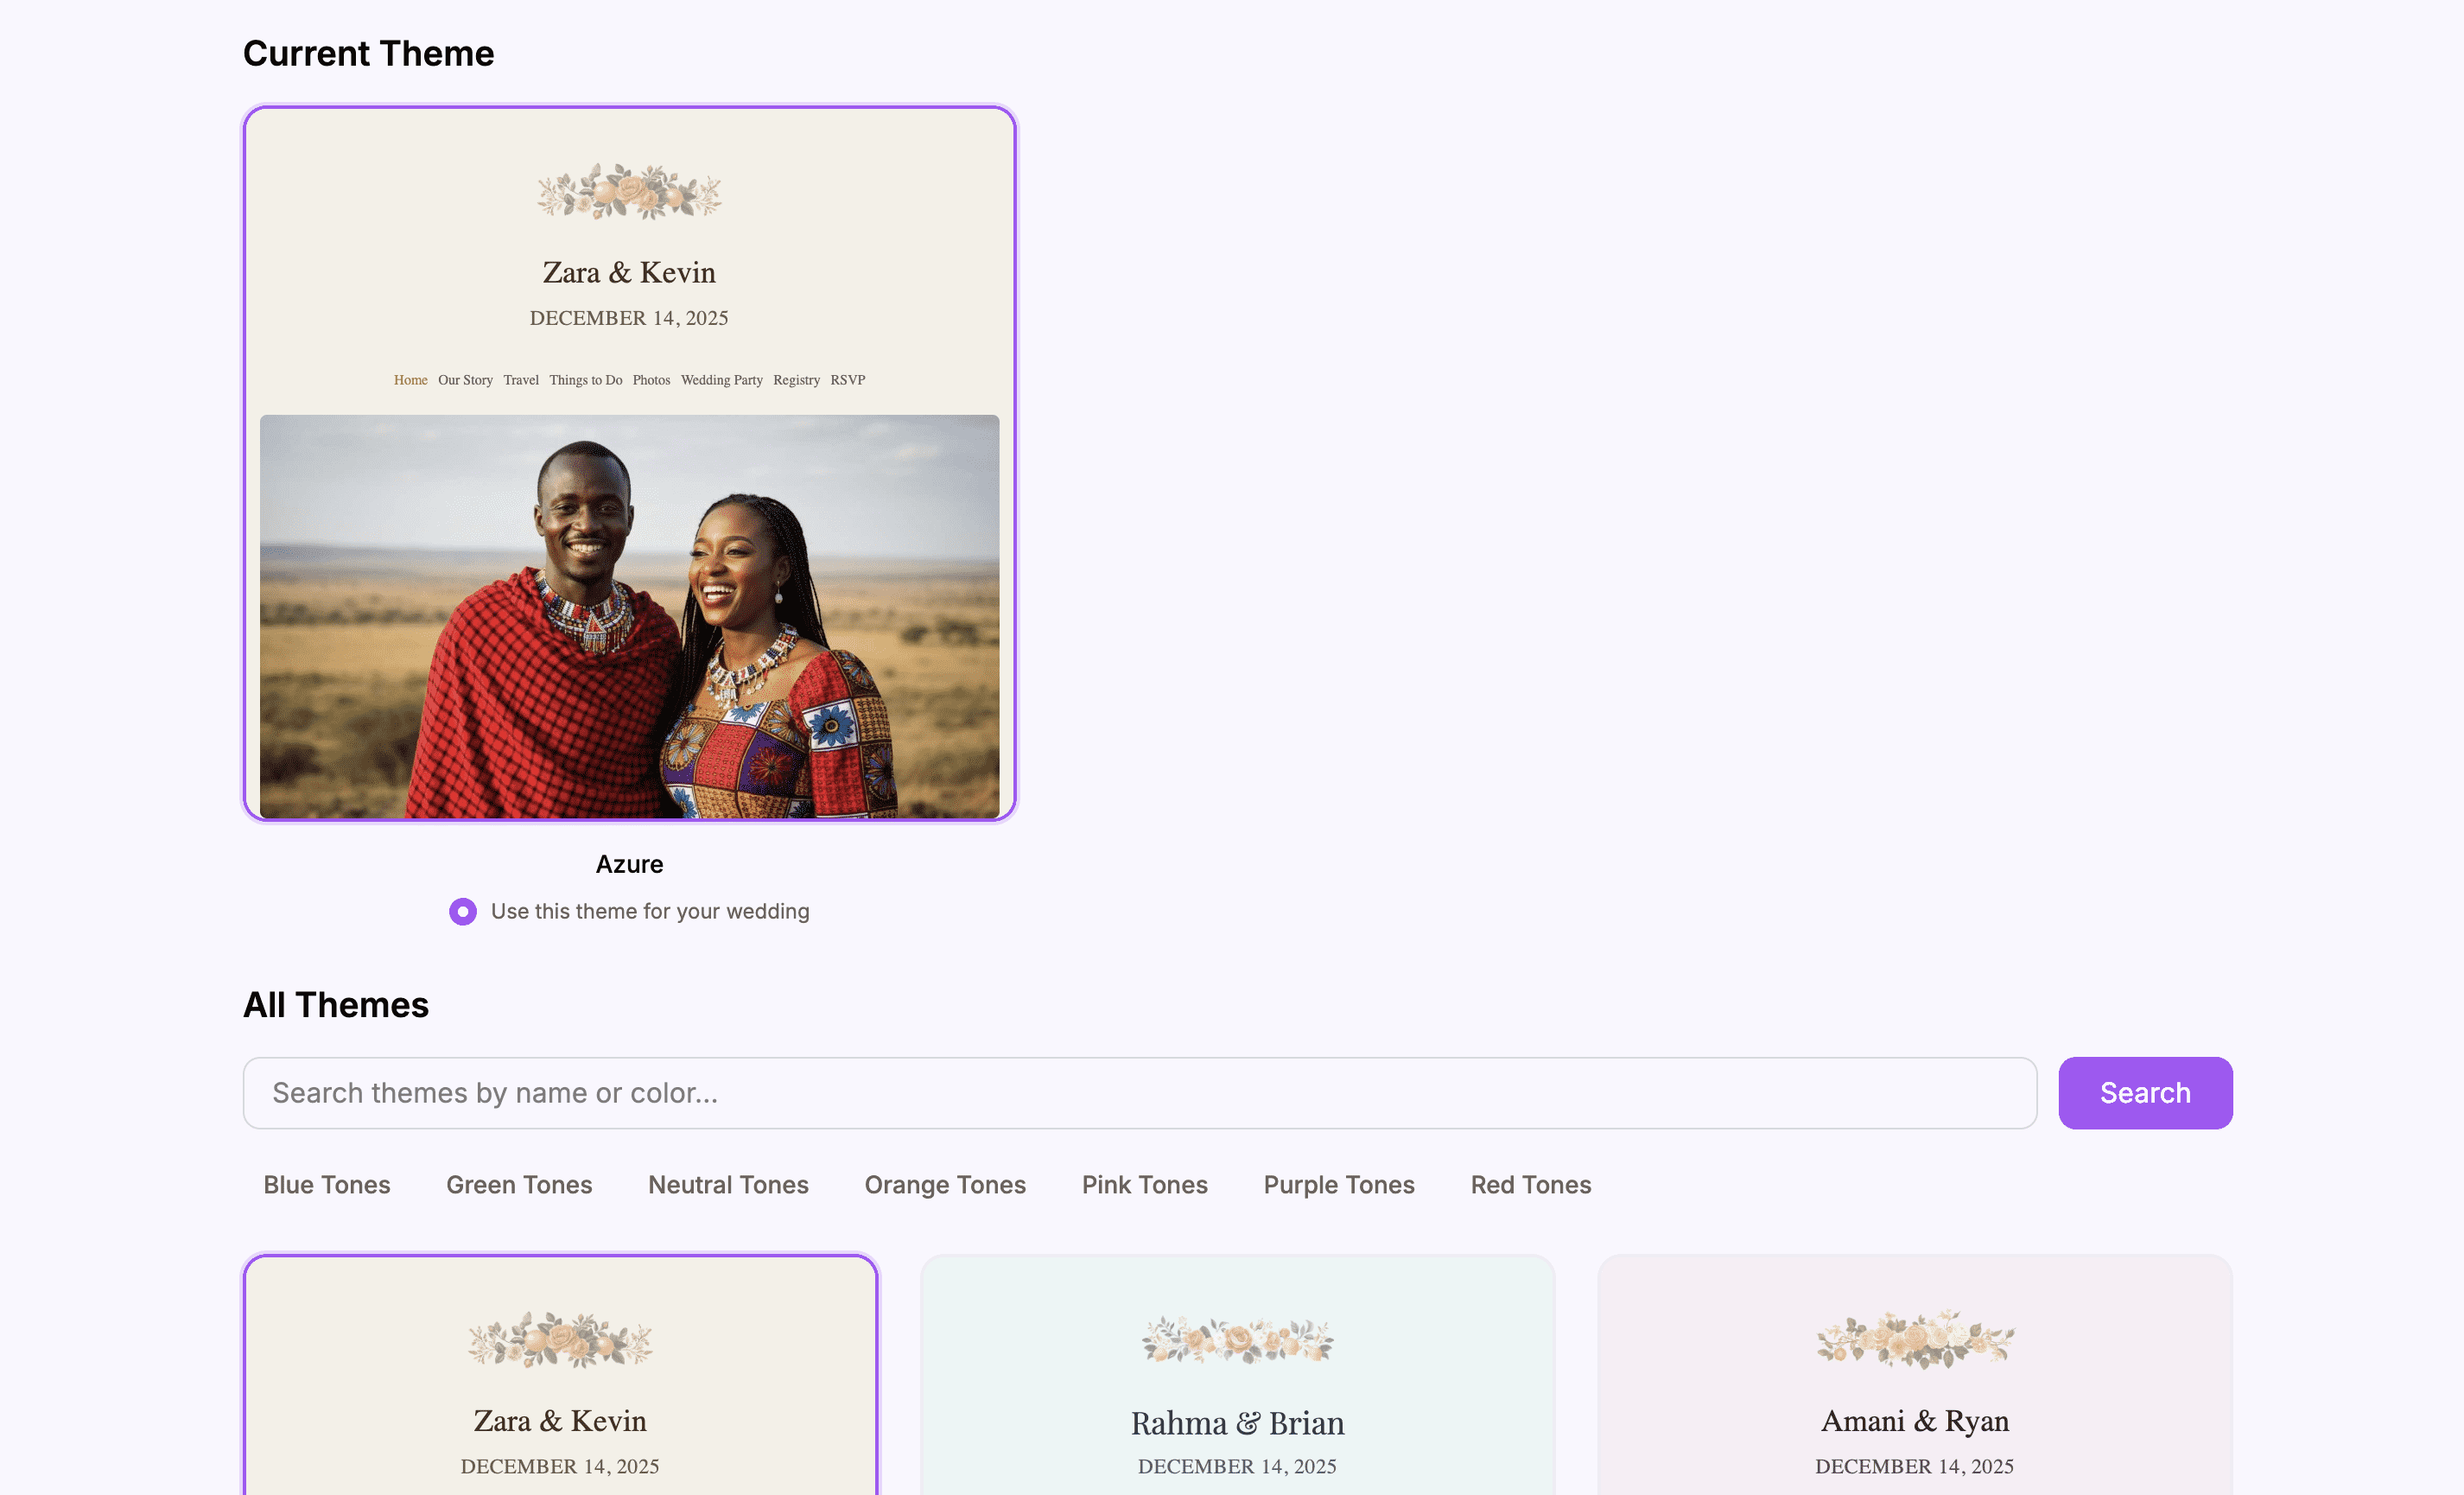 Your selected theme shows a checkmark or highlight
Changes Take Effect Immediately
Once you select a theme:
- Your live website immediately shows the new colors and fonts
- All pages update to match the theme
- Floral decorations change to the theme’s flower style
How Themes Affect Your Website
Colors
Each theme sets four colors:
| Color | Where It Appears |
|---|---|
| Primary | Buttons, links, accents, headers |
| Accent | Secondary highlights, decorative elements |
| Background | Page background, section backgrounds |
| Text | All body text and headings |
Fonts
Each theme includes two fonts:
| Font Type | Where It Appears |
|---|---|
| Heading font | Titles, section headers, your names |
| Body font | Paragraphs, descriptions, regular text |
Floral Decorations
Themes include matching flower illustrations that appear:
- In the website header
- As decorative elements on pages
- As visual accents throughout the site
The flowers are coordinated to match the theme’s color palette.
Live Website with Theme
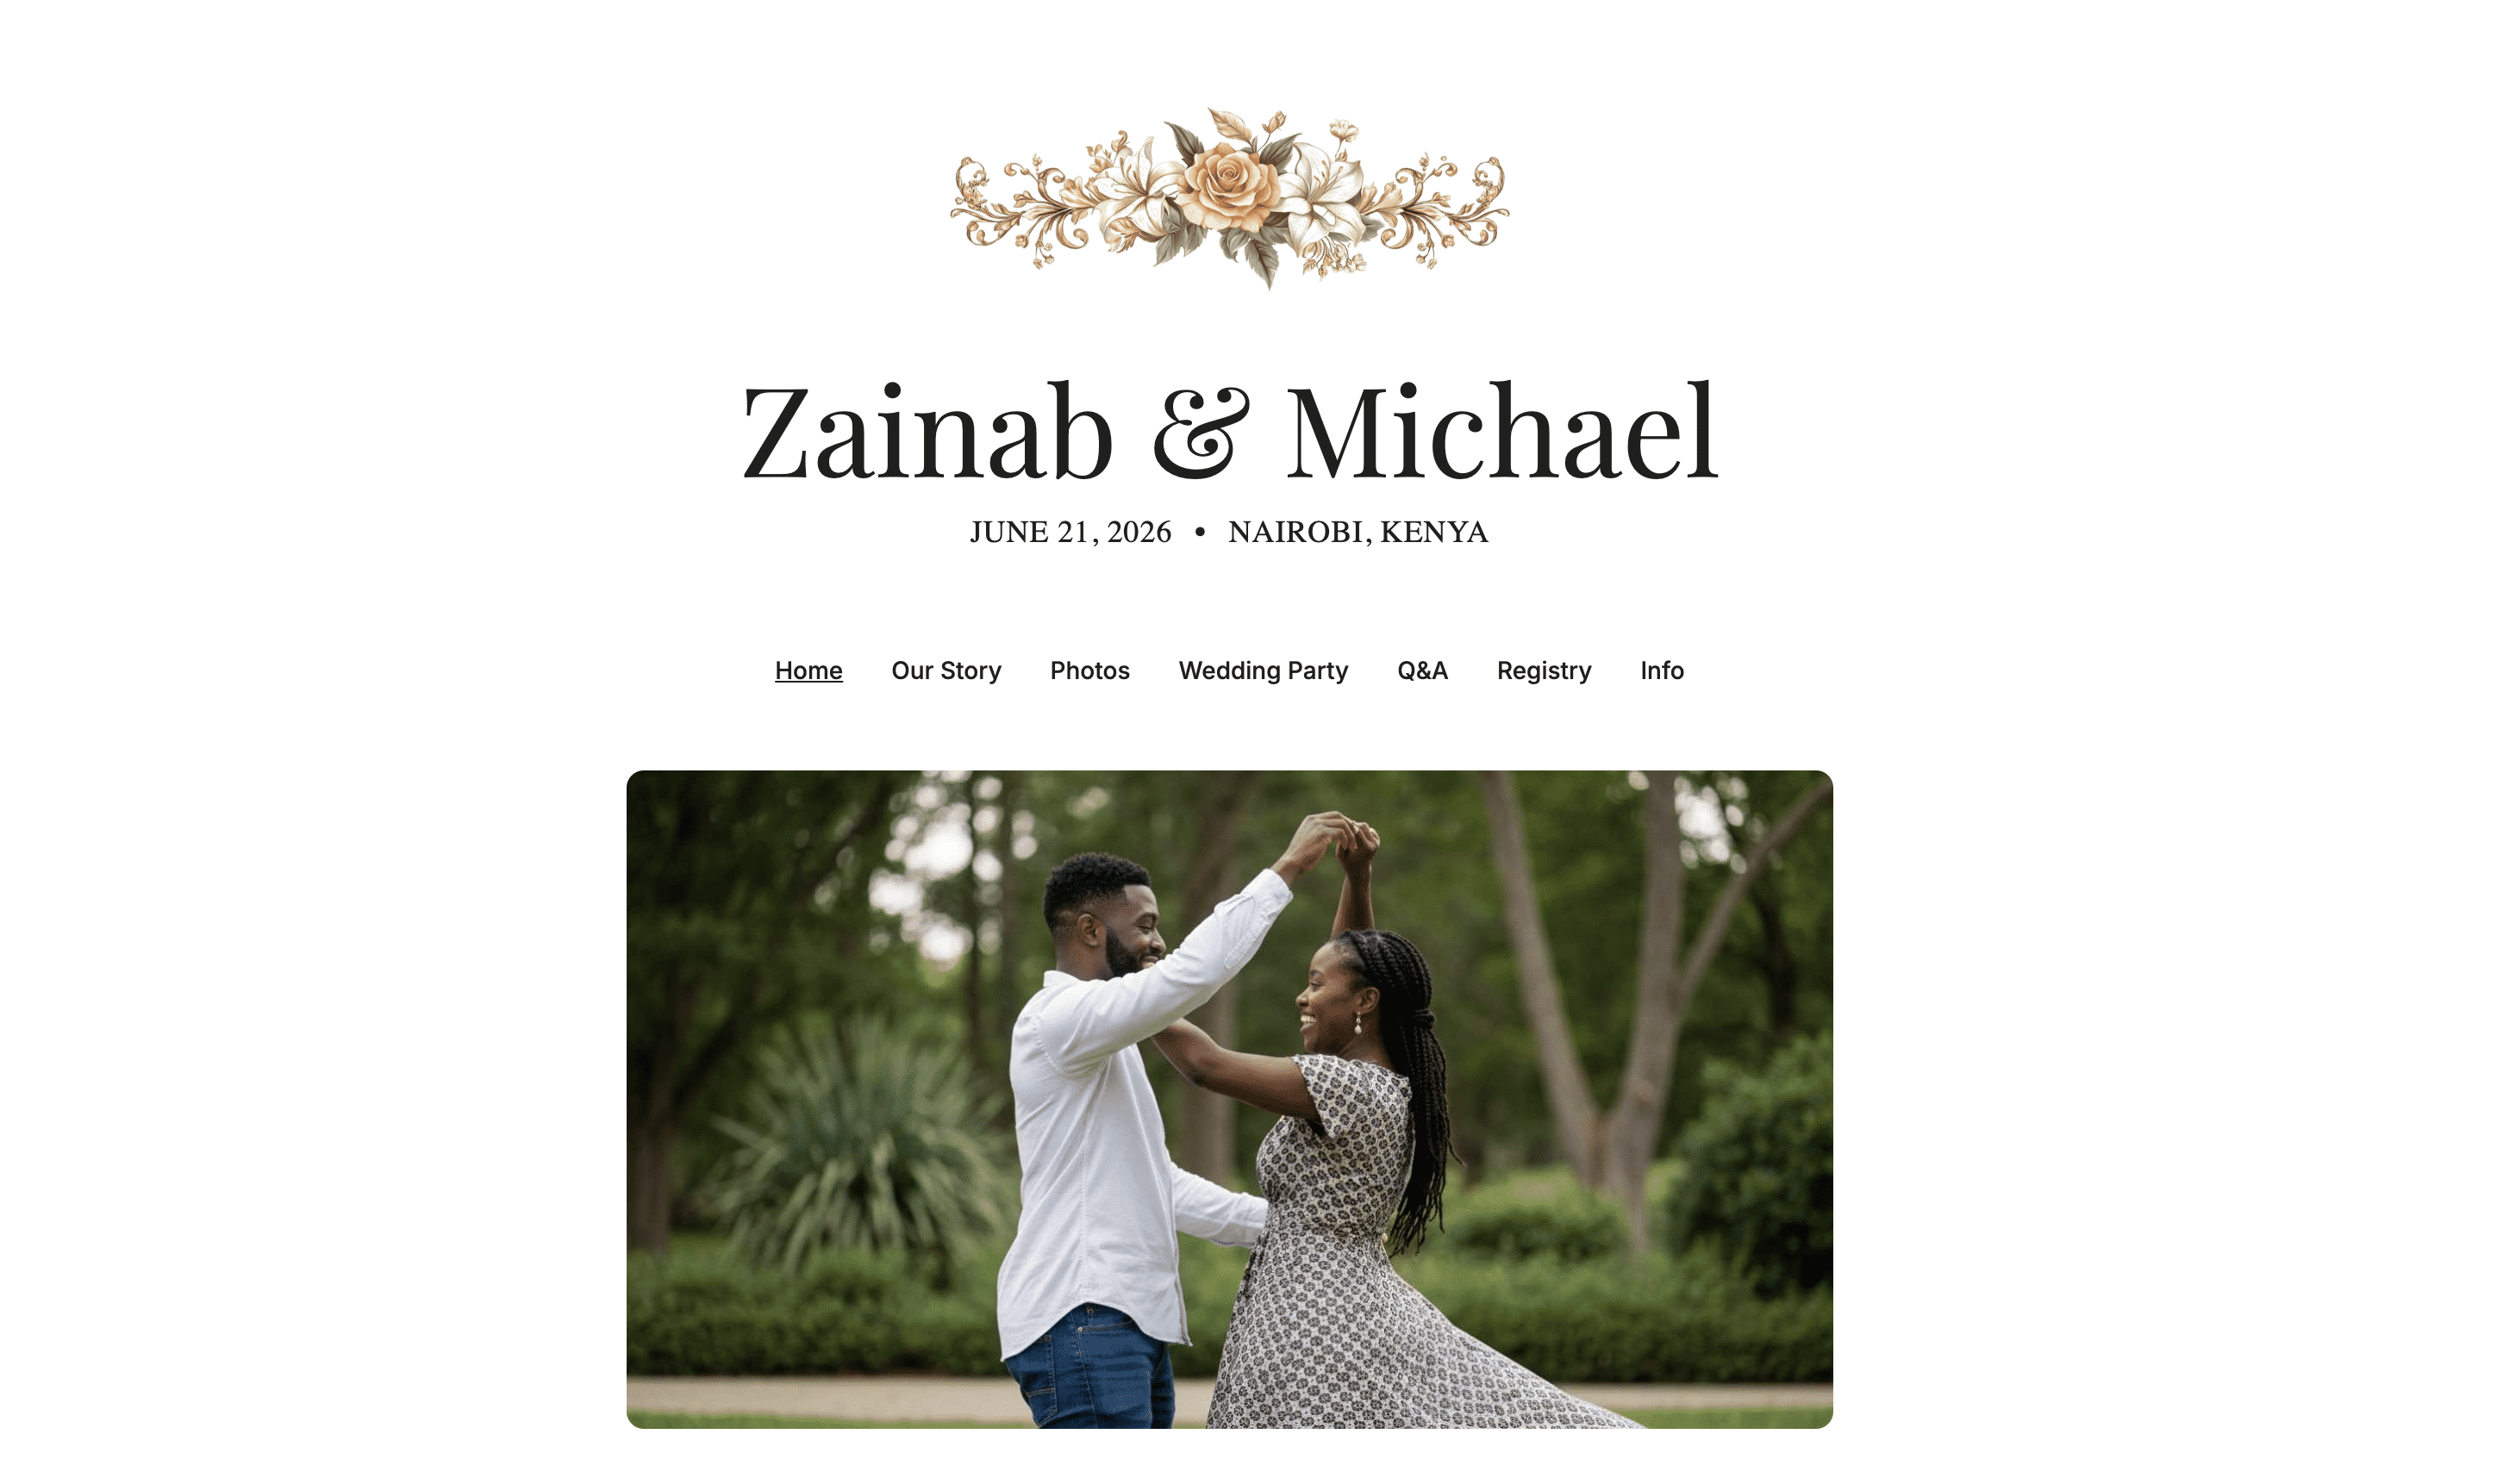 Your website with the selected theme applied
Changing Themes
You can change your theme at any time.
Switching Themes
- Go to the Theme settings
- Click on a different theme
- The new theme applies immediately
Things to Consider
- Test your content – Make sure your photos and text look good with the new colors
- Preview before events – Don’t change themes right before sharing your website widely
- Your theme is reversible – You can always switch back
Part 2: Password Settings
What Password Protection Does
When you set a password:
- Guests must enter the password to view your website
- Only people who know the password can see your content
- The password protects all pages on your website
Accessing Password Settings
To set or change your password:
- Log in to your Harusi Hub account
- From your dashboard, look at the left sidebar
- Click on Website to expand the menu
- Click on Password
You’ll see the password settings page.
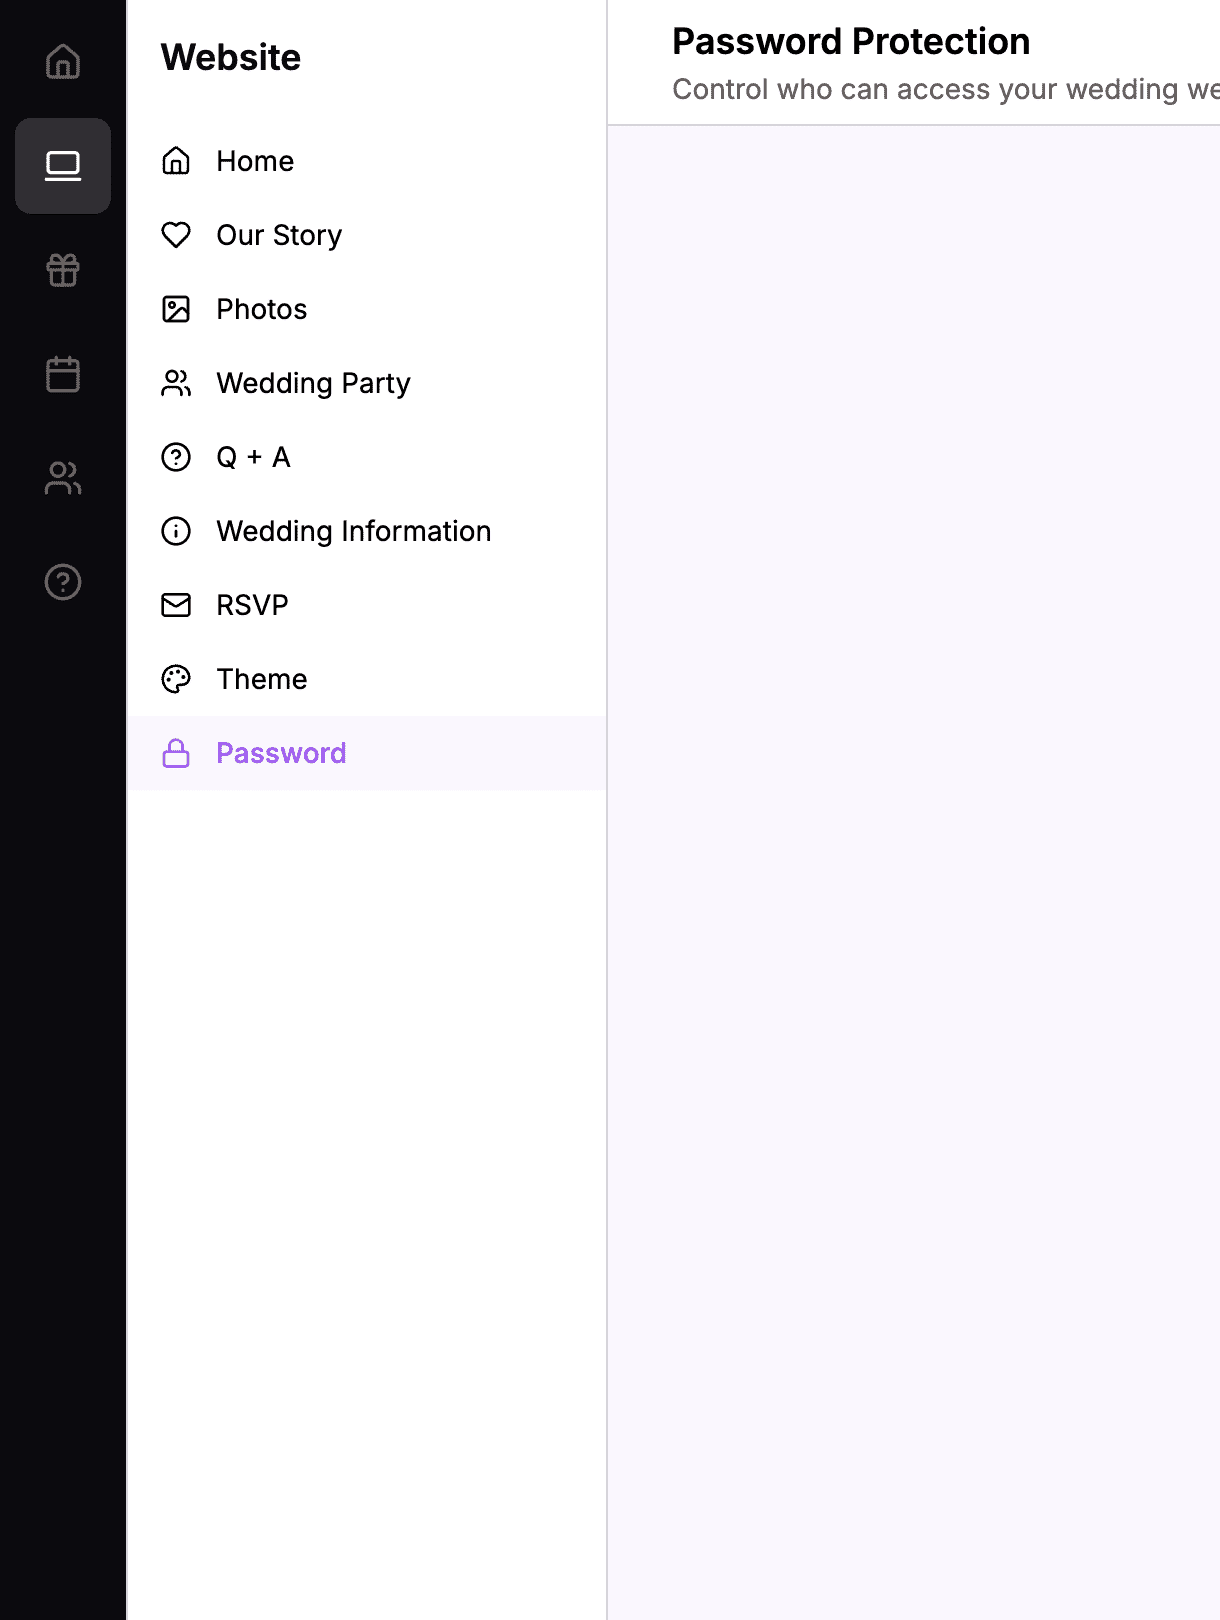 The sidebar navigation with Website > Password highlighted
Setting a Password
If your website is currently public (no password), you can add password protection.
How to Set a Password
- Find the Password field
- Enter your desired password
- The password saves automatically
- Your website is now password-protected
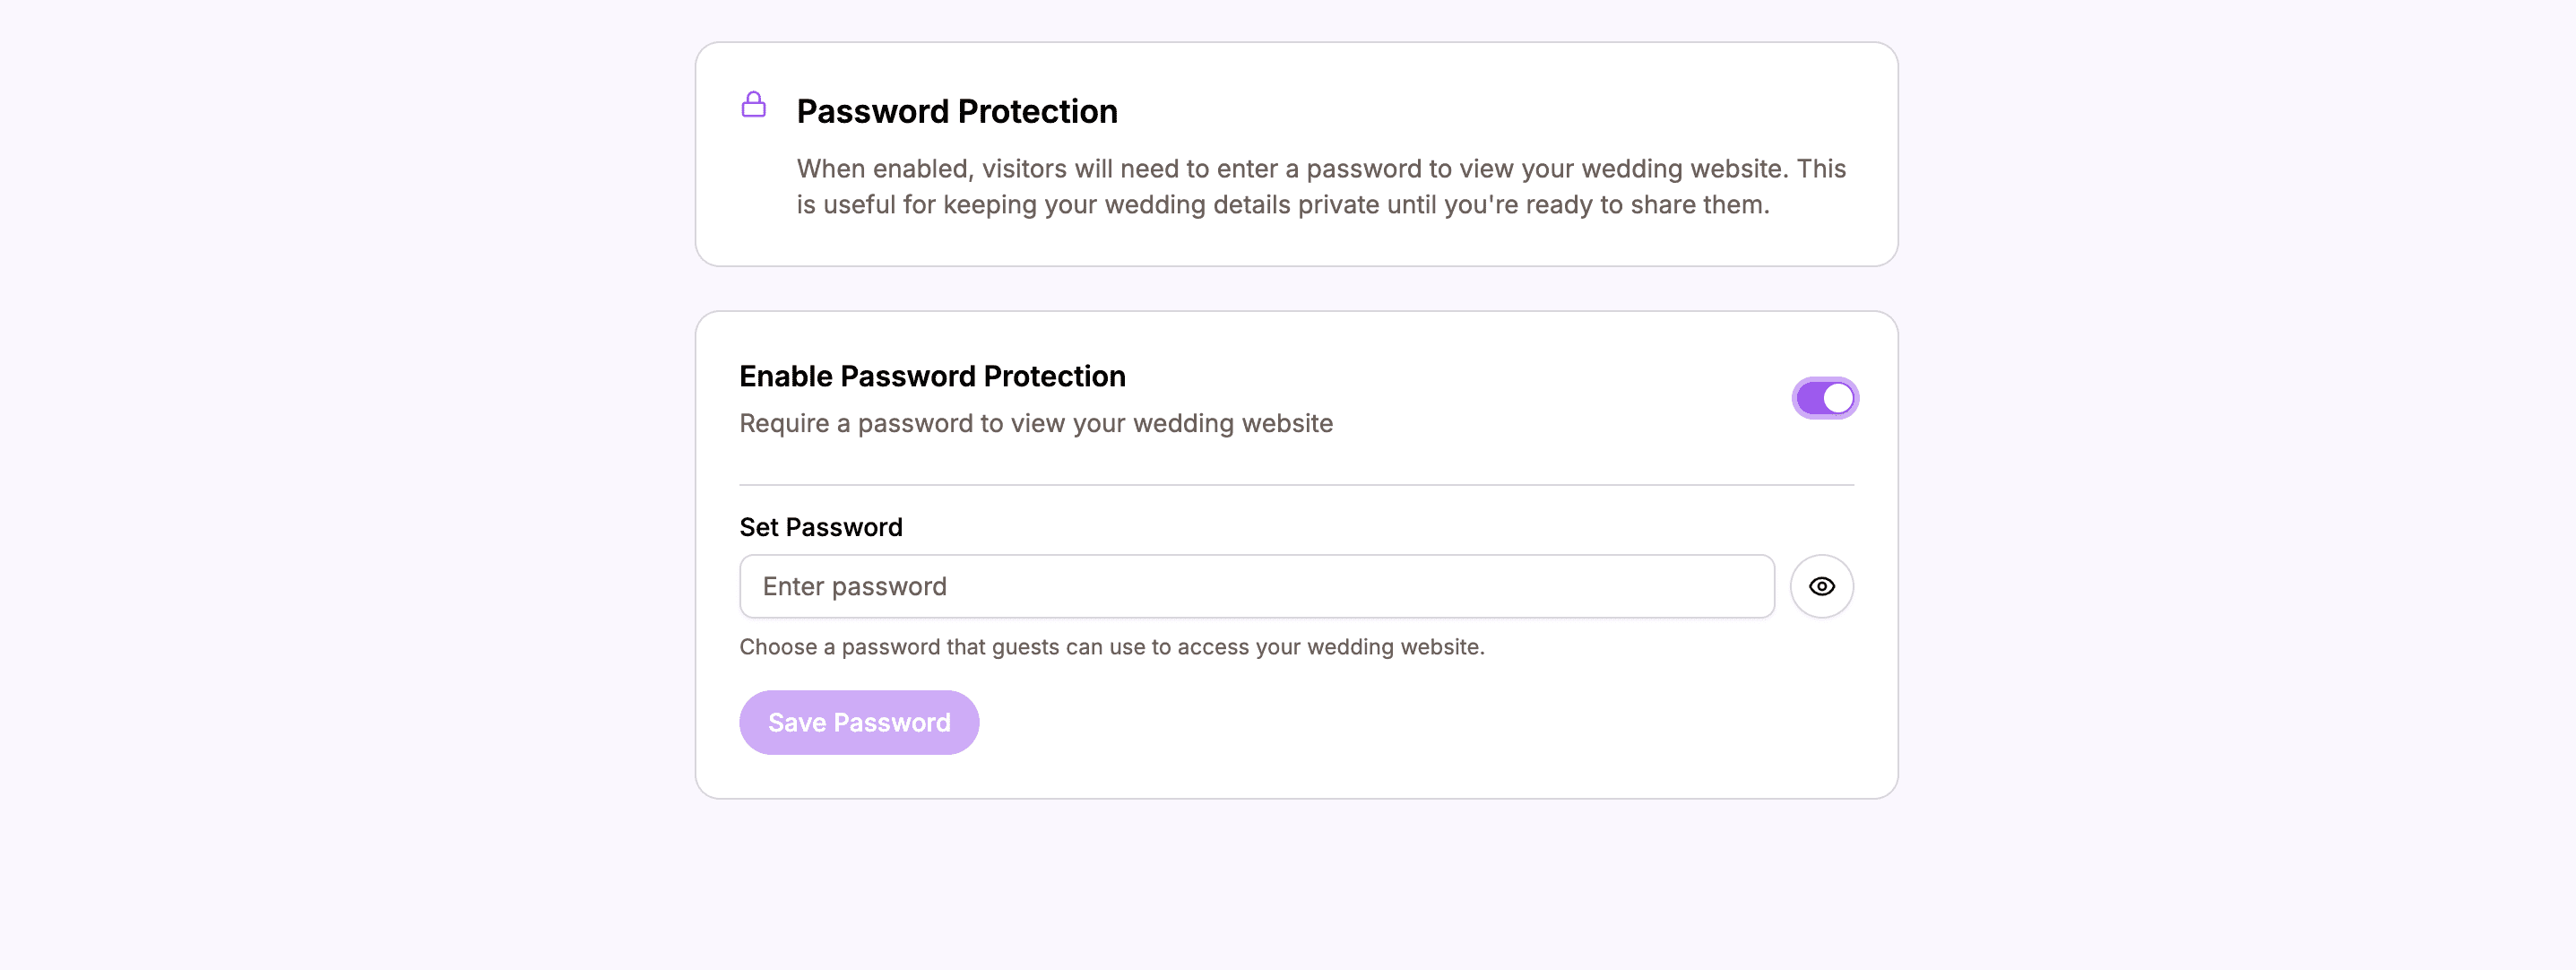 Enter a password to protect your website
Choosing a Good Password
Your wedding website password should be:
- Easy to share – You’ll give it to guests, so keep it simple
- Easy to remember – Guests shouldn’t struggle to recall it
- Unique enough – Not something easily guessed by strangers
Good examples:
- Your wedding date: “June2024”
- Your names: “JamesAndSarah”
- A meaningful word: “Mapenzi” (love in Swahili)
Avoid:
- Generic passwords like “password” or “1234”
- Overly complex passwords guests will forget
- Anything embarrassing to share
Managing Your Password
Once a password is set, the settings page shows that protection is enabled.
Password Enabled State
When your website is password-protected, you’ll see:
- Indication that password protection is active
- Option to change or remove the password
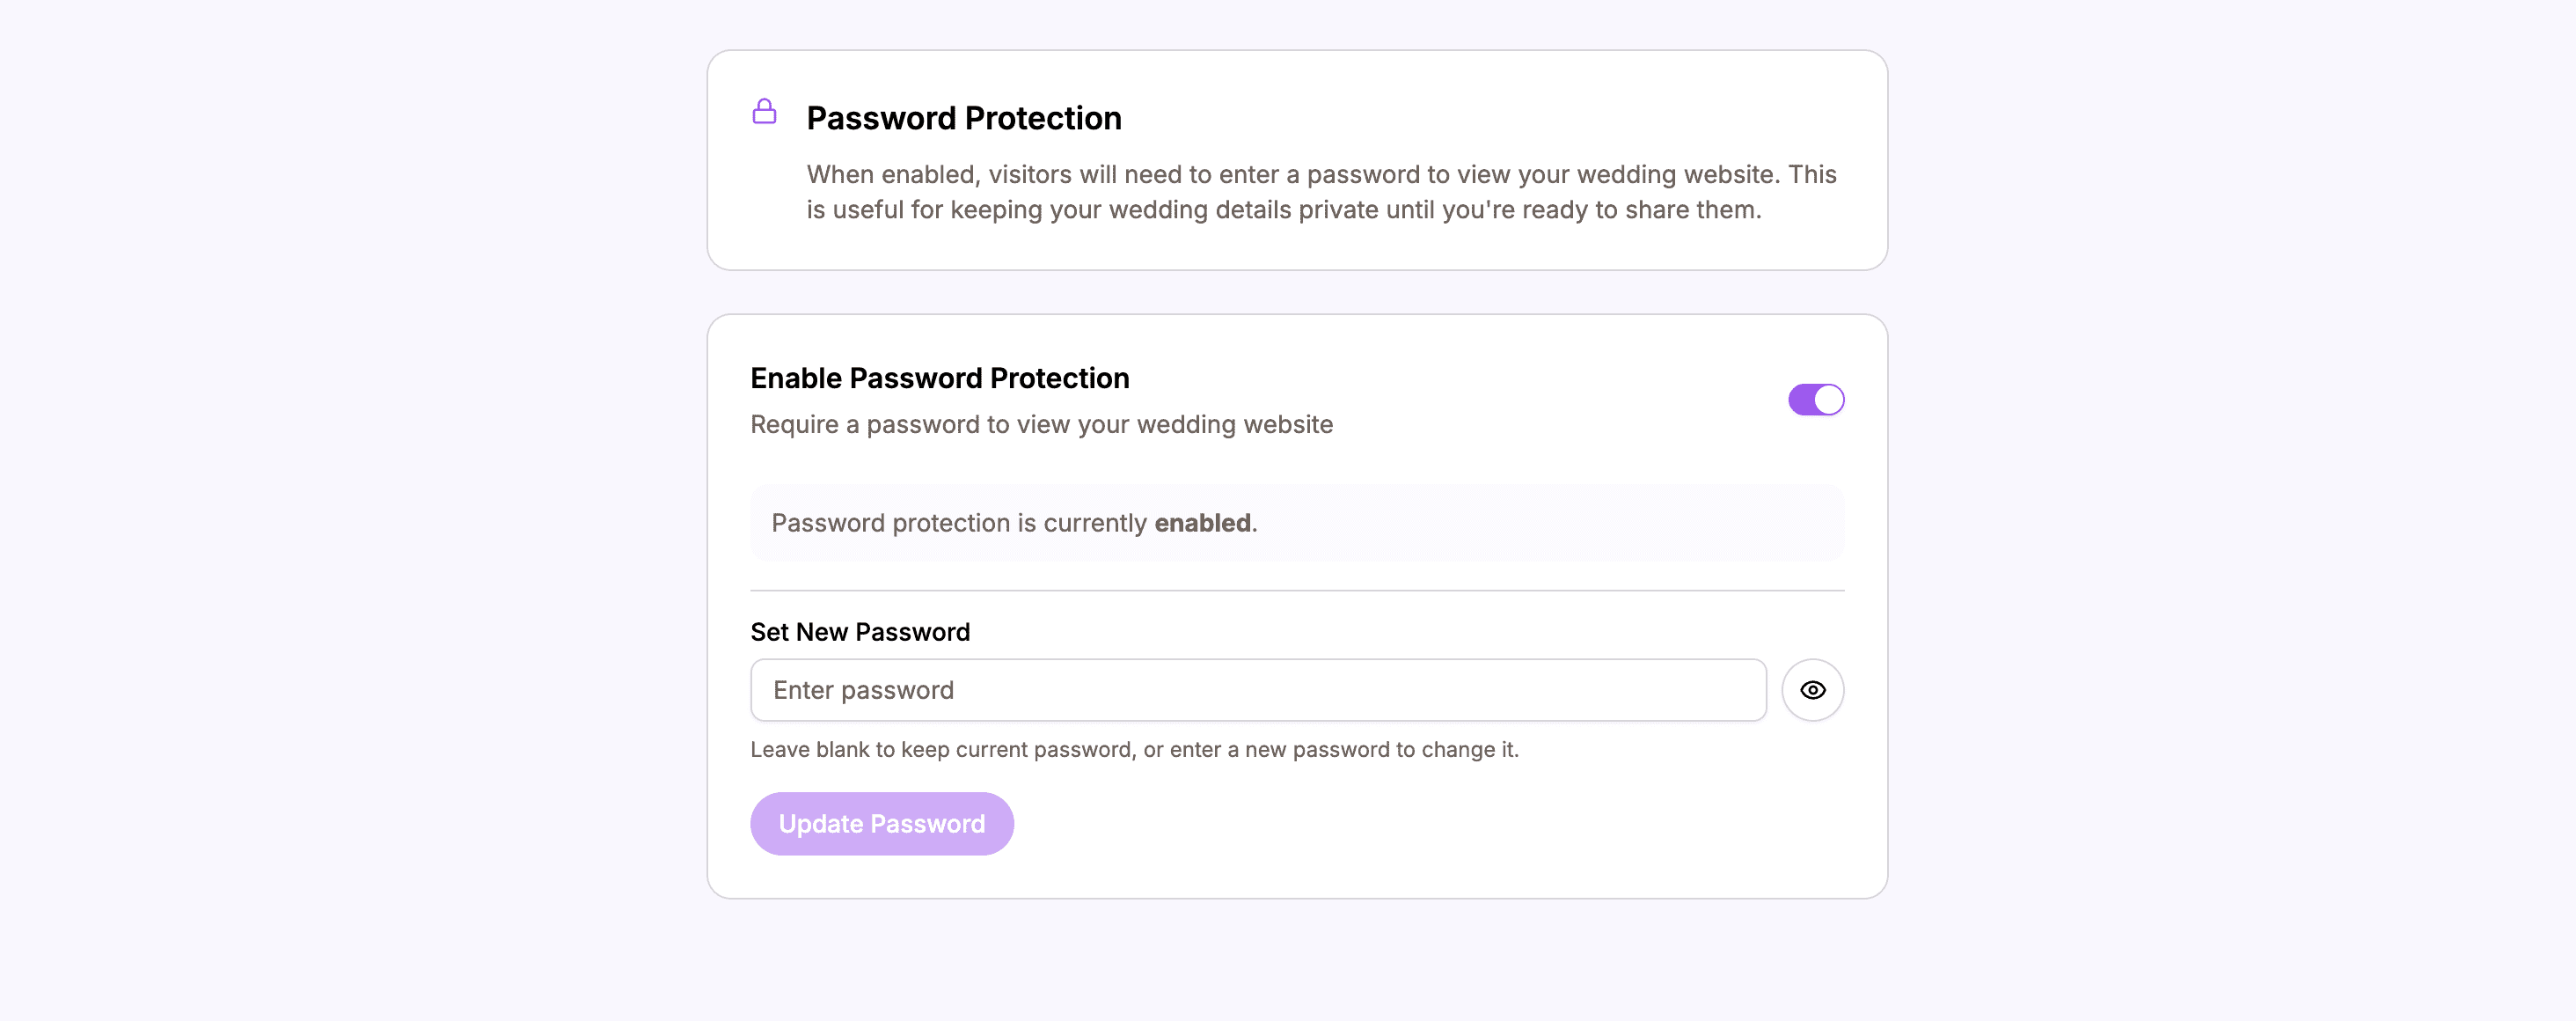 Password protection is now active
Changing Your Password
To change the password:
- Go to Password settings
- Enter a new password in the field
- The new password saves automatically
- Share the new password with guests
Removing the Password
To make your website public:
- Go to Password settings
- Clear the password field
- Password protection is disabled
- Anyone can view your website
How Password Protection Works for Guests
What Guests See
When a guest visits your password-protected website:
- They see a password prompt screen
- They enter the password you shared
- If correct, they can access the full website
- Their access is remembered for that browser session
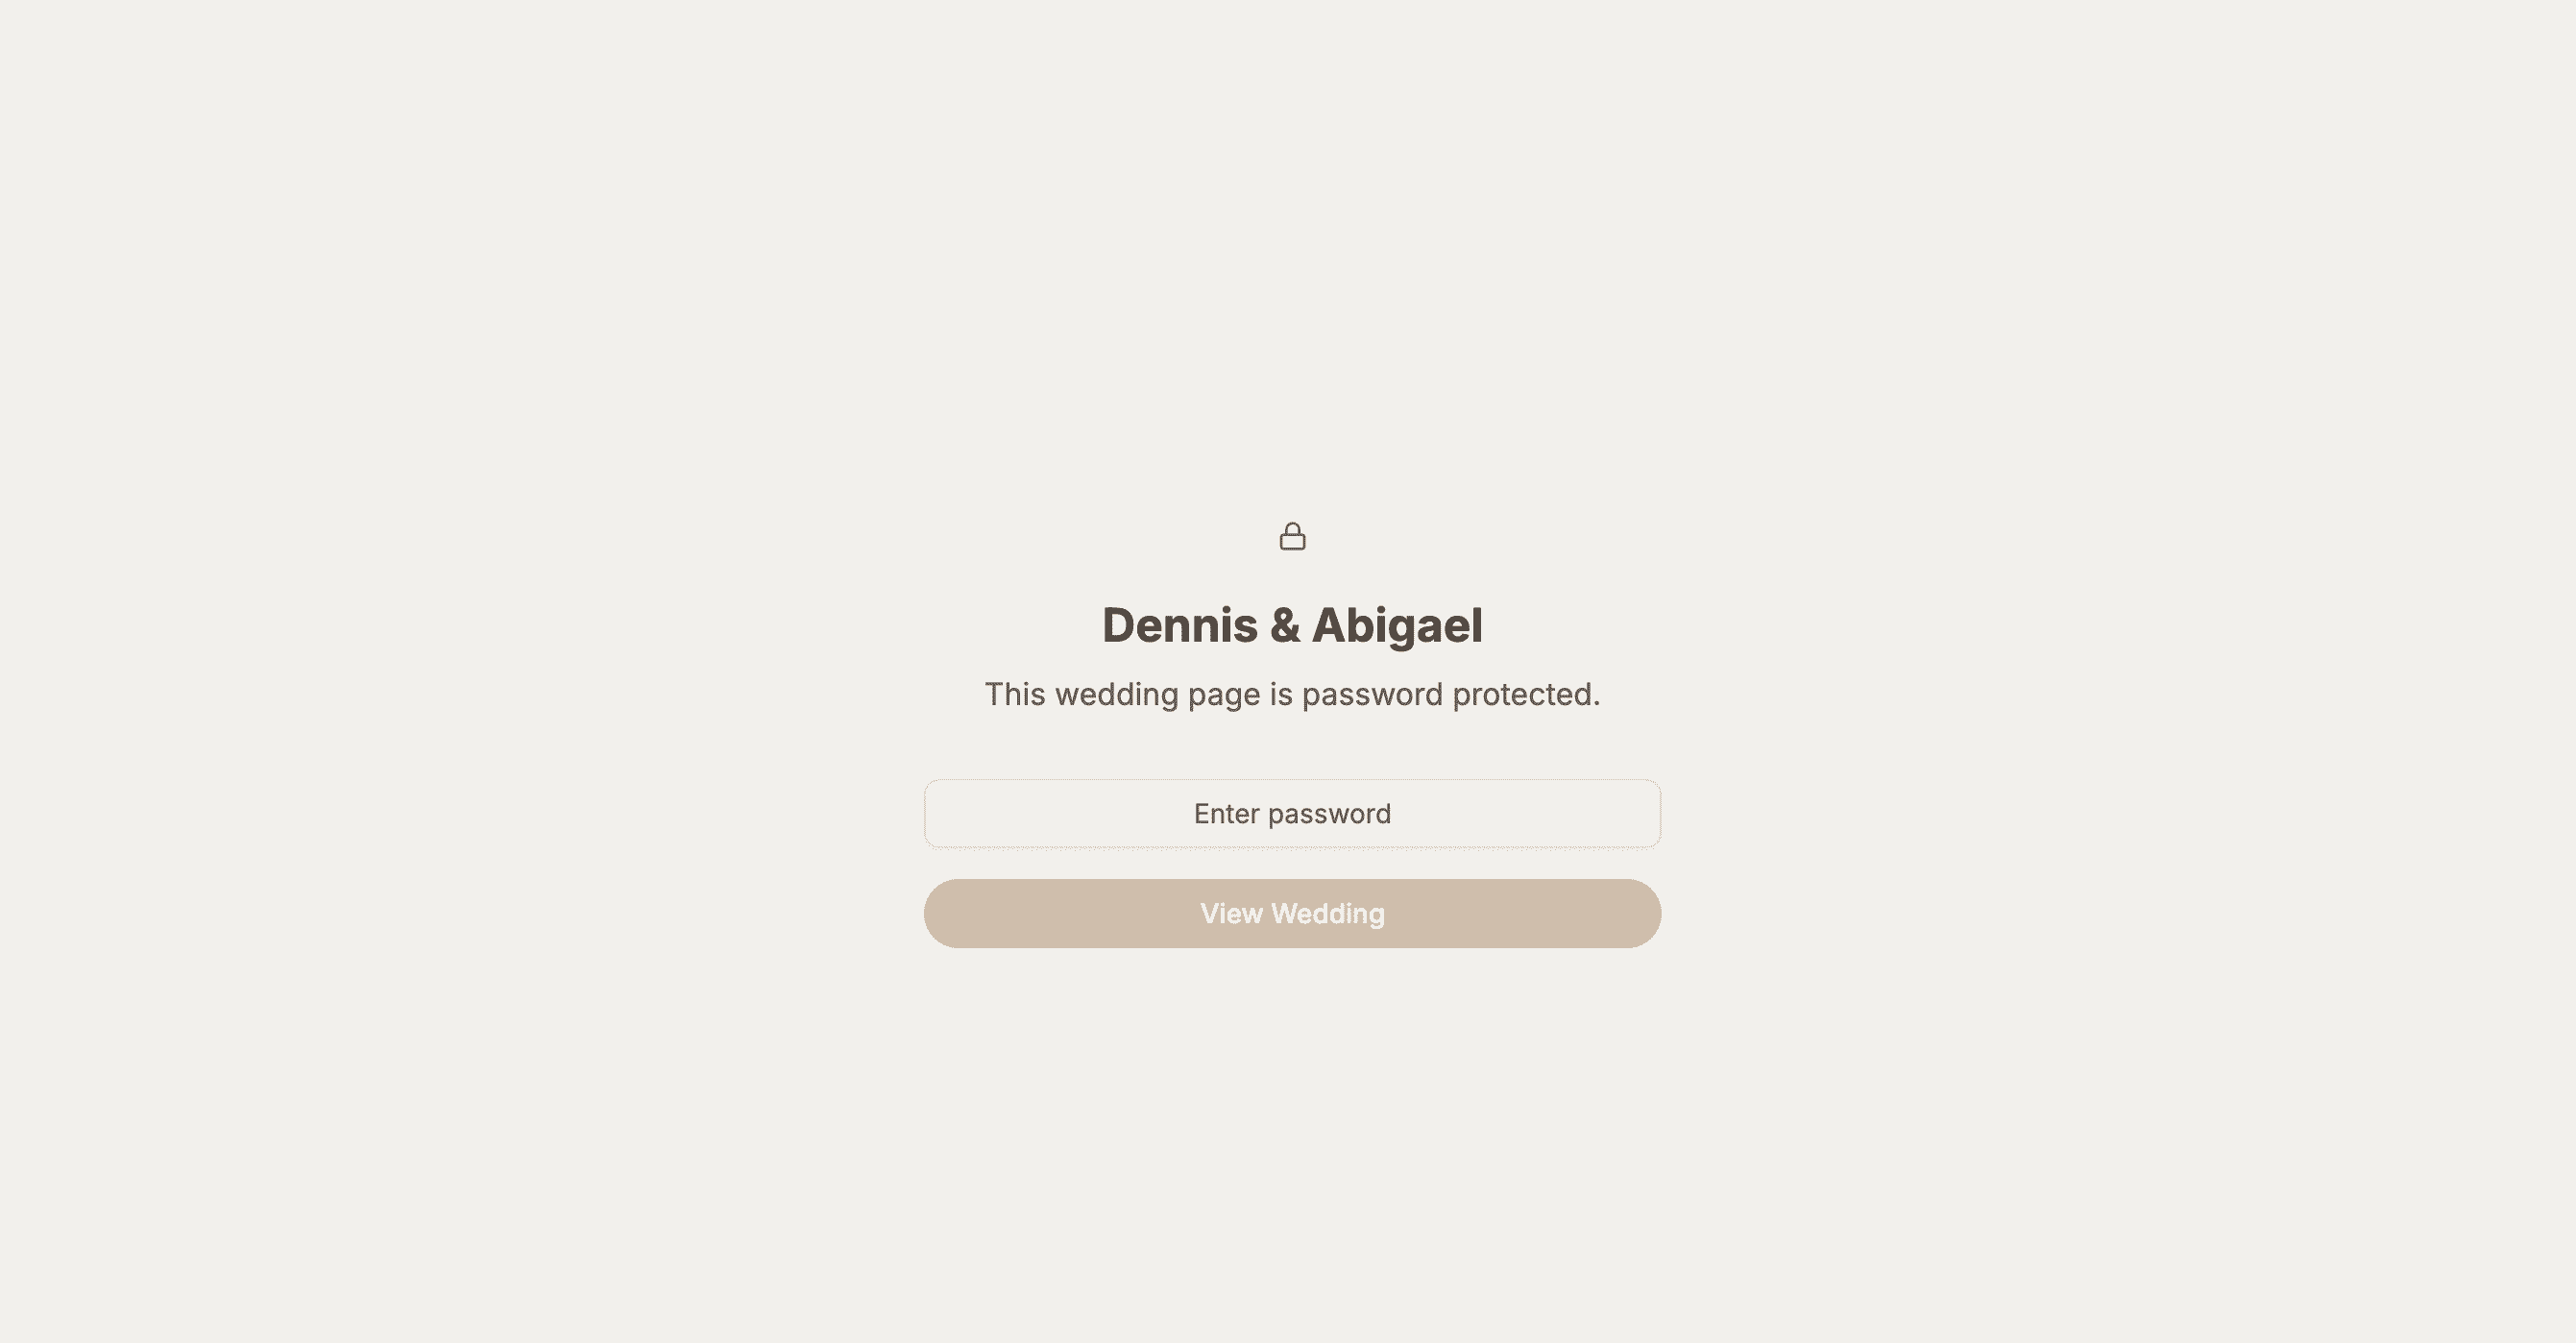 Guests see this password prompt when visiting your protected website
Session-Based Access
Once a guest enters the correct password:
- They can browse all pages without re-entering it
- Closing the browser clears their access
- They’ll need to enter the password again in a new session
Sharing Your Password
You’ll need to share the password with guests:
- In your invitation – Include it with RSVP details
- In save-the-dates – Share early access
- Via message – Text or email to guests
Example: “Visit our website at harusihub.com/james-sarah. The password is ‘June2024’.”
When to Use Password Protection
Reasons to Protect Your Website
- Privacy – Keep wedding details from the public
- Exclusivity – Only invited guests see information
- Pre-announcement – Hide the website until you’re ready to share
Reasons to Leave It Public
- Easy access – Guests don’t need to remember a password
- Search visibility – Public websites can be found online
- Open celebration – Nothing to hide
Common Approach
Many couples:
- Start with password protection during planning
- Share the password with invited guests
- Optionally remove the password after the wedding
Tips for Theme and Password Settings
Theme Tips
- Choose early – Pick a theme before adding lots of content
- Match your wedding – Consider your wedding colors and style
- Test on mobile – Make sure the theme looks good on phones
- Keep it readable – Prioritize clarity over creativity
Password Tips
- Share clearly – Make sure guests have the password
- Keep it simple – Don’t create frustration for guests
- Have a backup plan – Be ready to share the password if guests forget
- Consider your audience – Some guests may struggle with password entry
Summary
Theme and Password settings let you customize and control your website:
Theme Settings
| Feature | What It Does |
|---|---|
| Theme selection | Choose your website’s visual style |
| Colors | Primary, accent, background, and text colors |
| Fonts | Heading and body fonts |
| Decorations | Matching floral illustrations |
Password Settings
| Feature | What It Does |
|---|---|
| Set password | Add protection to your website |
| Change password | Update the password anytime |
| Remove password | Make your website public |
| Guest experience | Password prompt for visitors |
Create a beautiful, secure wedding website that reflects your style.
Ready to customize your website?
Create your wedding website and make it uniquely yours.
Choose Your Theme