How to Introduce Your Wedding Party on Your Website
Learn how to add your bridesmaids, groomsmen, and special people to your wedding website. Add photos, roles, and personal bios so guests know who's who.
How to Introduce Your Wedding Party on Your Website
Your Wedding Party page introduces the special people standing beside you on your wedding day. This is where guests learn about your bridesmaids, groomsmen, maid of honor, best man, and anyone else with a special role. This tutorial will show you how to add each person with their photo, role, and a personal bio.
What the Wedding Party Page Shows to Guests
When guests visit your Wedding Party page, they see:
- Photos of each person in your wedding party
- Names so guests know who they are
- Roles like “Maid of Honor” or “Best Man”
- Bios sharing how you know them and why they’re special
On desktop, people are displayed in a two-column grid. On mobile, they stack in a single column for easy reading.
Accessing the Wedding Party Editor
To edit your Wedding Party page:
- Log in to your Harusi Hub account
- From your dashboard, look at the left sidebar
- Click on Website to expand the menu
- Click on Wedding Party
You’ll see the Wedding Party page editor where you can add and manage your wedding party members.
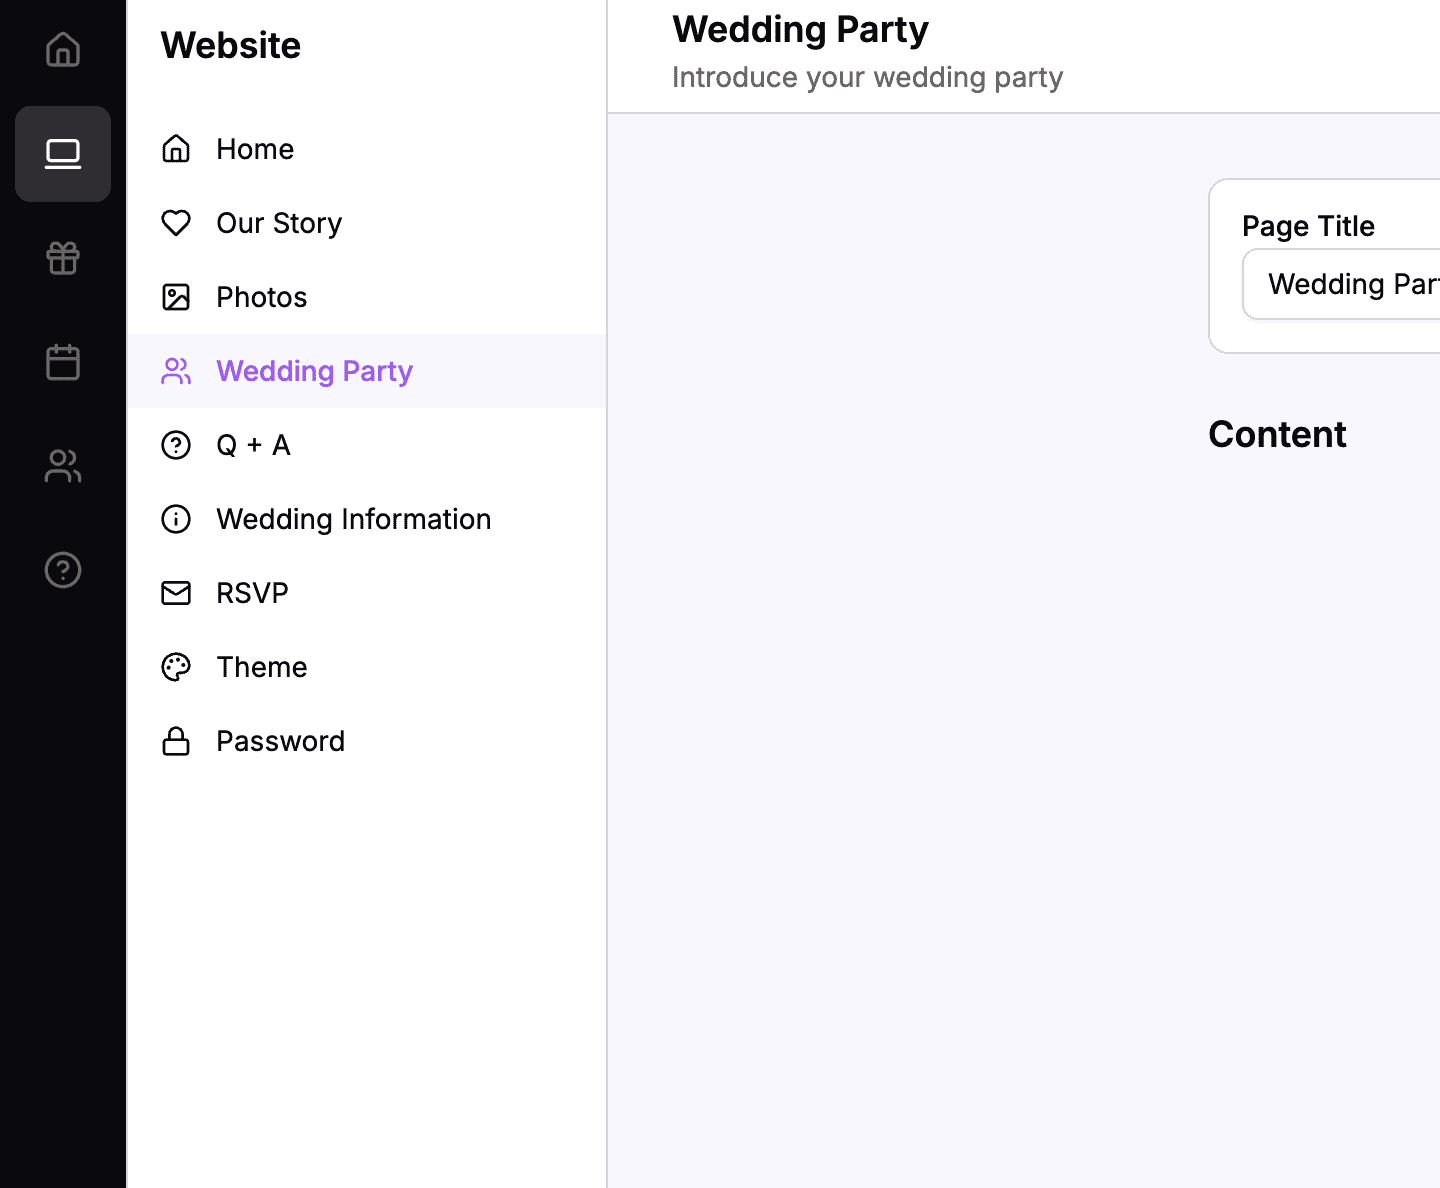 The sidebar navigation with Website > Wedding Party highlighted
Understanding Wedding Party Blocks
The Wedding Party page uses these content block types:
| Block Type | What It Contains | Best For |
|---|---|---|
| Person | Photo, name, role, and bio | Each wedding party member |
| Title & Body | A heading and text | Section headers like “The Bride’s Squad” |
| Spacer | Empty vertical space | Separating groups |
The Person block is the star of this page – you’ll create one for each member of your wedding party.
Adding a Person Block
Each person in your wedding party gets their own Person block with their photo, name, role, and bio.
How to Add a Person
- Click the Add Block button
- Select Person from the options
- The Person editor opens
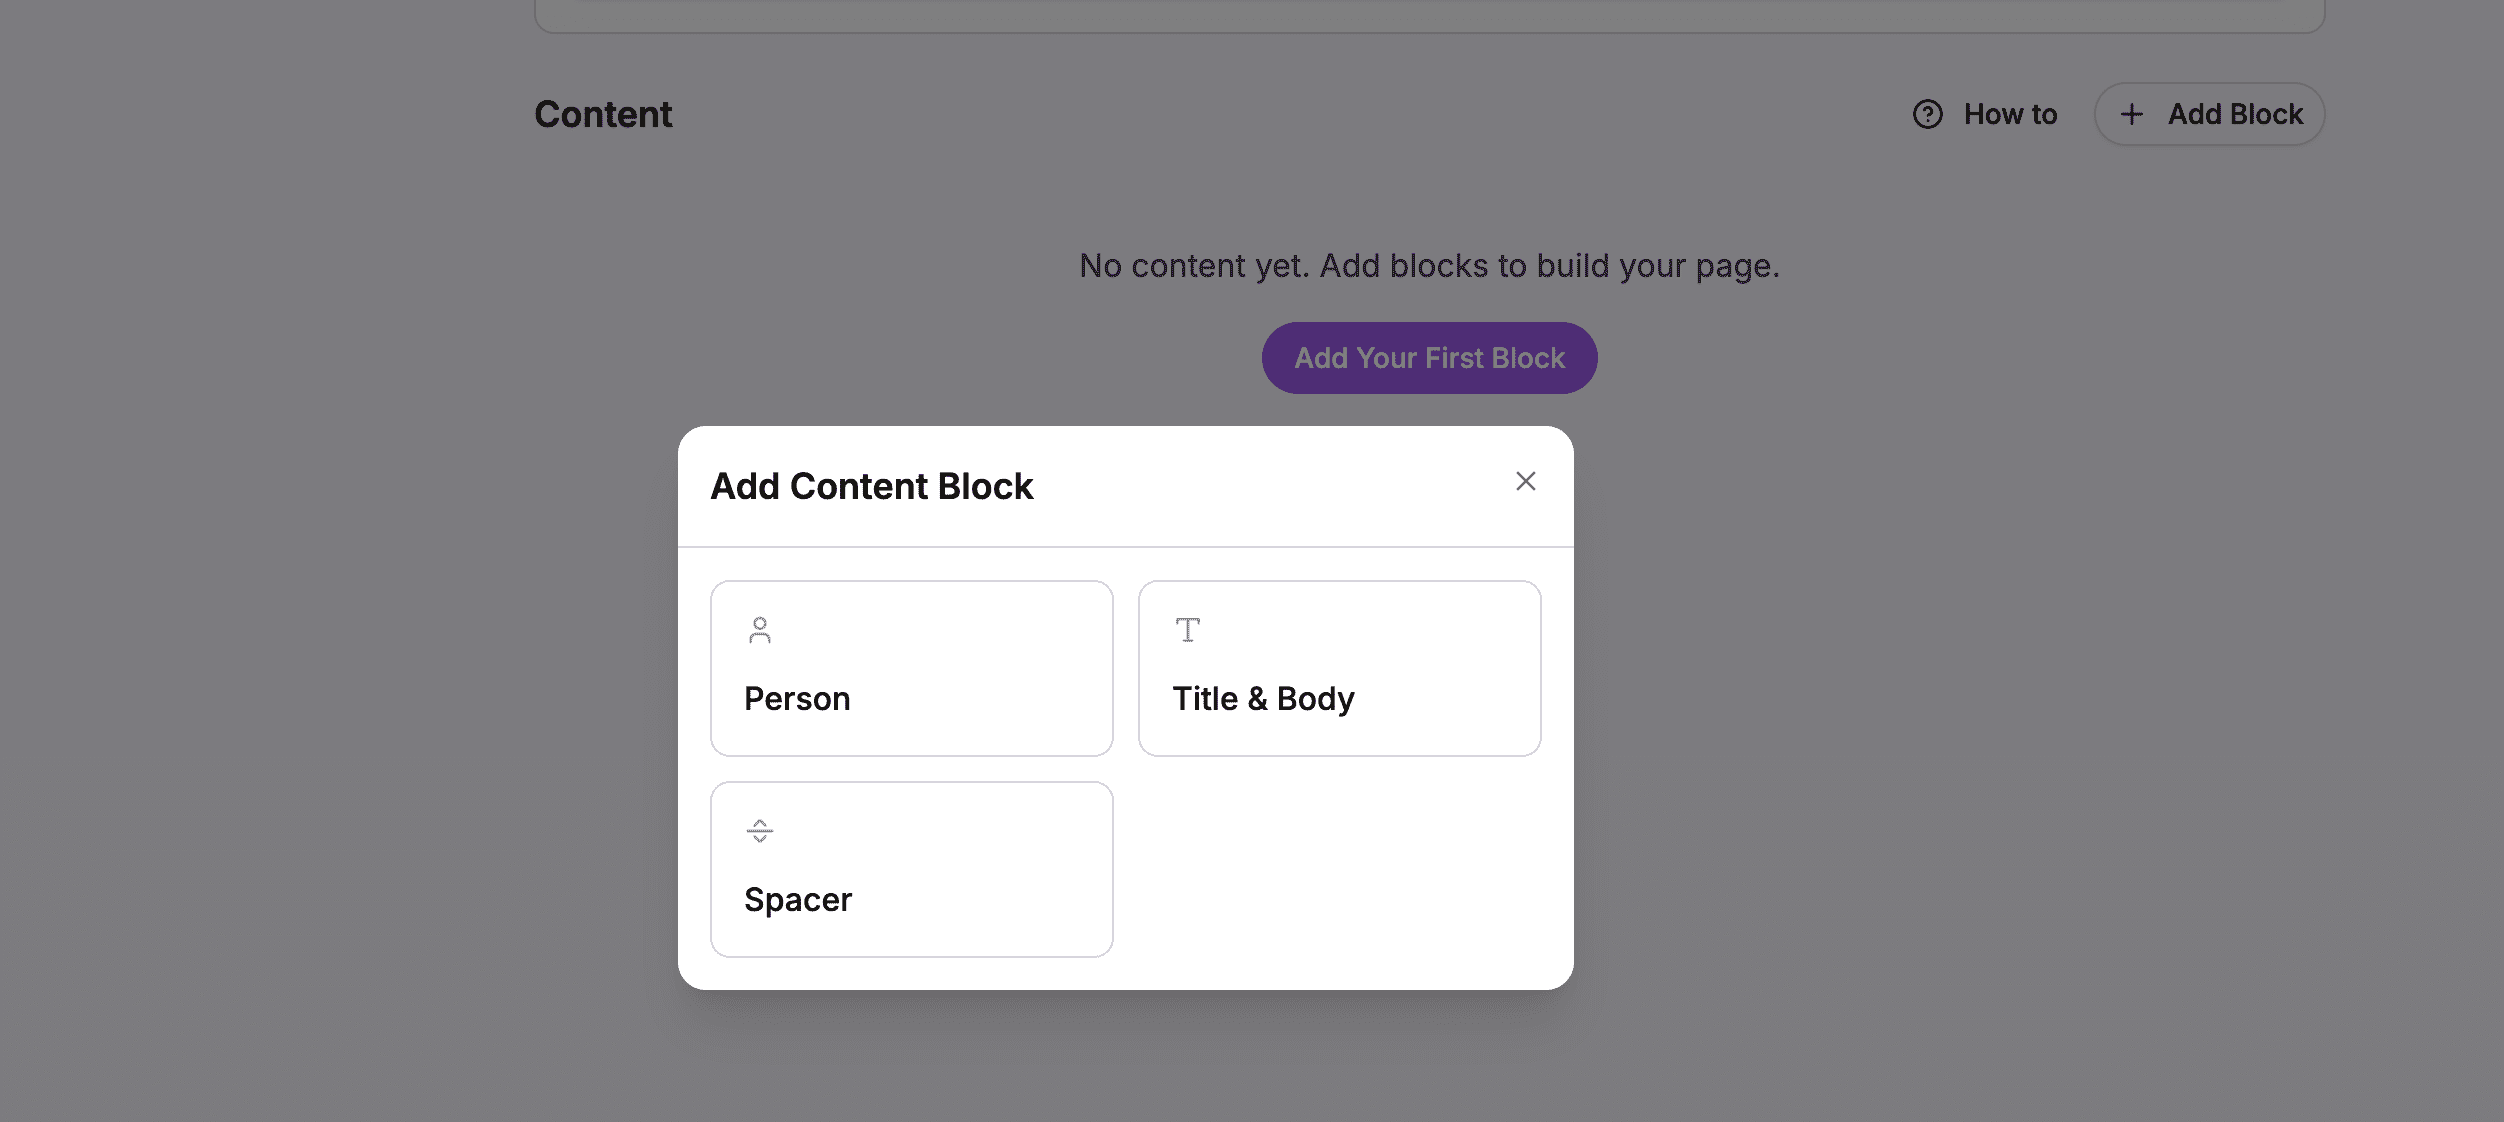 Choose Person to add a wedding party member
The Person Editor
The Person editor has fields for:
- Photo – Upload an image of this person
- Name – Their name as you’d like it displayed
- Role – Their wedding role (Maid of Honor, Groomsman, etc.)
- Bio – A personal description of your relationship
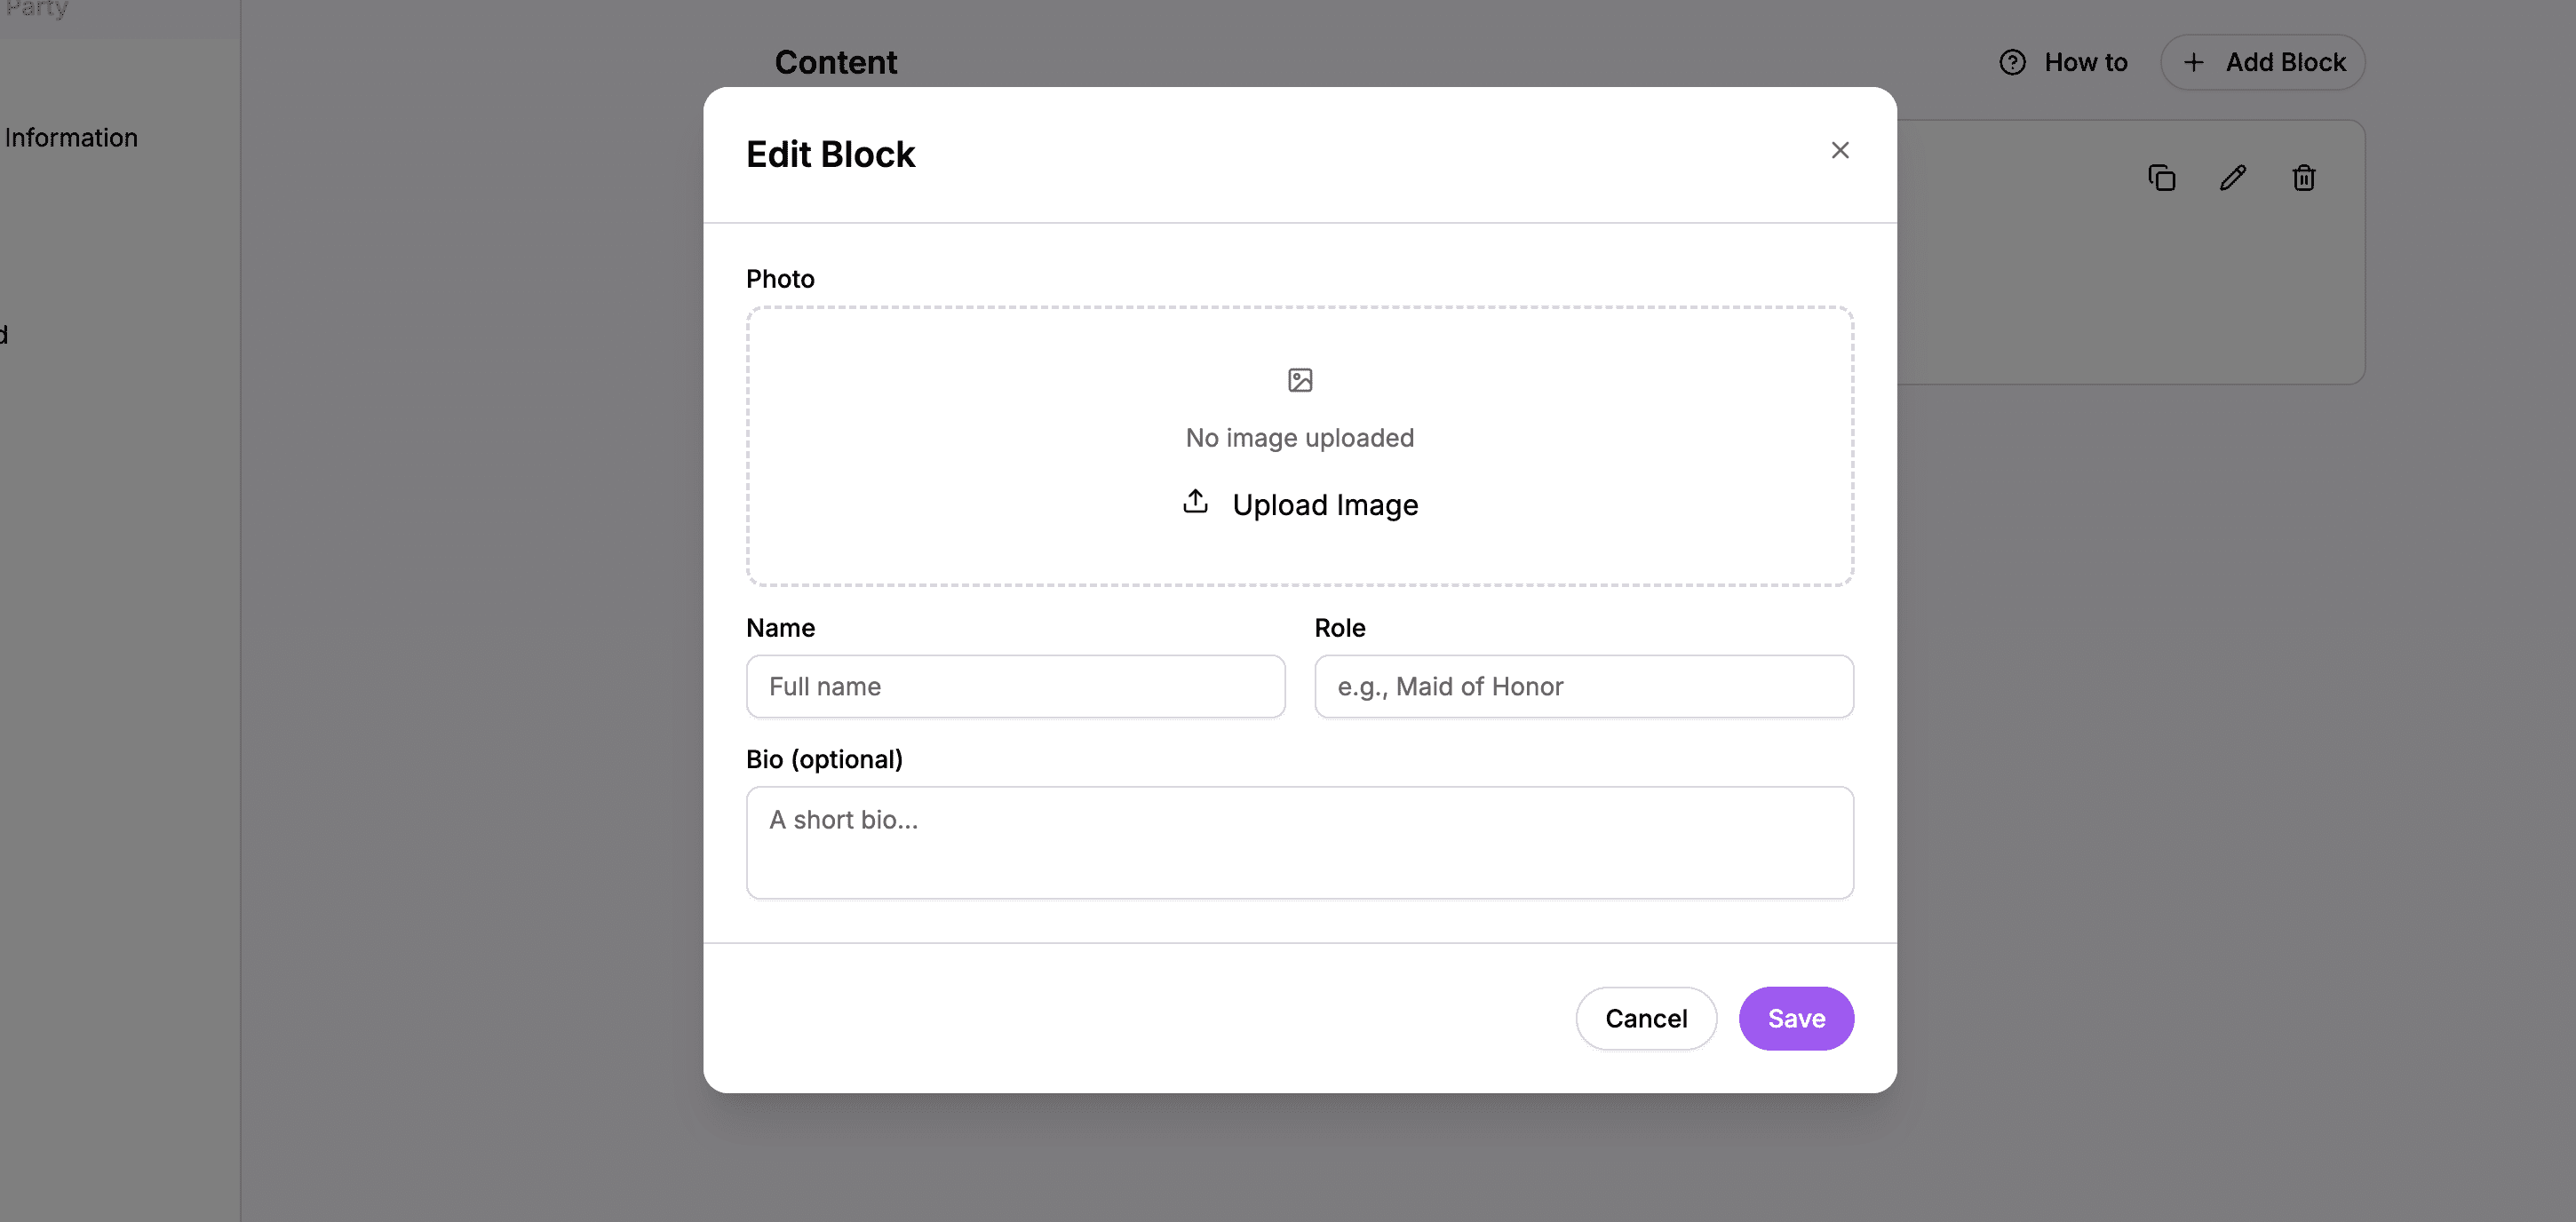 The Person editor with photo upload, name, role, and bio fields
Uploading a Person’s Photo
The photo appears prominently at the top of each person’s card, usually cropped to a circle.
How to Upload a Photo
- Click the photo upload area in the Person editor
- Select a photo from your computer
- The photo uploads and previews automatically
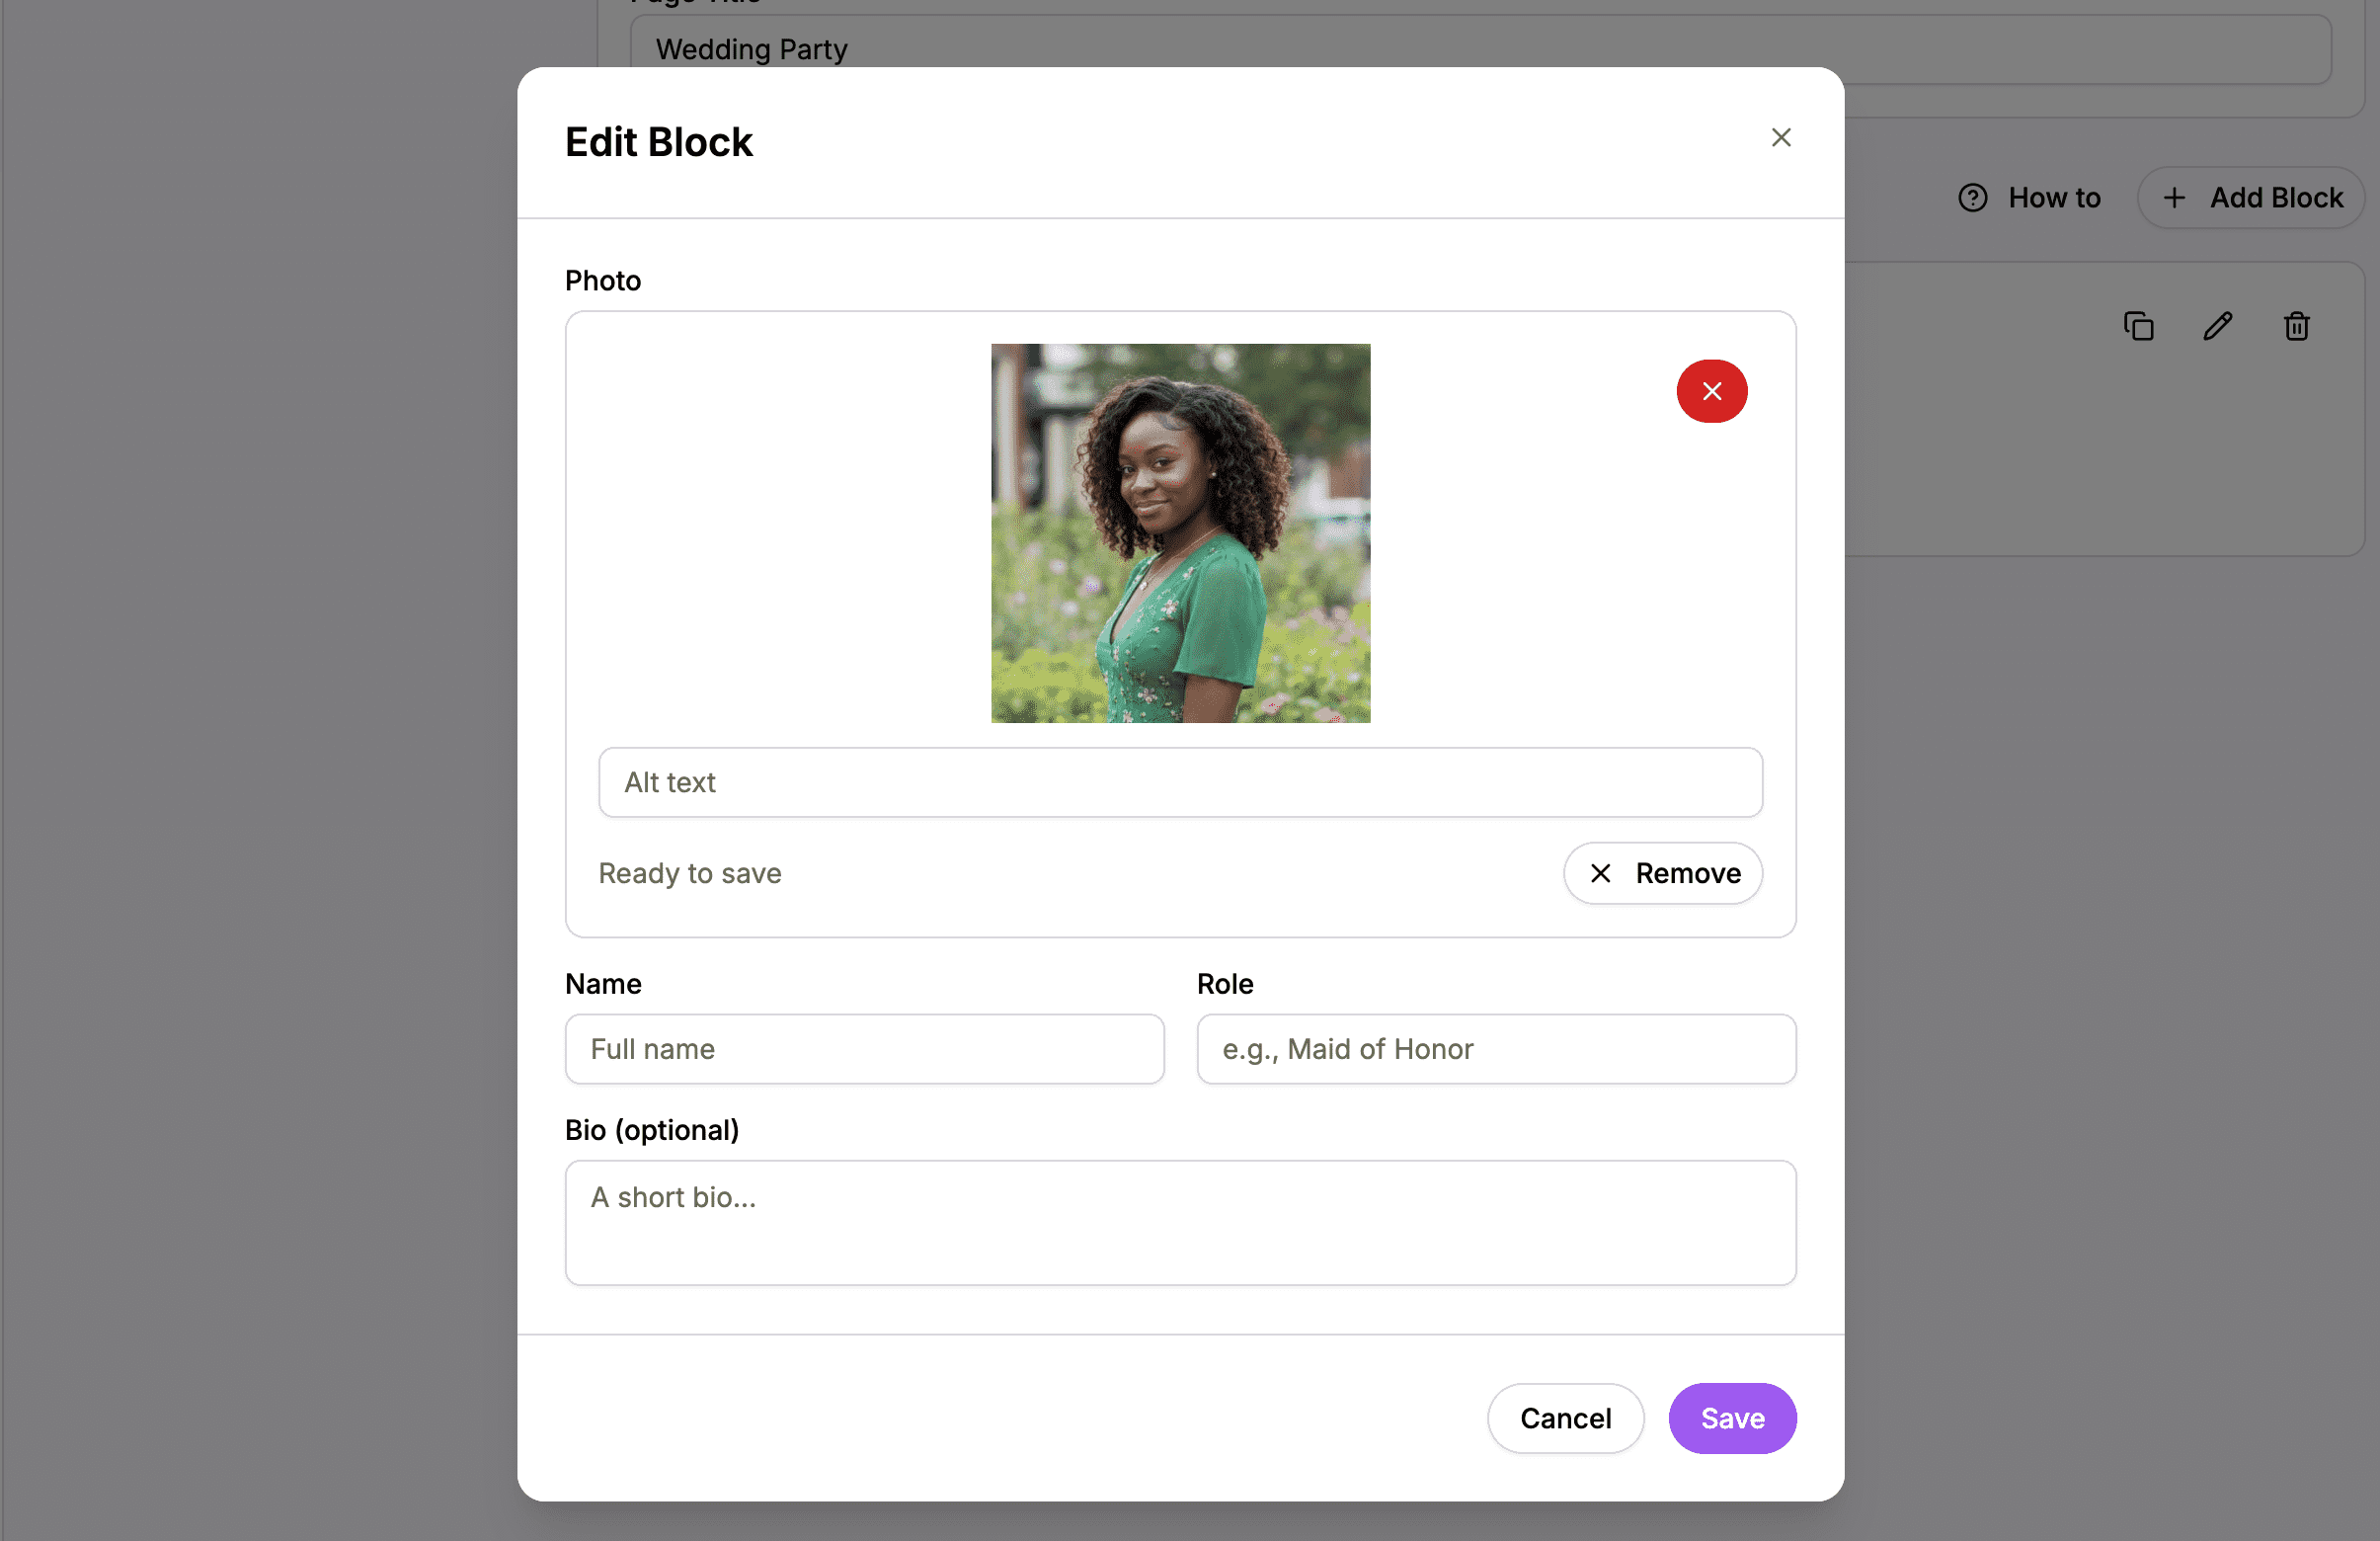 Click to upload or drag a photo of your wedding party member
Tips for Good Photos
- Face clearly visible – Use photos where you can see their face
- Consistent style – If possible, use similar photo styles for everyone
- Good quality – High-resolution photos look better
- Recent photos – Guests will recognize them better with current photos
- Get permission – Always ask before posting someone’s photo
Setting the Person’s Name
Enter the name exactly as you want it displayed on your website.
What to Include
You can use:
- Full name – “James Kamau”
- First name only – “James”
- Nickname – “JK” or “Jimmy”
Whatever you enter is what guests will see.
Setting the Role
The role tells guests what part this person plays in your wedding.
Common Wedding Roles
Here are typical roles you might use:
Bride’s Side:
- Maid of Honor
- Matron of Honor
- Bridesmaid
- Junior Bridesmaid
- Flower Girl
Groom’s Side:
- Best Man
- Groomsman
- Junior Groomsman
- Ring Bearer
Special Roles:
- Man of Honor
- Bridesman
- Groomswoman
- Best Woman
- Officiant
- Reader
- Usher
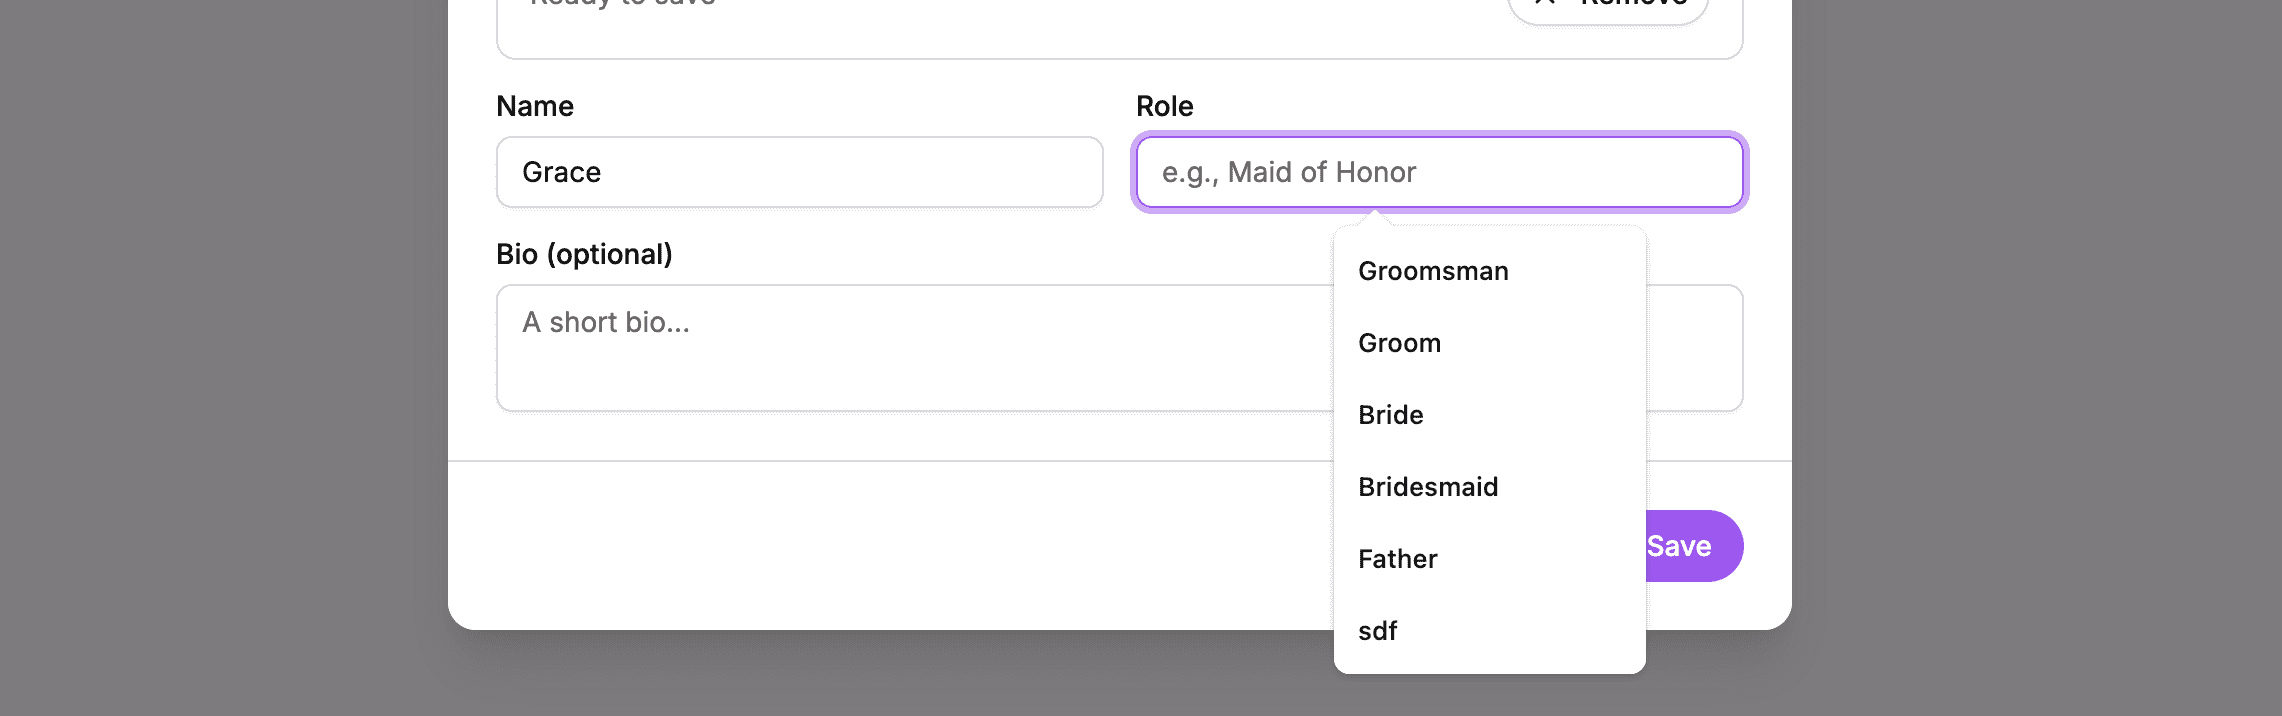 Enter whatever role best describes this person’s part in your wedding
Custom Roles
You can enter any role you want – the field isn’t limited to standard options. Feel free to use:
- “The One Who Introduced Us”
- “Bride’s Sister”
- “Partner in Crime Since Campus”
Writing a Bio
The bio is where you share your relationship with this person. This helps guests understand why they’re special to you.
How to Write a Great Bio
- Click in the Bio field
- Write a few sentences about this person
- The bio saves automatically
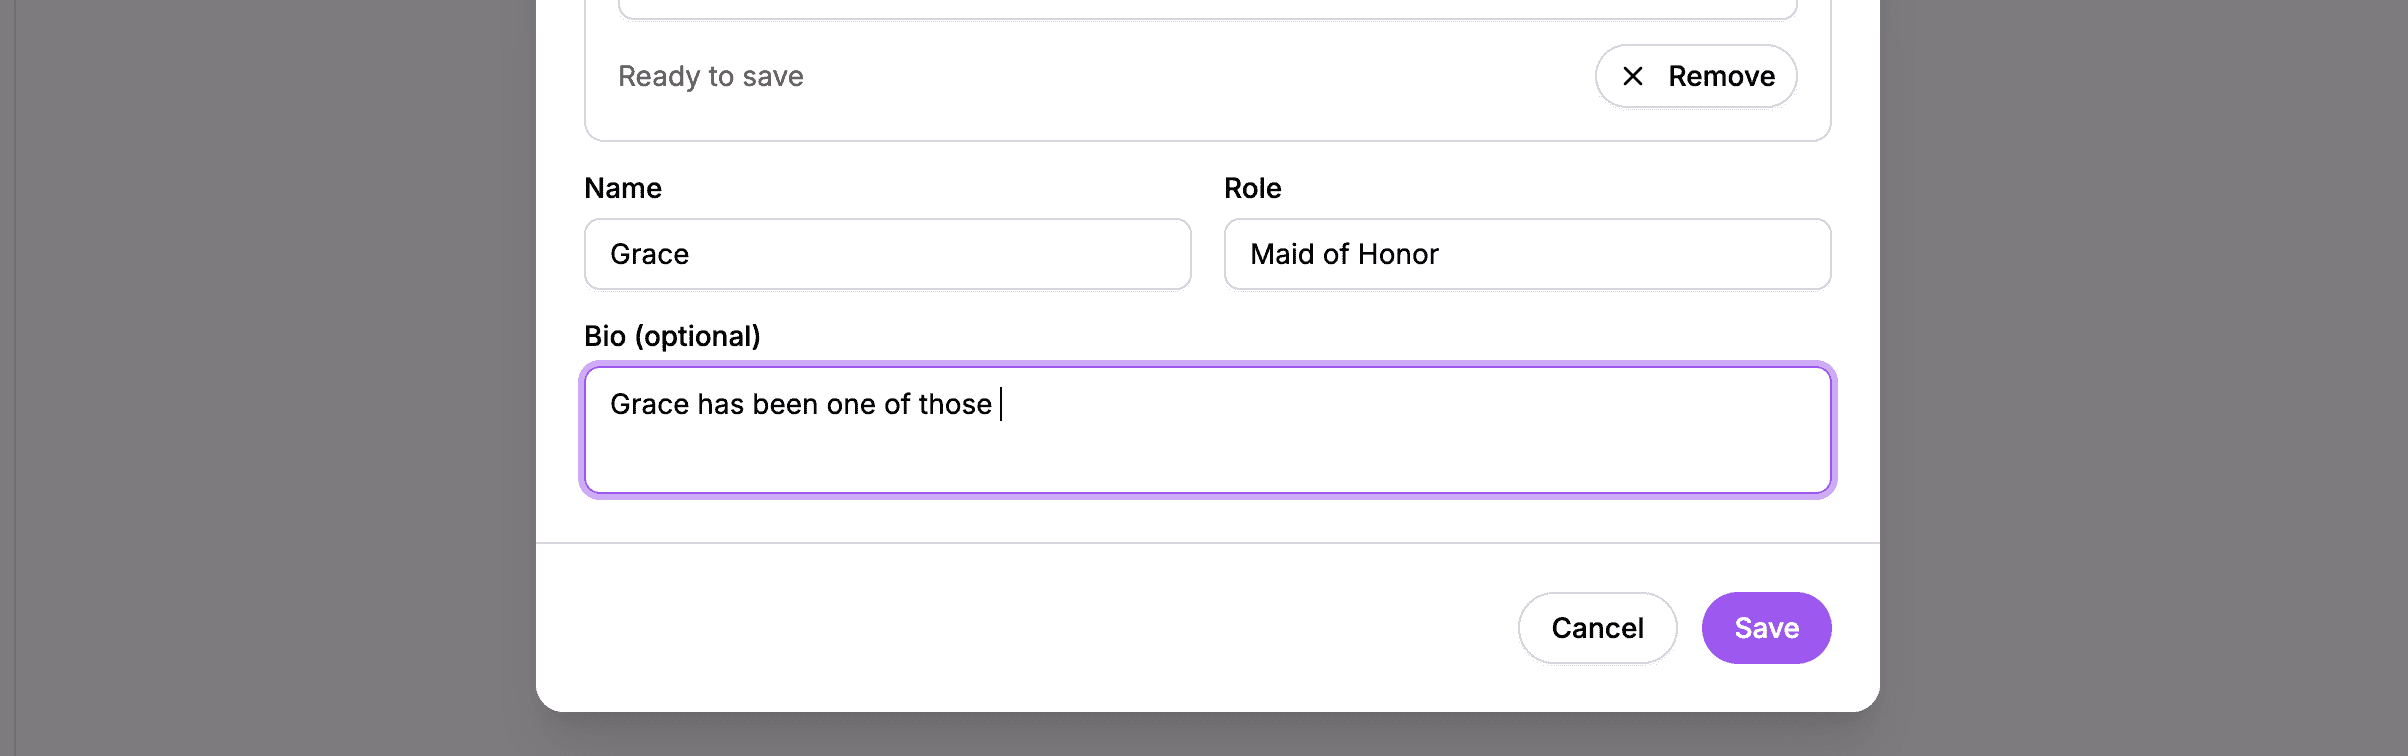 Share your connection to this person in the bio field
Bio Writing Tips
Keep it personal:
- How did you meet?
- What makes them special to you?
- Why did you choose them for this role?
Keep it appropriate:
- Remember parents and grandparents will read this
- Save the wild stories for the speech
Keep it balanced:
- Try to write similar length bios for everyone
- If one person gets three paragraphs, others might feel slighted
Example Bios
Short and sweet:
“My childhood best friend who’s been there through everything. Couldn’t imagine this day without her.”
With a story:
“Sharon and I met in university when we were assigned as roommates. She’s organized my birthdays, kept my secrets, and been my 3 AM phone call person for a decade. There’s no one else I’d want as my Maid of Honor.”
Fun and casual:
“Brian and I have been friends so long I don’t remember how we met. He probably owes me money. I probably owe him an apology. It all evens out.”
Saving a Person Block
After filling in all the details:
- Click Save to save the person
- The person appears in your block list
- You can see a preview of their info on the block card
Creating Section Headers
If you want to organize your wedding party into groups (like “The Bride’s Squad” and “The Groom’s Crew”), use Title & Body blocks.
How to Add a Section Header
- Click Add Block
- Select Title & Body
- Enter a title like “The Bride’s Squad”
- Optionally add body text
- Click Save
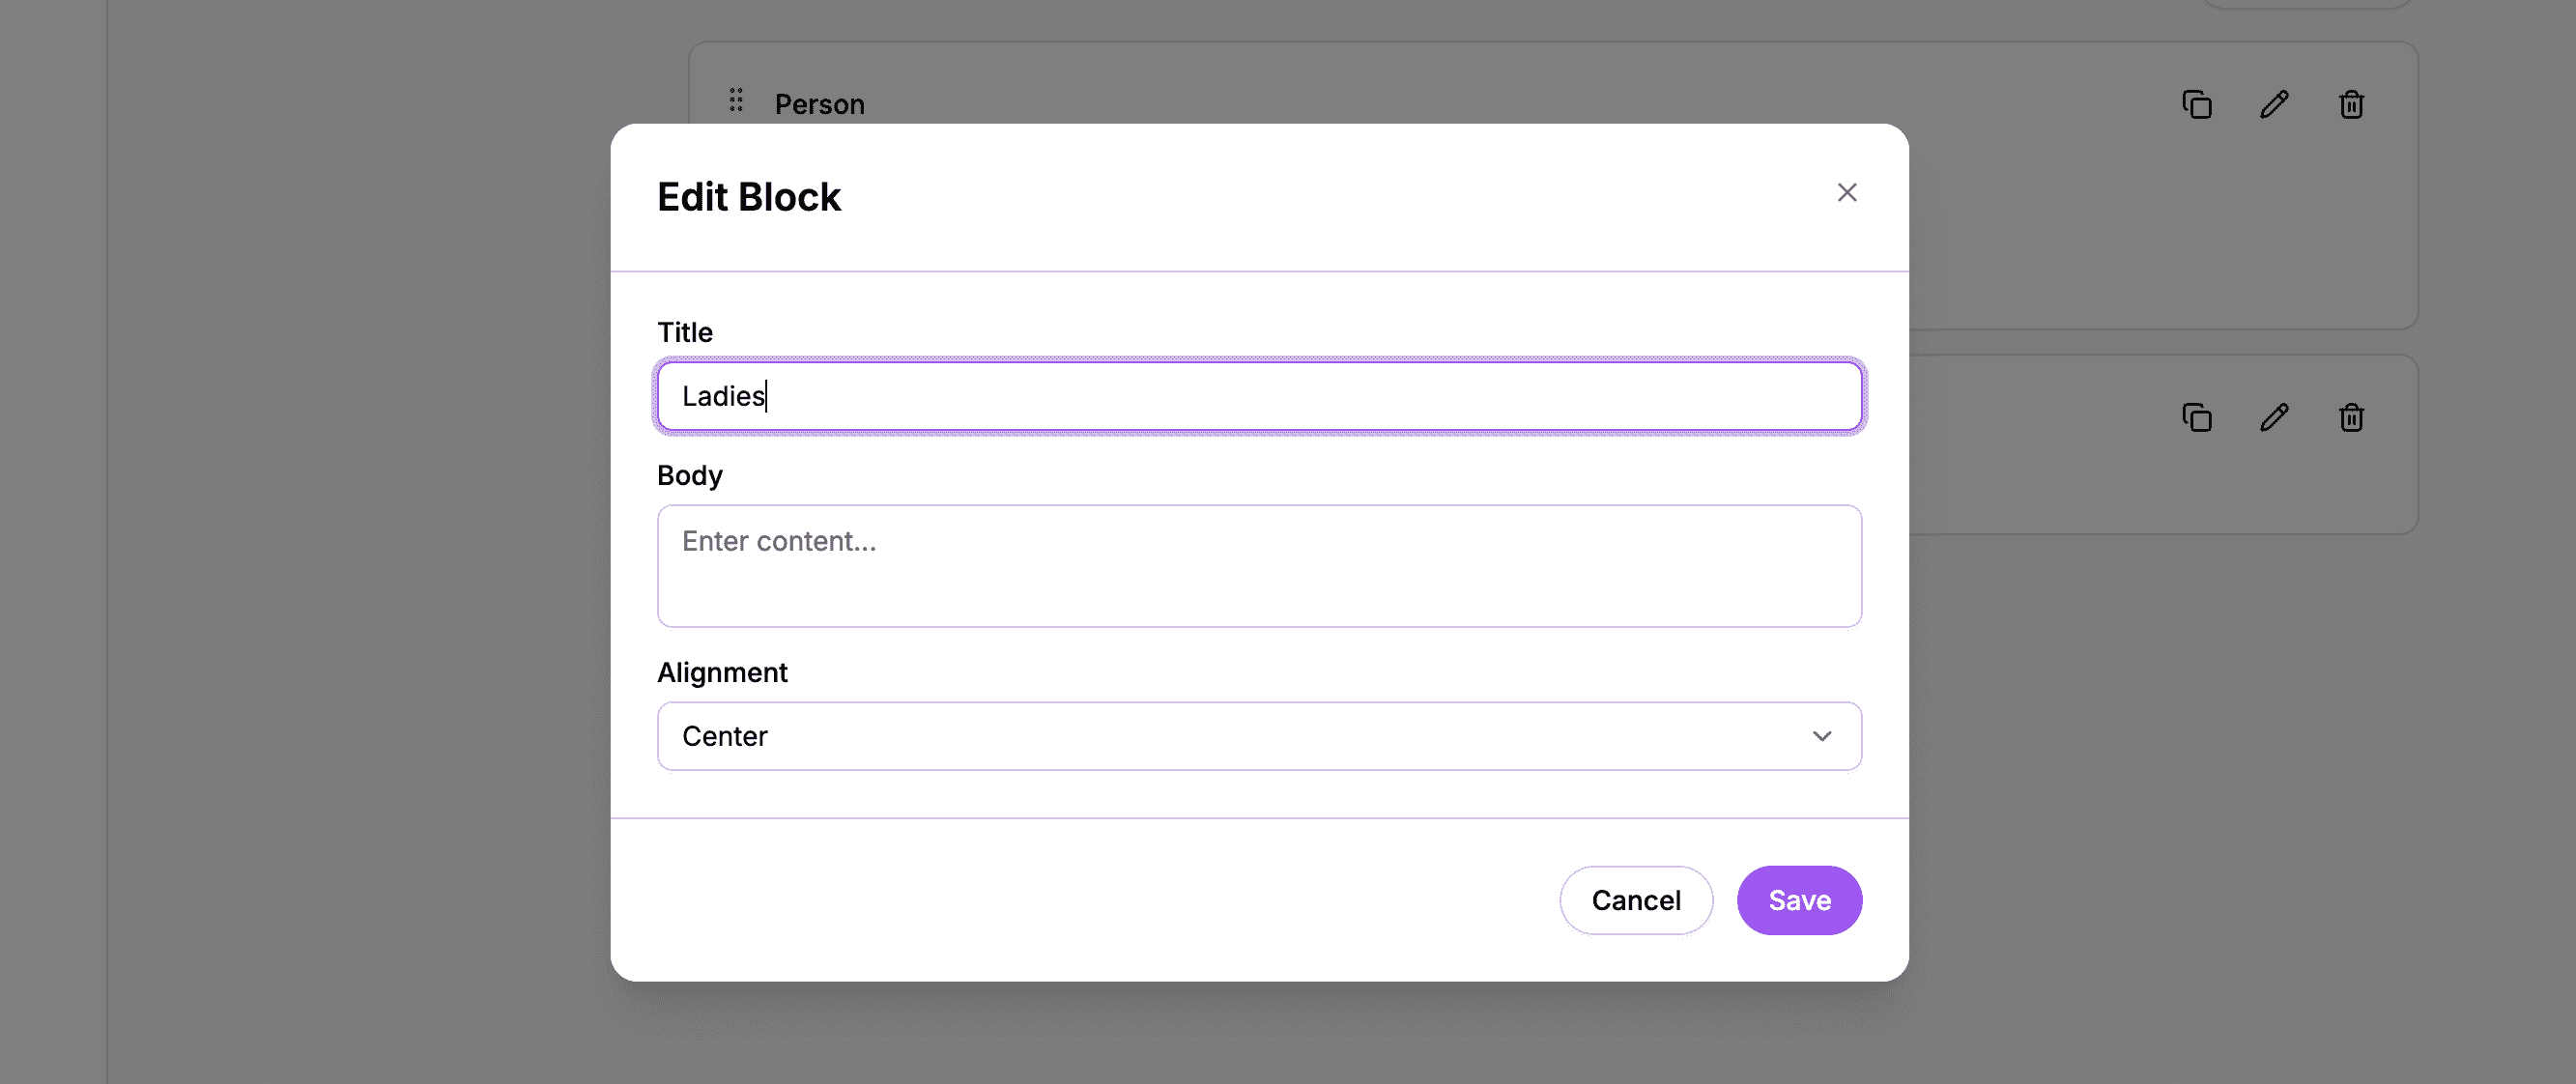 Use Title blocks to label different groups in your wedding party
Example Section Structure
- Title & Body – “The Bride’s Squad”
- Person – Maid of Honor
- Person – Bridesmaid
- Person – Bridesmaid
- Spacer (large)
- Title & Body – “The Groom’s Crew”
- Person – Best Man
- Person – Groomsman
- Person – Groomsman
Managing Multiple People
Once you’ve added several people, you’ll see them listed as block cards in the editor.
The Block List
Each person appears as a card showing:
- Their photo (thumbnail)
- Their name
- Their role
- Edit, Delete, and Duplicate buttons
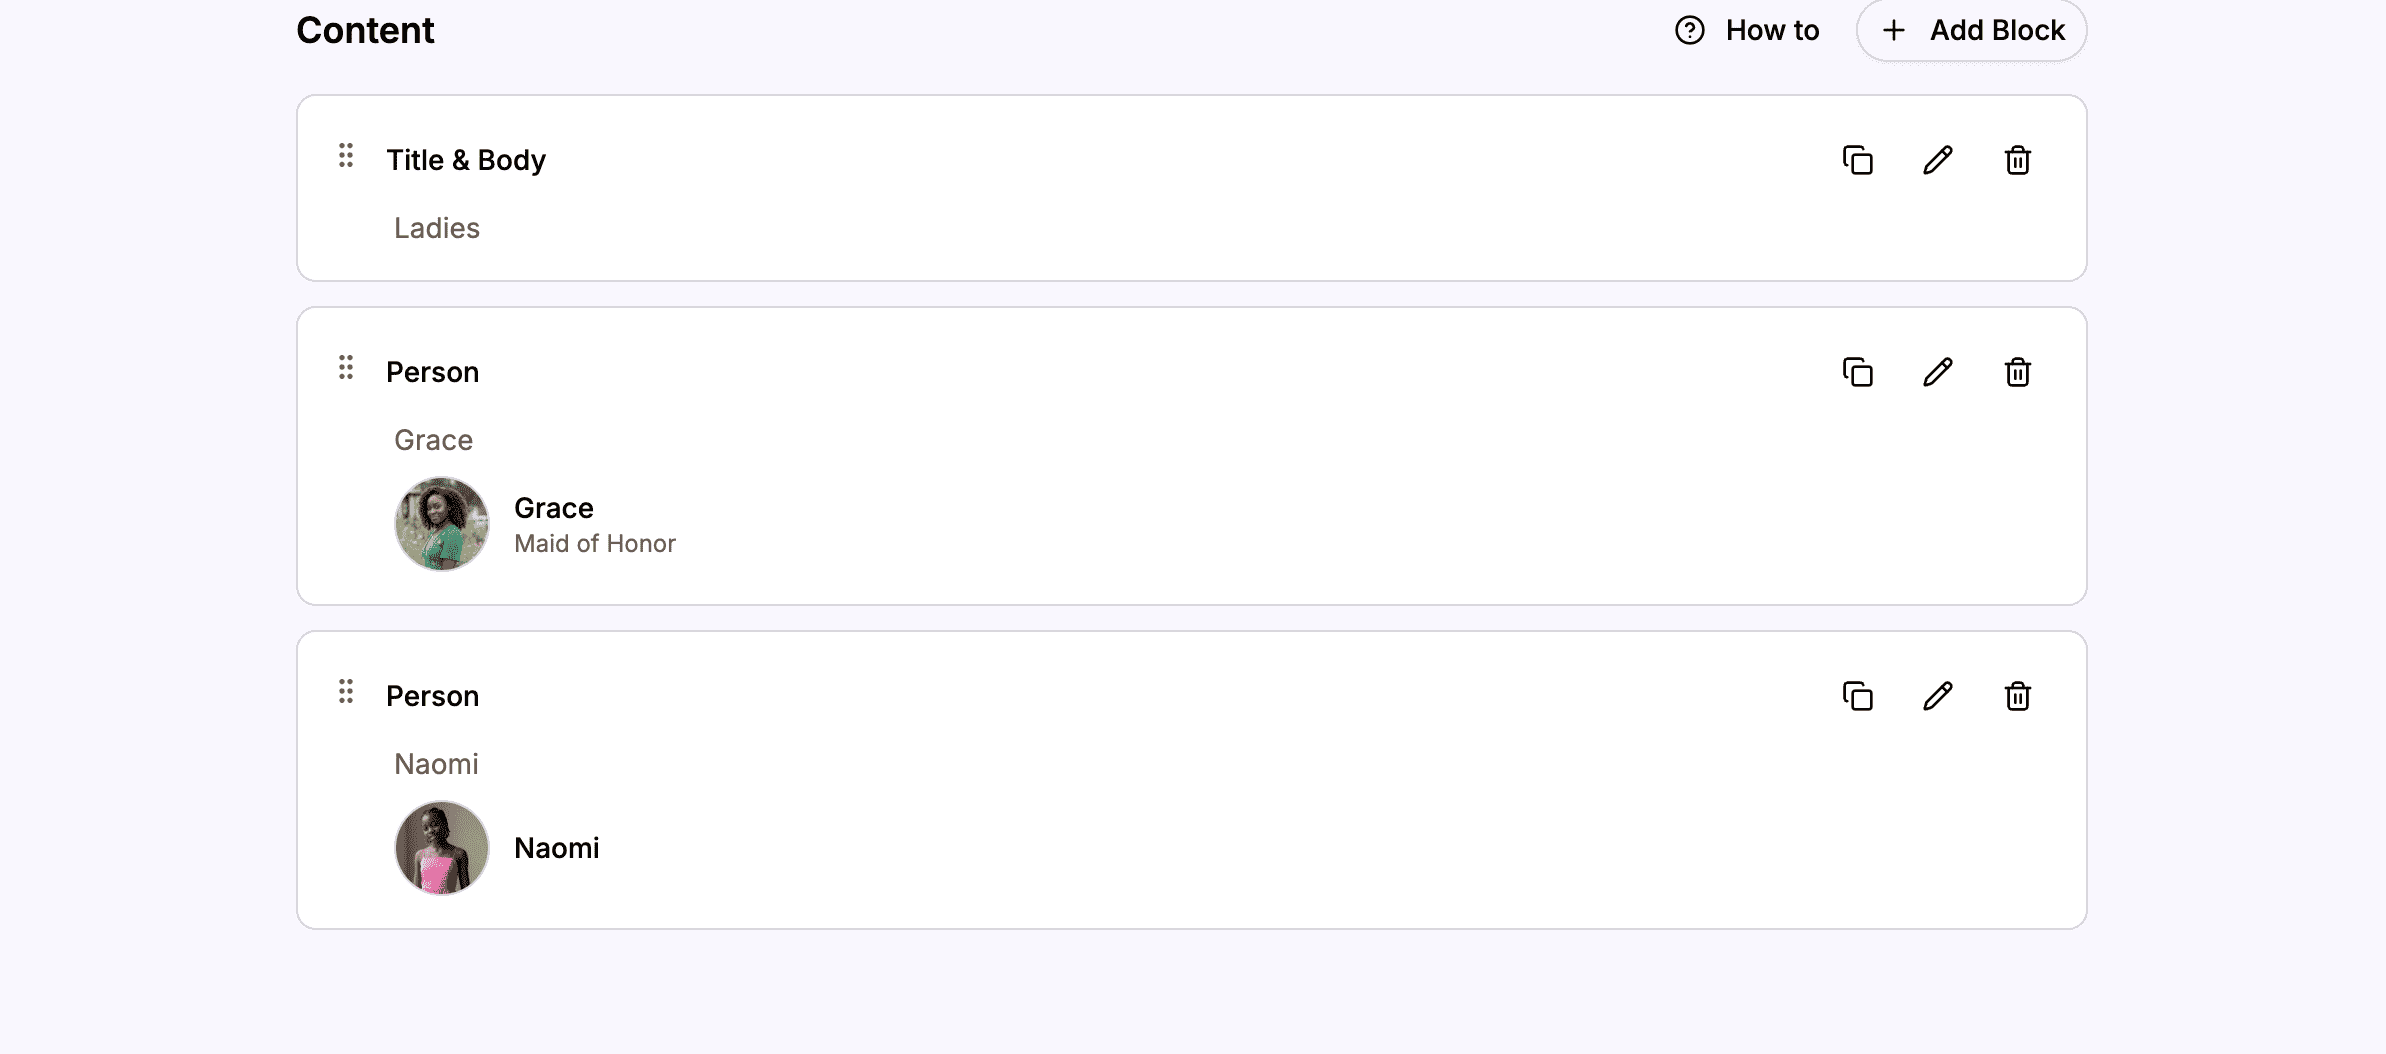 Your wedding party members appear as cards that you can edit, reorder, or delete
Reordering People
You can change the order people appear on the page:
- Find the person you want to move
- Grab the drag handle on their card
- Drag them to a new position
- Release to drop them in place
Editing a Person
To update someone’s information:
- Find their card
- Click the Edit button
- Make your changes
- Click Save
Deleting a Person
To remove someone:
- Find their card
- Click the Delete button
- Confirm the deletion
Duplicating a Person
If you’re adding multiple people with similar roles, duplicating can save time:
- Find a person to copy
- Click Duplicate
- Edit the duplicated card with new information
Using Spacers
Spacer blocks add visual breathing room between sections.
How to Add a Spacer
- Click Add Block
- Select Spacer
- Choose a size (Small, Medium, or Large)
- Click Save
Add spacers between different groups of your wedding party to clearly separate them visually.
How the Wedding Party Appears on Your Website
Desktop Layout
On desktop, person blocks display in a two-column grid. People appear side by side, making efficient use of space.
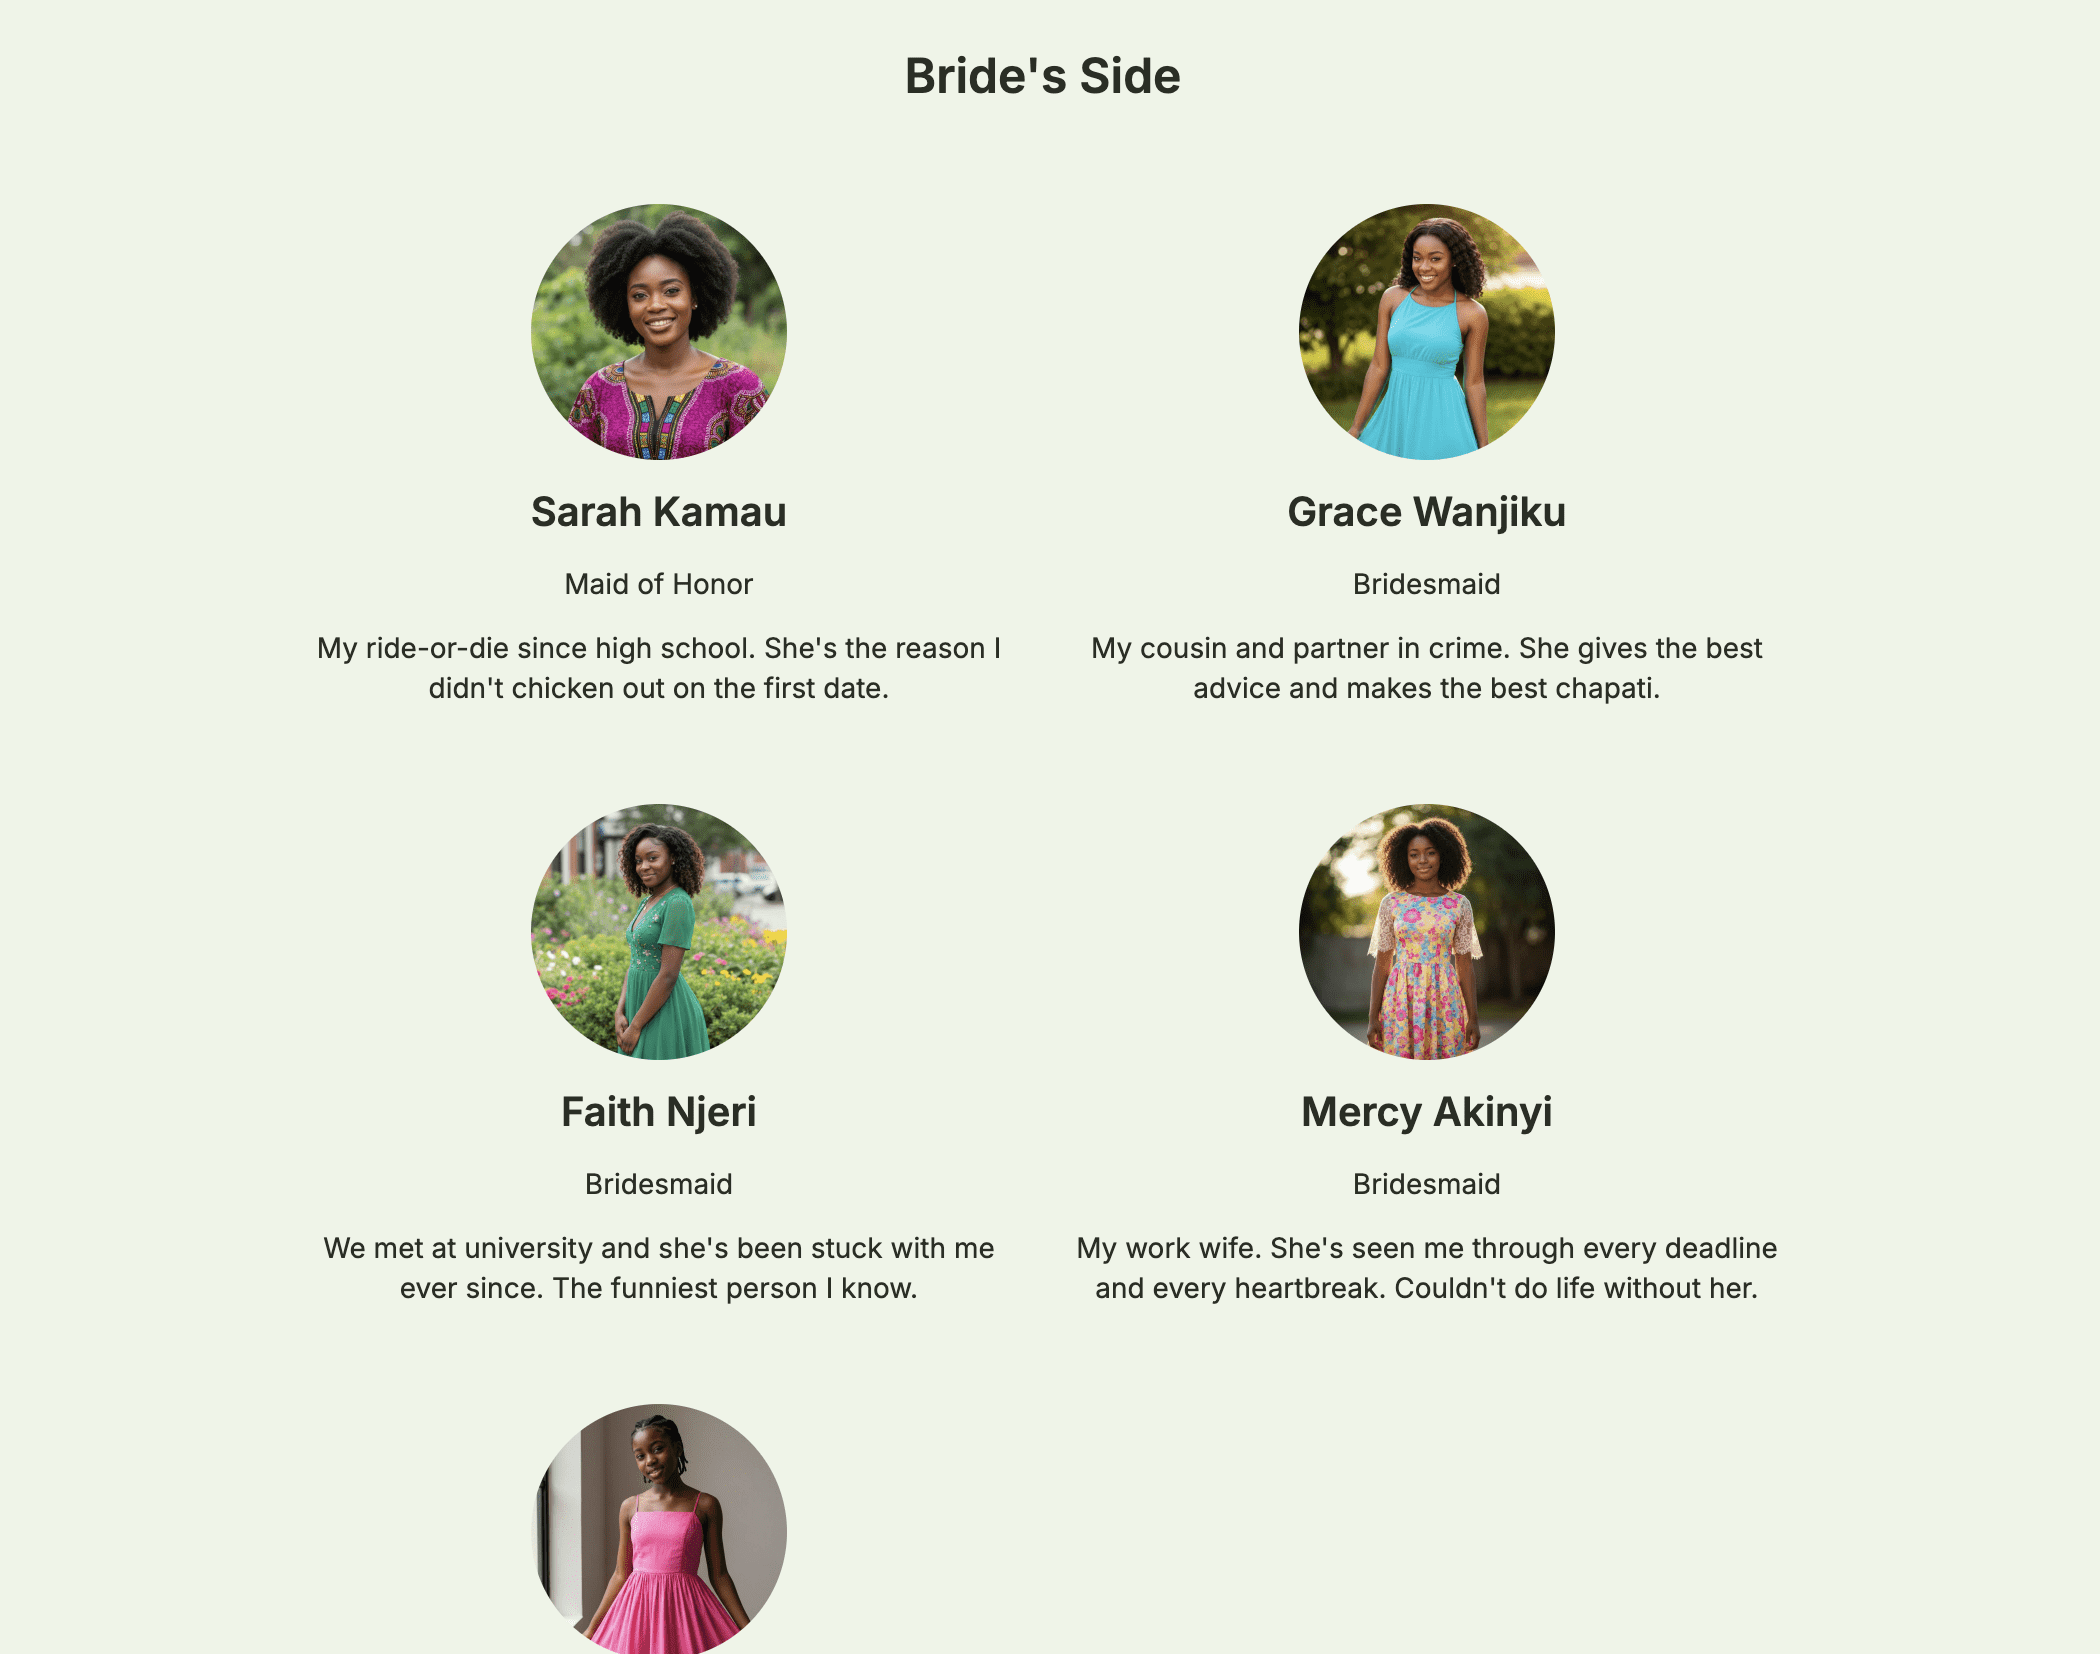 Your wedding party displays in a beautiful two-column layout on desktop
Mobile Layout
On mobile devices, the layout switches to a single column. Each person takes the full width, making photos and text easy to read on smaller screens.
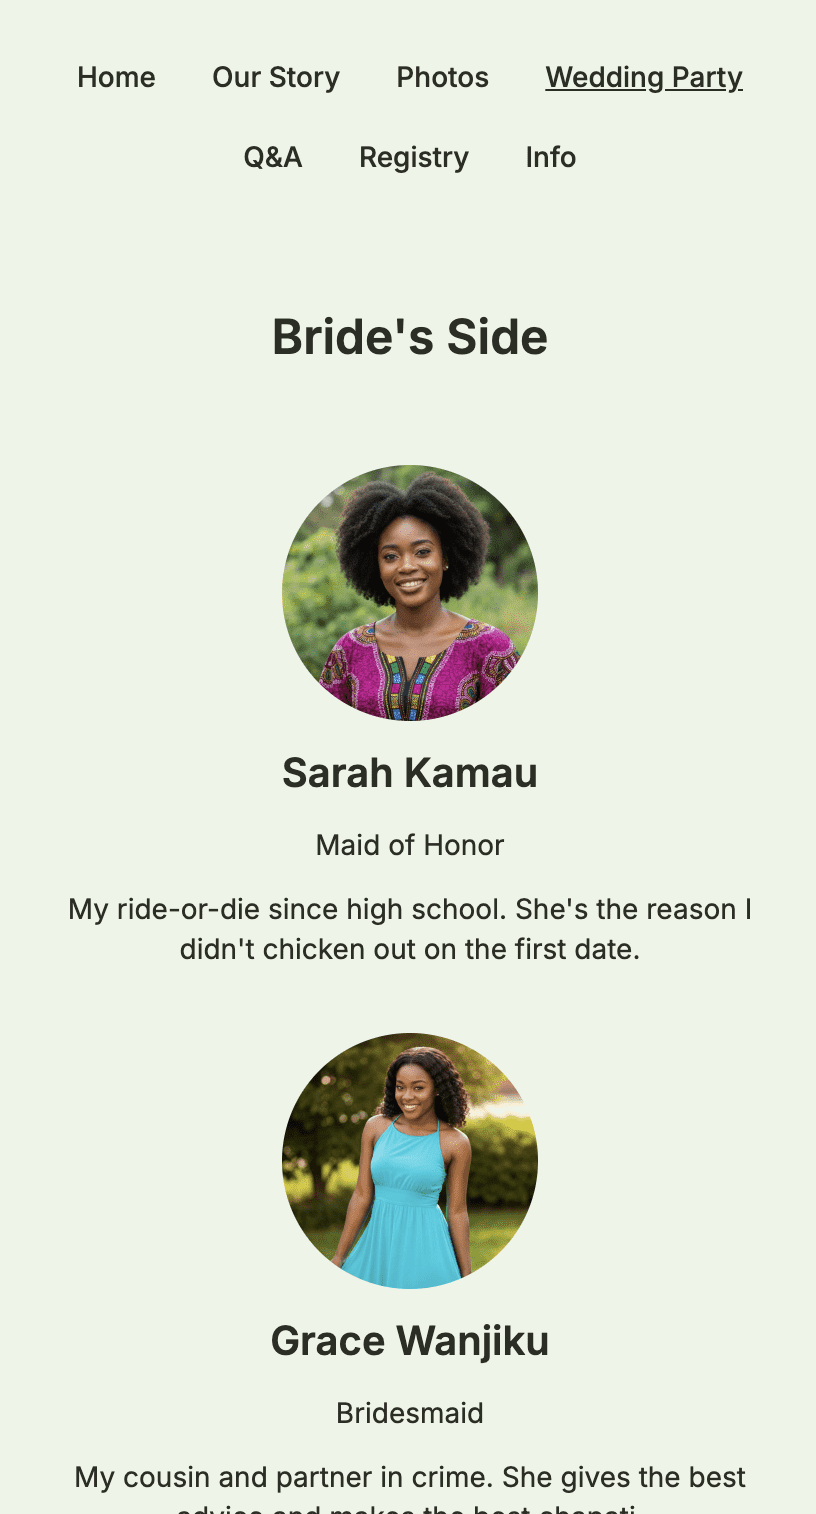 On mobile, the layout stacks into a single column for easy reading
Person Card Display
Each person shows:
- A circular cropped photo
- Their name below the photo
- Their role in smaller text
- Their bio at the bottom
Guests can click on photos to view them larger in a lightbox.
Tips for a Great Wedding Party Page
Photo Consistency
- Similar style – Professional headshots or casual photos, but consistent
- Similar lighting – Photos with vastly different lighting can look jarring
- Similar cropping – The circular crop works best with centered faces
Order Strategically
- Put Maid of Honor and Best Man first in their sections
- Order others by importance or alphabetically
- Keep couples or close friends near each other
Write Thoughtful Bios
- Take time to write something meaningful for each person
- They’ll appreciate being honored this way
- Guests will enjoy reading about the people they’ll meet at the wedding
Include Everyone Important
Consider including:
- Parents of flower girls and ring bearers
- Officiants
- Readers or musicians
- Anyone with a special role
Summary
The Wedding Party page editor lets you introduce everyone special:
| Feature | What It Does |
|---|---|
| Person block | Add photo, name, role, and bio for each person |
| Title & Body | Create section headers for groups |
| Spacer | Add visual separation between sections |
| Drag and drop | Reorder people and sections |
| Two-column grid | Beautiful layout on desktop |
| Lightbox | Guests can click photos for a larger view |
Create a Wedding Party page that honors the people standing beside you.
Ready to introduce your wedding party?
Create your wedding website and honor the people who matter most.
Add Your Wedding Party